Quantcast
Channel: Ken Shirriff's blog
Viewing all 311 articles
Browse latest View live

The Texas Instruments TMX 1795: the first, forgotten microprocessor

$
0
0
The first microprocessor, the TMX 1795 had the same architecture as the 8008 but was built months before the 8008. Never sold commercially, this Texas Instruments processor is now almost forgotten even though it had a huge impact on the computer industry. In this article, I present the surprising history of the TMX 1795 in detail, look at other early processors, and explain why the TMX 1795 should be considered the first microprocessor.

The Texas Instruments TMX 1795 microprocessor. Courtesy of Computer History Museum.

The Texas Instruments TMX 1795 microprocessor. Courtesy of Computer History Museum.

The story starts with the Datapoint 2200[1], a "programmable terminal" sized to fit on a desktop. While originally sold as a terminal, the Datapoint 2200 was really a minicomputer that could be programmed in BASIC or PL/B. Some people consider the Datapoint 2200 the first personal computer as it came out years before systems such as the Apple II or even the Altair.

The Datapoint 2200 programmable terminal / computer. Photo by Ecksemmess CC BY-SA 3.0  via Wikimedia Commons.

The Datapoint 2200 programmable terminal / computer. Photo by Ecksemmess CC BY-SA 3.0 via Wikimedia Commons.

The Datapoint 2200 had an 8-bit processor built out of dozens of TTL chips, which was the normal way of building computers at the time. The photo below shows the processor board. Keep in mind that there's no processor chip—the whole board is the processor, with a chip or two for each register, a few chips for the adder, a few chips to decode instructions, a few chips to increment the program counter, and so forth. [28] Nowadays, we think of MOS chips as high-performance and building a CPU out of TTL chips seems slow and backwards. However, in 1970, TTL logic was much faster than MOS. Even operating one bit at a time as a serial computer, the Datapoint 2200 performed considerably faster than the 8008 chip.

The processor board from the Datapoint 2200. The 8008 was built to replace this board. Photo courtesy of zuigadrummer.

The processor board from the Datapoint 2200. The 8008 was built to replace this board. Image courtesy of zuigadrummer.

While building the Datapoint 2200, its designers were looking for ways to make the processor board smaller and generate less heat. Datapoint met with Intel in December 1969, and what happened next depends on whether you listen to Intel or Datapoint. Intel's story is that Datapoint asked if Intel could build memory chips for the processor stack that had an integrated stack pointer register. Intel engineer Stan Mazor told Datapoint that Intel could not only do that, but could put the whole 2200 processor board on a chip.[2][3] Datapoint's story is that Datapoint founder Gus Roche and designer Jack Frassanito suggested to Intel's co-founder Robert Noyce that Intel build a single-chip CPU with Datapoint's design.[4] but Noyce initially rejected the idea, thinking that a CPU chip wouldn't have a significant market.

In any case, Intel ended up agreeing to build a CPU chip for Datapoint using the architecture of the Datapoint 2200.[5] Intel developed a functional specification for the chip by June 1970 and then put the project on hold for six months. During this time, there was a mention of future 8008 chip in Electronic Design (below)—I suspect I've found the first public mention of the 8008. You might expect there was a race to build the first microprocessor, so you may be surprised that both the 4004 and 8008 projects were put on hold for months. Meanwhile, Datapoint built a switching power supply for the 2200[6], which eliminated the heating concerns, and was planning to start producing the 2200 with the processor board of TTL chips. Thus, Datapoint wasn't particularly interested in the 8008 any more.

First description of the Intel 8008 processor in print. Electronic Design, Oct 25 1970.

First description of the Intel 8008 processor in print. Electronic Design, Oct 25 1970.

Meanwhile, a Texas Instruments salesman found out about Datapoint's CPU project with Intel and wanted to see if TI could fulfill Datapoint's needs. Texas Instruments started building a CPU for Datapoint around April 1970.

A Texas Instruments salesman at Datapoint learned that Intel was building a processor for Datapoint and asked if Texas Instruments could build them one too. Datapoint gave TI the specifications and told them to go ahead. Texas Instruments came up with a three-chip design, but came up with a single-chip CPU after Datapoint pointedly asked, "Can't you build it on one chip like Intel?" This chip became the TMX 1795.

There's a lot of debate on just how much information about Intel's design was given to Texas Instruments. The main TI engineer on the project, Gary Boone, says they received hints that Intel was doing better, but didn't improperly receive any proprietary information. According to Intel, though, Texas Instruments received Intel's detailed design documents through Datapoint. For instance, the TI processor copied an error that was in Intel's documentation leaving the TI chip with broken interrupt handling.[7]

The TI chip was first mentioned in March, 1971 in Businessweek magazine, in a short paragraph calling the chip a "milestone in LSI [Large-Scale Integration]" for jamming the CPU onto a single chip.[8] A few months later, the chip received a big media launch with an article and multi-page advertising spread in Electronics (below), complete with die photos of the TMX 1795.

Article on the TMX 1795 and TI advertising section featuring the chip. Electronics, June 7 1971.

Article on the TMX 1795 and two pages from the TI advertising section featuring the chip. Note the die photos of the TMX 1795. Electronics, June 7 1971.

The article, entitled "CPU chip turns terminal into stand-alone machine", described how the chip would make the Datapoint 2200 computer much more powerful. "The 212-by-224 mil chip turns the 2200 into a complete computer that doesn't have to be connected to a time-sharing system." The components of the chip are "similar to units previously available separately, but this is the first time that they've been combined monolithically", consolidated "into a single chip". The chip and 2K of memory would cost about $100. This "central processor on a chip" would make the new Datapoint 2200 "a powerful computer with features the original one couldn't offer."

That didn't happen. Datapoint tested the TMX 1795 chip and rejected it for four reasons. First, the chip and memory didn't tolerate voltage fluctuations of more than 50mV. Second, the TMX 1795 required a lot of support chips (although not as many as the 8008 would), reducing the benefit of a single-chip CPU. Third, Datapoint had solved the heat problem with a switching power supply.[6] Finally, Datapoint had just about completed the 2200 Version II, with a much faster parallel implementation of the CPU. The TMX 1795 (operating in parallel) was slightly faster than the original serial Datapoint 2200, but the 2200 Version II was much faster than the TMX 1795. (This illustrates the speed advantage of TTL chips over MOS at the time.)

Intel engineers provided another reason for the commercial failure of the TMX 1795: the chip was too big to manufacture cost-effectively. I created the diagram below to compare the TMX 1795, 4004, and 8008 at the same scale. The TMX 1795 is larger than the 4004 and 8008 combined! One reason is that Intel had silicon-gate technology, which in effect allowed three layers of circuitry instead of two. But even taking that into account, Texas Instruments didn't seem to put much effort into the layout, which Mazor calls "pretty sloppy techniques" and "throwing some blocks together".[9] While the 4004 and especially the 8008 are densely packed, the TMX 1795 chip has copious unused and wasted space.

Comparative die sizes of the TMX 1795, 4004 and 8008 microprocessors. Note that the 4004 and 8008 are nearly the same size, while the TMX 1795 is more than twice as large.

Comparative die sizes of the TMX 1795, 4004 and 8008 microprocessors. Note that the 4004 and 8008 are nearly the same size, while the TMX 1795 is more than twice as large. The top third of the TMX 1795 is instruction decoding and control logic, the middle is the 8-bit ALU, and the bottom is storage (stack and registers). TMX 1795 die photo courtesy of Computer History Museum.

As well as rejecting the TMX 1795, Datapoint also decided not to use the 8008 and gave up their exclusive rights to the chip. Intel, of course, commercialized the 8008, announcing it in April 1972. Two years later, Intel released the 8080, a microprocessor based on the 8008 but with many improvements. (Some people claim that the 8080 incorporates improvements suggested by Datapoint, but a close examination shows that later Datapoint architectures and the 8080 went in totally different directions.) The 8080 was followed by the x86 architecture, which was designed to extend the 8080. Thus, if you're using an x86 computer now, you're using a computer based on the Datapoint 2200 architecture.[10]

Some sources dismiss the TMX 1795 as a chip that never really worked. However, the video below shows Gary Boone demonstrating the TMX 1795 in 1996. A TMX 1795 board was installed in a laptop (probably a TI LT286) for the purpose of the demo. It runs a simple text editor, a sort program, a simple budget spreadsheet, and Fibonacci numbers. The demo isn't particularly thrilling, but it shows that the TMX 1795 was a functional chip.

Considering the size of Intel and the microprocessor market, Datapoint's decision to give up exclusive rights to the 8008 seems like a huge blunder, possibly "one of the worst business decisions in history". However, it's unlikely that Datapoint would have sold 8008 chips, given that they were a computer company, not a chip company like Intel.[11] In addition, Intel had plans to produce microprocessors even without the rights to the 4004 or 8008.[12]

After rejecting the TMX 1795 (and the 8008), Datapoint continued to build processors out of TTL chips until the early 1980s. While these processors were faster and more powerful than microprocessors for a surprisingly long time, eventually Moore's law led to processors such as the 80286, which outperformed Datapoint at a lower cost. Under heavy competition from PCs, Datapoint's stock crashed in 1982, followed by a hostile takeover in 1984. The company limped along before going bankrupt in 2000. Given that Datapoint designed the architecture used in the 8008, it's ironic that Datapoint was killed by x86 microprocessors which were direct descendents of the 8008.

The TMX 1795 microprocessor installed in a circuit board.

The TMX 1795 microprocessor installed in a circuit board. This board was used in a laptop for the 1996 demo.

Unlike Intel, who commercialized the 8008 chip, Texas Instruments abandoned the TMX 1795 after Datapoint's rejection. The chip would have disappeared without a trace, except for one thing, which had a huge impact on the computer industry.

The "Dallas Legal Firm" and "TI v. Everybody"[13]

Texas Instruments figured out early on that patent litigation and licensing fees could be very profitable. After (co-)inventing the integrated circuit and receiving patents on it, Texas Instruments engaged in bitter patent battles, earning the nickname "the Dallas legal firm" for their "unethical and unprofessional legal tactics".[13] Texas Instruments continued their legal practices with the TMX 1795, receiving multiple patents on it, issued between 1973 and 1985.[14][15]

Needless to say, Intel was not happy that Texas Instruments patented the TMX 1795, since building a single-chip processor for Datapoint was Intel's idea.[16] Intel was even unhappier that that Texas Instruments had used parts of Intel's specification when designing and patenting the TMX 1795.[7][17] Intel had wanted to patent the 4004[18], but their patent attorney told them that it wasn't worth it, and the idea of putting a computer on a chip was fairly obvious. Likewise, Datapoint had considered patenting the single-chip microprocessor but was told by their patent attorney that there was nothing patentable in the idea.[3]

In order to extract substantial licensing fees, Texas Instruments sued multiple companies using their microprocessor and microcontroller patents (including the TMX 1795 patent) in a case that Gordon Bell called "TI v. Everybody".[13] Dell decided to fight back in a "bet the company" lawsuit.[14] The lawsuit dragged on for years and was about to go to trial when the case suddenly turned against Texas Instruments.

Lee Boysel of Four-Phase Systems had built a 24-bit MOS-based minicomputer in 1970, as will be discussed in more detail below. The computer had a 9-chip CPU, but in an amazing hack, Boysel took one of the three 8-bit arithmetic/logic chips and was able to build a working microcomputer from it. Since this chip was a year before than the TMX 1795, it torpedoed Texas Instruments' case and it never went to trial. As a result, many people consider the Four-Phase AL1 to be the first microprocessor. However, as I'll explain below, the demo wasn't quite what most people think.

The Four-Phase AL1 running as a single-chip processor in a patent litigation demo. From Boysel's EECS presentation.

The Four-Phase AL1 running as a single-chip processor in a patent litigation demo. From Boysel's EECS presentation.

Is the TMX 1795 really the first microprocessor?

There's a fair bit of argument of what is the first microprocessor. Several candidates for first microprocessor were introduced in a short period of time between 1968 and 1971. These are all interesting chips, but most of them have been forgotten. In this section, I'll discuss various candidates, but first I'll look at whether it makes sense to consider the microprocessor an invention.

Giving some hardware background will help the following discussion. The transistors you're probably most familiar with are bipolar transistors—they are fast, but bipolar integrated circuits can't contain large numbers of transistors. The TTL chips used in the Datapoint 2200 and other systems are built from bipolar transistors. A later technology produced MOS transistors, which are slower than bipolar, but can now be squeezed onto a chip by the millions or billions. The final term is LSI or Large-Scale Integration, referring to an integrated circuit containing a large number of components: 100 gates or more. The introduction of MOS/LSI is what made it possible to build a processor with a few chips or a single chip, rather than a board full of chips.

The inevitability of microprocessors

One perspective is that the microprocessor isn't really an invention, but rather something that everyone knew would happen, and it was just a matter of waiting for the technology and market to be correct. This view is convincingly presented in Schaller's thesis,[19] which has some interesting quotes:
The idea of putting the computer on a chip was a fairly obvious thing to do. People had been talking about it in the literature for some time.—Ted Hoff, 4004 designer
At the time in the early 1970s, late 1960s, the industry was ripe for the invention of the microprocessor.- Hal Feeney, 8008 designer
The question of ‘who invented the microprocessor?’ is, in fact, a meaningless one in any non-legal sense. - Microprocessor Report

I largely agree with this perspective. It was obvious in the late 1960s that a CPU would eventually be put on a chip, and it was just a matter of time for the density of MOS chips to improve to the point that it was practical. In addition, in the 1960s, MOS chips were slow, expensive, and unreliable[11]—a computer built out of a bunch of bipolar chips was obviously better, and this included everything from the IBM 360 mainframe to the PDP-11 minicomputer to the desktop Datapoint 2200. At first a MOS-based computer only made sense for a low-performance application (calculators, terminal), or when high density was required (aerospace, calculators).

To summarize this view, the microprocessor wasn't anything to specifically invent, but just something that happened when MOS technology improvements and a marketing need made it worthwhile to build a single chip processor.

Defining "microprocessor"

Picking the first microprocessor is largely a linguistic exercise in how you define "microprocessor". It also depends on how you define "first": this could be first design, first manufactured chips, first sales, or first patent. But I think for reasonable definitions, the TMX 1795 is first.

There's no official definition of a microprocessor. Various sources define a microprocessor as a CPU on a chip, or an arithmetic-logic unit (ALU) on a chip, or on a few chips. One interesting perspective is that "microprocessor" is basically a marketing term driven by the need of companies like Intel and Texas Instruments to give a label to their new products.[11]

In any case, I consider a microprocessor to be a CPU on a single chip, including the ALU, control, and registers. Storage and I/O is generally outside the chip. There will generally be additional support and interface chips such as buffers, latches, and clock generation. I also consider it important that a microprocessor be programmable as a general-purpose computer. This definition, I think, is a reasonable definition for a microprocessor.

One architecture that I don't consider a microprocessor is a microcoded system, where the control unit is separate and provides micro-instructions to control the ALU and the rest of the system. In this system, the microcode can be provided by a ROM and a latch steps through the micro-instructions. Since the ALU doesn't need to do instruction decoding, it can be a much simpler chip than a full-blown CPU. I don't think it's fair to call it a microprocessor.

Timeline of early microprocessors

There are several processors that are frequently argued to be the first microprocessor, and they were created in a span of just a few years. I created the timeline below to show when they were developed. In the remainder of this article, I describe the different processors in detail. Timeline of early MOS/LSI processors.

Timeline of early MOS/LSI processors.

Four-Phase AL1

If one person could be considered the father of MOS/LSI processors, it would be Lee Boysel. While working at Fairchild, he came up with the idea of a MOS-based computer and methodically designed and built the necessary cutting-edge chips (ROM in 1966, ALU in 1967, DRAM in 1968). Along the way he published several influential articles on MOS chips, as well as a 1967 "manifesto" explaining how a computer comparable to the IBM 360 could be built from MOS.

Four-Phase AL4 arithmetic-logic chip (variant of AL1)

Four-Phase AL4 arithmetic-logic chip (variant of AL1)

Boysel left Fairchild and started Four-Phase Systems in October 1968 to build his MOS-based system. In 1970, he demoed the System/IV, a powerful 24-bit computer. The processor used 9 MOS chips: three 8-bit AL1 arithmetic / logic chips, three microcode ROMs, and three RL random logic chips. This computer sold very well and Four-Phase became a Fortune 1000 company before being acquired by Motorola in 1981.

Die photo of Four-Phase AL1 arithmetic-logic chip. Courtesy of Computer History Museum.

Die photo of Four-Phase AL1 arithmetic-logic chip. Courtesy of Computer History Museum.

As described earlier, Boysel used an AL1 chip as a processor in a courtroom demonstration system in 1995 to show prior art against TI's patents. Given this demonstration, why don't I consider the AL1 to be the first microprocessor? It used an AL1 chip as the processor, along with ROM, RAM, and I/O and some address latches, so it seems like a single-chip CPU. But I've investigated this demonstration system closely, and while it was a brilliant hack, there's also some trickery. The ROM and its associated latch are actually set up as a microcode controller, providing 24 control lines to the rest of the system. The ROM constrols memory read/write, selects an ALU operation, and provides the address of the next microcode instruction (there's no program counter). After close examination, it's clear that the AL1 chip is acting as an Arithmetic/Logic chip (thus the AL1 name), and not as a CPU.

There are a few other things that show the AL1 wasn't working as a single-chip computer. The die photo published as part of the trial has the components of the AL1 chip labeled, including "Instruction Register 23 bits". However, that label is entirely fictional—if you study the die photo closely, there's no instruction register or 23 bits there, just vias where the ground lines pass under the clock lines. I can only conclude that this label was intended to trick people at the trial. In addition, the AL1 block diagram used at the trial has a few subtle changes from the originally-published diagram, removing the program counter and adding various interconnections. I examined the code (microcode) used for the trial, and it consists of super-bizarre microcode instructions nothing like the AL1's original instruction set.

Detail of AL1 die photo showing fictional 'Instruction Register 23 bits' label.

Detail of AL1 die photo showing fictional 'Instruction Register 23 bits' label.

While the demo was brilliant and wildly successful at derailing the Texas Instruments lawsuits, I don't see it as showing the AL1 was a single-chip microprocessor. It showed that combined with a microcode controller, the AL1 could be used as a barely-functioning processor. In addition, you could probably use a similar approach to build a processor out of an earlier ALU chip such as the 74181 or Fairchild 3800, and nobody is arguing that those are microprocessors.

Looking at the dates, it appears that Viatron (described below) shipped their MOS/LSI computer a bit before Four-Phase, so I can't call Four-Phase the first MOS/LSI computer. However, Four-Phase did produce the first computer with semiconductor memory (instead of magnetic core memory), and thus the first all-semiconductor computer.

Viatron

Viatron is another interesting but mostly forgotten company. It began as a hugely-publicized startup founded in November, 1967. About a year later, they announced System 21, a 16-bit minicomputer with smart terminals, tape drives, and a printer, built from custom MOS chips. The plan was volume: by building a large number of systems, they hoped to produce the chips inexpensively and lease the systems at amazingly low prices—computer rental for $99 a month.[20] Unfortunately, Viatron ran into poor chip yields, delays, and price increases. As a result, the company went spectacularly bankrupt in March 1971.

The Viatron System 21: color display, terminal keyboard, 'robot' printer, and computer. From Viatron brochure, via bitsavers.org.

The Viatron System 21: color display, terminal keyboard, 'robot' printer, and computer. From Viatron brochure, via bitsavers.org.

Viatron is literally the originator of the microprocessor—they were the first to use the word "microprocessor" in their October 1968 announcement of the 2101 microprocessor. However, this microprocessor wasn't a chip—it was an entire smart terminal, leasing for the incredibly low price of $20 a month. Viatron used the term microprocessor to describe the whole desktop unit complete with keyboard and tape drives. Inside the microprocessor cabinet were a bunch of boards—the processor itself consisted of 18 custom MOS chips on 3 boards, with more boards of custom MOS and CMOS chips for the keyboard interface, tape drive, memory, and video display.

The 3-board processor inside the 2101 was specialized for its terminal role. It read and wrote multiple I/O control lines, moved data between I/O devices and memory, updated the display, and provided serial input and output.[20] The processor was very limited, not even providing arithmetic. Nonetheless, I think the Viatron 2101 "microprocessor" can be considered the first (multichip) MOS/LSI processor, shipping before the Four Phase System/IV.

One of the three CPU boards from the Viatron System 21 terminal. Photo courtesy of UMMR.

CPU board #2 of three from the Viatron System 21 terminal. Top row holds two RAR register chips and six ROM chips. Bottom chips are IBR multiplexer, flag chip and ROM multiplexer, Photo courtesy of UMMR.

Viatron also built an advanced general-purpose 16-bit computer, the 62-pound 2140 minicomputer, which leased for $99 a month and came with a Fortran compiler. It had 4K 16-bit words of core memory and two 16-bit arithmetic units. The microcoded processor had an extensive instruction set including multiply and divide operations, and supported 48-bit arithmetic. Coming on the market slightly before the Four-Phase computer, the Viatron 2140 appears to be the first MOS/LSI general-purpose computer. Unfortunately, sales were poor and the 2140 projected ended in 1973.

MP944 / F-14 CADC

The Central Air Data Computer was a flight control system for the F-14 fighter, using the MP944 MOS/LSI chipset developed between 1968 and 1970. This computer processed information from sensors and generated outputs for instrumentation and to control the aircraft. The main operation it performed was computing polynomial functions on the inputs. This chipset was designed by Ray Holt, who argues on his website (firstmicroprocessor.com) that this 20-bit serial computer should be considered the first microprocessor.

Block diagram of the F14A CADC computer. From 'Architecture Of A Microprocessor'.

Block diagram of the F14A CADC computer. Module 1 performs multiplication, module 2 performs division, and module 3 performs special logic functions. From Architecture Of a Microprocessor.

The architecture of this computer is pretty unusual; it consists of three functional modules: a multiplier, a divider, and "special logic". Each functional unit has a microcode ROM (including an address register) that provides a 20-bit microinstruction, a data steering unit (SL) that selects between 13 data inputs and performs addition, the arithmetic chip (multiply (PMU), divide (PDU) or special logic (SLF)), and a small RAM chip for storage (RAS). Each data line transfers a 20-bit fixed-point value, shifted serially one bit at a time. The main purpose of the SLF (special logic function) chip is to clamp a value between upper and lower bounds. It also converts Gray code to binary[21] and performs other logic functions.[22]

I don't consider this a microprocessor since the control, arithmetic, and storage are split across four separate chips in each functional unit.[23] Not only is there no CPU chip, there's not even a general-purpose ALU chip. Computer architecture expert David Patterson says, "No way Holt's computer is a microprocessor, using the word as we mean it today."[24] Even if you define a microprocessor as including a multi-chip processor, Viatron beat the CADC by a few months. While the CADC processor is very interesting, I don't see any way that it can be considered the first microprocessor.

Intel 4004

The well-known Intel 4004 is commonly considered the first microprocessor, but I believe the TMX 1795 beat it. I won't go into details of how Busicom contracted with Intel to have the 4004 built for a calculator, since the story is well-known.[25] I did a lot of research into the dates of the 4004 to determine which was first: the 4004 or the TMX 1795. According to the 4004 oral history, the first successful 4004 chip was the end of February 1971 and shipped to Busicom in March. TI wrote a draft announcement with photos of the TMX 1795 on February 24, 1971, and it was written up in Businessweek in March. The TMX 1795 was delivered to Datapoint in the summer and TI applied for a patent on August 31. The 4004 wasn't announced until November 15.

To summarize, the dates are very close but it appears that the TMX 1795 chip was built first (assuming the chip was working for the Feb 24 writeup) and announced first, while the 4004 was delivered to customers first. On the other hand, Federico Faggin claims that the 4004 was a month or two before the TMX 1795[17]. However, the TMX 1795 was patented; I assume that someone would have mentioned in all the patent litigation if the 4004 really beat the TMX 1795 (rather than building a demo out of the Four-Phase AL1). Based on the evidence, I conclude that the TMX 1795 was slightly before the 4004 as the first microprocessor built, while the 4004 is clearly the first microprocessor sold commercially. Texas Instruments claims on their website: "1971: Single-chip microprocessor invented", and I agree with this claim.

Intel 8008

Many people think of the Intel 8008 as the successor to the 4004, but the two chips are almost entirely independent and were developed roughly in parallel. In fact, some of the engineers on the 4004 worried that the 8008 would come out first because the 8008 project consisted of one chip to the four in the 4004 project. The 8008 was originally called the 1201 in Intel's naming scheme because it was the first custom MOS chip Intel was developing. The 4004 would have been the 1202 except Faggin, a key engineer on the project, convinced management that 4004 was a much better name. The 1201 was renamed the 8008 before release to fit the new naming pattern.

According to my research, the 8008 may be the first microprocessor described in print. I found a reference to it (although without the 8008 name) in a four-paragraph article in Electronic Design in Oct 25, 1970, discussing Intel's chip under development for the Datapoint 2200. The article briefly describes the chip's instruction set, architecture, and performance. It said the processor would be used in the 2200 "smart terminal" (which of course didn't happen), and said the chip was scheduled for January, 1971 delivery (it slipped and was officially announced in March 1972).

Gilbert Hyatt's microcontroller patent

The story of how Gilbert Hyatt obtained a broad patent covering the microcontroller in 1990 and lost it a few years later is complex, but I will try to summarize it here. The story starts with the founding of Micro-Computer Incorporated in 1968. Hyatt built a 16-bit serial computer out of TTL chips and sold it as a numerical control computer. He had plans to build this processor as a single chip, but before that could happen, the company went out of business in 1971. Mr. Hyatt claims that investors Noyce and Moore (of Intel fame) cut off funding because "their motive was to sell the company and take the technology."

The Nu-troller IV CNC machine using Gilbert Hyatt's 16-bit processor built from TTL chips. Photo from Numerical Control Society Proceedings, 1971.

The Nu-troller IV CNC machine using Gilbert Hyatt's 16-bit processor built from TTL chips. Photo from Numerical Control Society Proceedings, 1971.

In 1990, seemingly out of nowhere, Gilbert Hyatt received a very general patent (4942516) covering a computer with ROM and storage on a single chip. Hyatt had filed a patent on his computer in 1969, and due to multiple continuations, he didn't receive the patent until 1990.[15] This patent caused considerable turmoil in the computer industry since pretty much every microcontroller was covered by this patent. Hyatt ended up receiving substantial licensing fees until Texas Instruments challenged the patent a few years later and the patent office canceled Hyatt's key patent claims.[26] In any case, Gilbert Hyatt's microprocessor was never built (except in TTL form), there was no design for it, and the patent didn't provide any information on how to put the computer on a chip. Thus, while this computer built from TTL chips is interesting, it never became a microprocessor.

TMS 0100 calculator-on-a-chip / microcontroller

Texas Instruments created the TMS 1802NC calculator-on-a-chip in 1971; this was the first chip in the TMS 0100 series.[27] This chip included program ROM, storage, control logic and an ALU that performed arithmetic on 11-digit decimal numbers under the control of 11-bit opcodes.

The TMS 1802 calculator chip, first chip in the TMS 0100 series. Photo courtesy of datamath.org.

The TMS 1802 calculator chip, first chip in the TMS 0100 series. Photo courtesy of datamath.org.

While the TMS 0100 series was usually called a calculator-on-a-chip, it was also intended for microcontroller tasks. The patent describes "Programming of the calculator system for non-calculator functions", including digital volt meter, tax-fare meter, scale, cash register operations, a controller, arithmetic teaching unit, clock, and other applications. As the first "computer-on-a-chip", the TMS 0100 gave Texas Instruments several important microcontroller patents. which they used in patent litigation (including the Dell case described earlier).[14] (The key difference between a microcontroller and a microprocessor is the microcontroller includes the storage and program ROM, while the microprocessor has them externally.)

The TMX 1795 (first microprocessor) and TMS 0100 (first microcontroller) were both developed by Gary Boone and team (Mike Cochran, Jerry Vandierendonck, and others) at Texas Instruments almost simultaneously, which is a remarkable accomplishment. The TMS1802NC / TMS 0100 was announced September 17, 1971.

In 1974, Texas Instruments released the successor to the TMS 0100 series, the TMS 1000 series, and marketed it as a microcontroller. Externally, the TMS 1000 series had I/O similar to the TMS 0100 series, but internally it was entirely different. The 11-bit opcodes of the TMS 0100 were replaced by 8-bit opcodes and the 11-digit decimal storage was replaced by 4-bit binary storage. Some sources call the TMS 1000 series the first microcontroller or first microprocessor. This is entirely wrong and based on confusion between the two series. Confusing the TMS 0100 and TMS 1000 is like confusing the 8008 and 8080: the latter is a related, but entirely new chip.

Conclusions

Because the TMX 1795 wasn't commercially successful, the chip is almost forgotten, even though the chip has an important historical role. I've uncovered some history about this chip and take a detailed technical look at other chips that are sometimes considered the first microprocessor. The "first microprocessor" title depends on how exactly you define a microprocessor, but the TMX 1795 is first under a reasonable definition—a CPU-on-a-chip. It's interesting, though, how multiple MOS/LSI processor chips were built in a very short span once technology permitted, and how most of them are now almost entirely forgotten. In a future article, I'll look at the implementation and circuitry of the TMX 1795 in detail.

Thanks to Austin Roche for detailed information on Datapoint. Thanks to K. Kroslowitz of the Computer History Museum" for obtaining TMX 1795 photos for me; the chip is so obscure, there were no photos of it on the internet up until now.

Notes and references

[1] The Datapoint Corporation was founded in 1968 as CTC (Computer Terminal Corporation), CTC later changed its name to Datapoint as the name of its product was much better known than the company name itself. For simplicity, I'll use Datapoint instead of CTC to refer to the company in this article.

[2] The Computer History Museum's Oral History Panel on the Development and Promotion of the Intel 8008 Microprocessor discusses the history of the 8008 in great detail. The story of the initial idea to build a single chip for Datapoint is on page 2. Texas Instruments' chip development is on page 3-4. The use of little-endian format is discussed on page 5. TI's chip is discussed on page 6. Automated design of TI's chip is on page 25.

[3] The Computer History Museum's Oral History of Victor (Vic) Poor provides a lot of history of Datapoint. Page 34 describes Stan Mazor suggesting that Intel put Datapoint's processor on a single chip. Page 43 describes the TI chip and its noise issues. Page 46 explains how Datapoint's patent attorney told them there was nothing patentable about the single-chip microprocessor.

[4] Much of the information on Datapoint comes from the book Datapoint: The Lost Story of the Texans Who Invented the Personal Computer Revolution. The story of Datapoint suggesting a single-chip CPU to Noyce is on pages 70-72.

[5] The 8008 processor was originally given the number 1201 under Intel's numbering scheme. The first digit indicated the type of circuitry: 1 for p-MOS. The second digit indicated the type of chip: 2 for random logic. The last two digits were a serial number. For some reason, the 4004 was numbered after the 8008 and would have been the 1202. Fortunately, its developers argued that 4004 would be a better name for marketing reasons. The 1201 was later renamed the 8008 to fit this pattern. Thus, the 8008 is often though of as a successor to the 4004, even though the chips were developed in parallel and have totally different architectures.

[6] A switching power supply is much more efficient than the less complex linear power supplies commonly used at the time, so it generates much less heat. The Datapoint 2200 used a push-pull topology switching power supply. Steve Jobs called the Apple II's power supply "revolutionary", saying "Every computer now uses switching power supplies, and they all rip off Rod Holt's design." Note that the Datapoint 2200 with its swiching power supply came out 6 years before the Apple II. I've written a lot more about the history of switching power supplies here. (By the way, don't confuse Ray Holt of the CADC with Rod Holt of Apple.)

[7] According to Ted Hoff[18], Intel had a flaw in the original interrupt handling specification for the 8008 and TI copied that error in the TMX 1795, demonstrating that TI was using Intel specifications. In particular, when the 8008 processor is interrupted, a RESTART instruction can be forced onto the bus, redirecting execution to the interrupt handler. The stack pointer must be updated by the RESTART instruction to save the return address, but Intel didn't include that in the initial specification. (The RESTART instruction is not part of the original Datapoint architecture.)

I've verified from the patent that the RESTART logic in the TMX 1795 doesn't update the stack pointer, so interrupt handling is broken and there's no way to return from an interrupt. (The interrupt handling section of the TMX 1795 patent is kind of a mess. It discusses a "CONTINUE" instruction that doesn't exist.) According to Ted Hoff, this demonstrates that Texas Instruments was using Intel's proprietary specification without entirely understanding it.

[8] The text of the TMX 1795 announcement in Businessweek, March 27 1971, p52:
"Computer Terminal Corp., of San Antonio, Tex., has designed a remote cathode-ray computer terminal no bigger than a typewriter that also functions as a powerful minicomputer. In what must rank as a milestone in LSI, Texas Instruments has managed to jam this terminal's entire central processing unit- the equivalent of 3,100 MOS transistors-on a single custom chip roughly 2 in. square."

[9] In the Intel 8080 Oral History, the layout of the TMX 1795 is criticized on page 35.

[10] One enduring legacy of the Datapoint 2200 is the little-endian storage used by Intel x86 processors, which is backwards compared to most systems. Because the Datapoint 2200 had a serial processor, it accessed bits one at a time. For arithmetic, it needed to start with the lowest bit, in order to handle carries (the same as long addition starts at the right). As a consequence of this, Datapoint 2200 instructions had the low-order byte before the high-order byte. There's no need for a processor accessing bits in parallel to be little endian: processors such as the 6800 and 8051 use the more natural big-endian format. But all the microprocessors descended from the 8008 (8080, Z80, x86) kept the little-endian format used by Datapoint. (See also 8008 Oral History, page 5.)

[11] The perspective that Four-Phase and Intel treated the microprocessor differently because For Phase was a computer manufacturer and Intel is a chip manufacturer is discussed at length in When is a microprocessor not a microprocessor? in Exposing Electronics. This also goes into the history of Boysel and Four-Phase. It contains the interesting remark that the Texas Instruments litigation turned an old integrated circuit (the Four-Phase AL1) into a new microprocessor. Related discussion is in the book To the Digital Age: Research Labs, Start-up Companies, and the Rise of MOS Technology.

[12] While designing the 4004, Intel had a little-known backup plan in case the 4004 turned out to be too complex to build. This backup plan would also allow Intel to sell processors even though Busicom had exclusive rights to the 4004. (The 4004 was built under contract to calculator manufacturer Busicom, who had exclusive rights to the 4004 (which they later gave up). Federico Faggin explains (Oral History) that while Busicom had exclusive rights to use the 4004, they didn't own the intellectual property, so Intel was free to build similar processors.) This backup plan was the simpler 4005 chip. While the 4004 had 16 registers and an on-chip stack, the 4005 just had the program counter, a memory address register, and an accumulator, using external RAM for registers. When the 4004 chip succeeded, Intel didn't need the 4005 and licensed it to a Canadian company, MicroSystems International, which released the chip as the MF7114 in the second half of 1972. Sales were poor and the MF7114 was abandoned in 1973, so the chip is almost unknown today. The history of the MF7114 is described in detail in The MIL MF7114 Microprocessor.

[13] The description "TI versus Everybody trial" is from The Evolution to the Computer History Museum" by Gordon Bell, p28. Texas Instruments was referred to as "The Dallas Legal Firm" by the CEO of Cypress Semiconductors according to History of Semiconductor Engineering p 194-195.

[14] Texas Instruments received several broad patents on the TMX 1795. 3,757,306: "Computing Systems CPU" covers a CPU on a single chip with external memory. 4,503,511: "Computing system with multifunctional arithmetic logic unit in single integrated circuit" covers an ALU, registers, and logic on a chip. 4,225,934: "Multifunctional arithmetic and logic unit in semiconductor integrated circuit" describes an ALU on a single chip with a parallel bus.

The Texas Instruments v. Dell litigation featured multiple patents. The TMX 1795 patent in the litigation was 4,503,511: "Computing system with multifunctional arithmetic logic unit in single integrated circuit"; the other TMX 1795 patents were not part of the litigation. Several were TMS 0100 calculator/microcontroller patents: 4,326,265: "Variable function programmed calculator", 4,471,460: "Variable function programmed system", 4,471,461: "Variable function programmed system", 4,485,455: "Single-chip semiconductor unit and key input for variable function programmed system". Finally there were some miscellaneous patents: 3,720,920: "Open-ended computer with selectable I/O control", 4,175,284: "Multi-mode process control computer with bit processing", RE31,864: "Self-test feature for appliance or electronic systems operated by microprocessor".

The broader lawsuit Texas Instruments v. Daewoo, et al was against computer manufacturers Cordata (formerly Corona Data Systems), Daewoo, and Samsung. It went on from 1990 to 1993, and ended up with the companies needing to license the patents. The Dell lawsuit, Texas Instruments v. Dell, also went from 1990 to 1993 but ended in a settlement favorable to Dell after Boysel's demonstration of the AL1 chip acting as a single-chip CPU in 1992.

[15] It may seem strange that someone can get a patent a decade or two after their invention. This is accomplished through a "continuation", which lets you file updated patents with additional claims. This process can be dragged out for decades, resulting in a submarine patent.

Patents used to be good for 17 years from the date it was granted, no mater how delayed. This delay can make a patent much more valuable; there are a lot more companies to sue over a microprocessor patent in 1985 than in 1971, for instance. Plus, if you have a similar non-delayed patent too, it's like having a free extension on the patent. US patents are now valid for 20 years from filing, eliminating submarine patents (except for those still in the system).

[16] Ted Hoff's article Impact of LSI on future minicomputers, IEEE International Convention Digest, Mar. 1970, discusses the difficulty of building LSI parts that can be used in large (and thus cost-effective) volumes. He suggests that since a MOS chip can hold 1000 to 6000 devices, a standardized CPU could be built on a single LSI chip and sold for $10 to $20.

[17] The 4004 Oral History has information on the 4004 timeline. Federico Faggin says that the TI chip was a month or two after the 4004 (page 32). Page 33 discusses the interrupt problem on the TMX 1795.

[18] Interview with Marcian (Ted) Hoff provides a lot of background on development of the 4004. It describes how by October 1969 they were committed to building the 4004 as a computer on a chip. The first silicon for the 4004 was in January 1971, and by February 1971 the chip was working. In May 1971, Busicom ran into financial difficulties and negotiated a lower price for the 4004 in exchange for giving up exclusive rights to the chip. He describes how at the Fall Joint Computer Conference, many customers would argue that the 4004 wasn't a computer but just a bit slice; after looking at the datasheet, they realized that it was a computer. Ted Hoff also describes the origins of the 8008, saying that he and Stan Mazur proposed the single-chip processor to Datapoint, much to Vic Poor's surprise, but later Vic Poor claimed that he had planned a single-chip processor all along.

[19] The thesis Technological Innovation in the Semiconductor Industry by Robert R. Schaller, 2004, has several relevant chapters. Chapter 6 analyzes the history of the integrated circuit in detail. Chapter 7, The Invention of the Microprocessor, Revisited, provided a lot of background for this article. Chapter 8 is a detailed analysis of Moore's Law.

[20] By carefully studying the Viatron terminal schematics, I uncovered details about the multi-chip processor in the Viatron terminal. The processor handled 8-bit characters and was programmed in 12-bit microcode, 512 words stored in ROM chips. It had three data registers (IBR, TEMP, and AUX), and two microcode ROM address registers (RAR and RAAR). Arithmetic operations appear to be entirely lacking from the processor. The memory was built from shift register memory chips and was used for the display. The Viatron price list is in the Viatron System 21 Brochure.

[21] The Gray code is a way of encoding values in binary so only one bit changes at a time. This is useful for mechanical encoding because it avoids errors during transitions. For instance, if you use binary to encode the position of an aircraft control, as it moves from 3 to 4 the binary values are 011 and 100. If the first bit changes before the rest, you get 111 (i.e. 7) and your plane may crash. With Gray code, 3 and 4 are encoded as 010 and 110. Since only one bit changes, it doesn't matter if the bits don't change simultaneously—you either have 3 or 4 and no bad values in between.

[22] Ray Holt's firstmicroprocessor.com calls the SLF (special logic function) chip the CPU. In the original paper, this chip was not called the CPU and was only described briefly. In the paper, each of the three multi-chip functional units is called a CPU. It's clear that the SLF chip was recently renamed the CPU just to support the claim that the CADC was the first microprocessor.

[23] The MP944 chips had considerably fewer transistors than the 4004: 1063 in the PMU, 1241 in the PDU, 743 in the SLF, and 771 in the SLU, compared to 2300 in the 4004.

[24] David Patterson's analysis of the CADC computer can be found on the firstmicroprocessor.com website.

[25] The inventors of the 4004 wrote a detailed article about the chip: The history of the 4004. Other articles with details on the 4004's creation are The birth of the microprocessor and The Microprocessor.

[26] For more information on Gilbert Hyatt's patent, see Chip Designer's 20-Year Quest and For Texas Instruments, Some Bragging Rights, Inventor battling U.S. over patents from '70s and Gilbert Who? An obscure inventor's patent may rewrite microprocessor history.

The specific legal issues and maneuvering over Hyatt's patent are complex, but described in the appeal summary and Berkeley Technology Law Journal. If you try to follow this, note that Boone's '541 application and '541 patent are two totally different things, even though they have the same title and end in 541. The presentation Patent litigations that shaped their industries provides an overview of the litigation over the "Single Chip Computer" and other inventions.

[27] Note that the TMS 0100 is actually a series of chips (TMS 01XX) and likewise the TMS 1000 is also a series. Confusingly, the first chip in the TMS 0100 series was the TMS 1802NC calculator chip, which was renamed the TMS 0102; despite its name, it was not in the TMS 1000 series.

[28] The Datapoint 2200 was a serial processor—while it was an 8-bit processor, it operated on one bit at a time, had a one-bit ALU, and a one-bit internal bus. While this seems bizarre from our perspective, implementing a processor serially was a fairly common way to reduce the cost of a processor; the PDP-8/S was another serial minicomputer. (This should not be confused with the Motorola MC14500B, which genuinely is a one-bit processor designed for simple control applications.)


Bitcoin mining on a 55 year old IBM 1401 mainframe: 80 seconds per hash

$
0
0
Could an IBM mainframe from the 1960s mine Bitcoin? The idea seemed crazy, so I decided to find out. I implemented the Bitcoin hash algorithm in assembly code for the IBM 1401 and tested it on a working vintage mainframe. It turns out that this computer could mine, but so slowly it would take more than the lifetime of the universe to successfully mine a block. While modern hardware can compute billions of hashes per second, the 1401 takes 80 seconds to compute a single hash. This illustrates how computer performance has improved a lot in the past decades, thanks to Moore's law.

The photo below shows the card deck I used, along with the output of my SHA-256 hash program as printed by the line printer. (The card on the front of the deck is just for decoration; it was a huge pain to punch.) Note that the second line of output ends with a bunch of zeros; this indicates a successful hash.

Card deck used to compute SHA-256 hashes on IBM 1401 mainframe.

Card deck used to compute SHA-256 hashes on IBM 1401 mainframe. Behind the card deck is the line printer output showing the input to the algorithm and the resulting hash.

How Bitcoin mining works

Bitcoin, a digital currency that can be transmitted across the Internet, has attracted a lot of attention lately. If you're not familiar with how it works, the Bitcoin system can be thought of as a ledger that keeps track of who owns which bitcoins, and allows them to be transferred from one person to another. The interesting thing about Bitcoin is there's no central machine or authority keeping track of things. Instead, the records are spread across thousands of machines on the Internet.

The difficult problem with a distributed system like this is how to ensure everyone agrees on the records, so everyone agrees if a transaction is valid, even in the presence of malicious users and slow networks. The solution in Bitcoin is a process called mining—about every 10 minutes a block of outstanding transactions is mined, which makes the block official.

To prevent anyone from controlling which transactions are mined, the mining process is very difficult and competitive. In particular a key idea of Bitcoin is that mining is made very, very difficult, a technique called proof-of-work. It takes an insanely huge amount of computational effort to mine a block, but once a block has been mined, it is easy for peers on the network to verify that a block has been successfully mined. The difficulty of mining keeps anyone from maliciously taking over Bitcoin, and the ease of checking that a block has been mined lets users know which transactions are official.

As a side-effect, mining adds new bitcoins to the system. For each block mined, miners currently get 25 new bitcoins (currently worth about $6,000), which encourages miners to do the hard work of mining blocks. With the possibility of receiving $6,000 every 10 minutes, there is a lot of money in mining and people invest huge sums in mining hardware.

Line printer, IBM 1401 mainframe, and tape drives at the Computer History Museum.

Line printer and IBM 1401 mainframe at the Computer History Museum. This is the computer I used to run my program. The console is in the upper left. Each of the dark rectangular panels on the computer is a "gate" that can be folded out for maintenance.

Mining requires a task that is very difficult to perform, but easy to verify. Bitcoin mining uses cryptography, with a hash function called double SHA-256. A hash takes a chunk of data as input and shrinks it down into a smaller hash value (in this case 256 bits). With a cryptographic hash, there's no way to get a hash value you want without trying a whole lot of inputs. But once you find an input that gives the value you want, it's easy for anyone to verify the hash. Thus, cryptographic hashing becomes a good way to implement the Bitcoin "proof-of-work".

In more detail, to mine a block, you first collect the new transactions into a block. Then you hash the block to form an (effectively random) block hash value. If the hash starts with 16 zeros, the block is successfully mined and is sent into the Bitcoin network. Most of the time the hash isn't successful, so you modify the block slightly and try again, over and over billions of times. About every 10 minutes someone will successfully mine a block, and the process starts over. It's kind of like a lottery, where miners keep trying until someone "wins". It's hard to visualize just how difficult the hashing process is: finding a valid hash is less likely than finding a single grain of sand out of all the sand on Earth. To find these hashes, miners have datacenters full of specialized hardware to do this mining.

I've simplified a lot of details. For in-depth information on Bitcoin and mining, see my articles Bitcoins the hard way and Bitcoin mining the hard way.

The SHA-256 hash algorithm used by Bitcoin

Next, I'll discuss the hash function used in Bitcoin, which is based on a standard cryptographic hash function called SHA-256. Bitcoin uses "double SHA-256" which simply applies the SHA-256 function twice. The SHA-256 algorithm is so simple you can literally do it by hand, but it manages to scramble the data entirely unpredictably. The algorithm takes input blocks of 64 bytes, combines the data cryptographically, and generates a 256-bit (32 byte) output. The algorithm uses a simple round and repeats it 64 times. The diagram below shows one round, which takes eight 4-byte inputs, A through H, performs a few operations, and generates new values for A through H.

SHA-256 round, from Wikipedia

SHA-256 round, from Wikipedia created by kockmeyer, CC BY-SA 3.0.

The dark blue boxes mix up the values in non-linear ways that are hard to analyze cryptographically. (If you could figure out a mathematical shortcut to generate successful hashes, you could take over Bitcoin mining.) The Ch"choose" box chooses bits from F or G, based on the value of input E. The Σ"sum" boxes rotate the bits of A (or E) to form three rotated versions, and then sums them together modulo 2. The Ma"majority" box looks at the bits in each position of A, B, and C, and selects 0 or 1, whichever value is in the majority. The red boxes perform 32-bit addition, generating new values for A and E. The input Wt is based on the input data, slightly processed. (This is where the input block gets fed into the algorithm.) The input Kt is a constant defined for each round.

As can be seen from the diagram above, only A and E are changed in a round. The other values pass through unchanged, with the old A value becoming the new B value, the old B value becoming the new C value and so forth. Although each round of SHA-256 doesn't change the data much, after 64 rounds the input data will be completely scrambled, generating the unpredictable hash output.

The IBM 1401

I decided to implement this algorithm on the IBM 1401 mainframe. This computer was announced in 1959, and went on to become the best-selling computer of the mid-1960s, with more than 10,000 systems in use. The 1401 wasn't a very powerful computer even for 1960, but since it leased for the low price of $2500 a month, it made computing possible for mid-sized businesses that previously couldn't have afforded a computer.

The IBM 1401 didn't use silicon chips. In fact it didn't even use silicon. Its transistors were built out of a semiconductor called germanium, which was used before silicon took over. The transistors and other components were mounted on boards the size of playing cards called SMS cards. The computer used thousands of these cards, which were installed in racks called "gates". The IBM 1401 had a couple dozen of these gates, which folded out of the computer for maintenance. Below, one of the gates is opened up showing the circuit boards and cabling.

Cards and wires inside an IBM 1401 mainframe.

This shows a rack (called a "gate") folded out of the IBM 1401 mainframe. The photo shows the SMS cards used to implement the circuits. This specific rack controls the tape drives.

Internally, the computer was very different from modern computers. It didn't use 8-bit bytes, but 6-bit characters based on binary coded decimal (BCD). Since it was a business machine, the computer used decimal arithmetic instead of binary arithmetic and each character of storage held a digit, 0 through 9. The computer came with 4000 characters of storage in magnetic core memory; a dishwasher-sized memory expansion box provided 12,000 more characters of storage. The computer was designed to use punched cards as input, with a card reader that read the program and data. Output was printed on a fast line printer or could be punched on more cards.

The Computer History Museum in Mountain View has two working IBM 1401 mainframes. I used one of them to run the SHA-256 hash code. For more information on the IBM 1401, see my article Fractals on the IBM 1401.

Implementing SHA-256 on the IBM 1401

The IBM 1401 is almost the worst machine you could pick to implement the SHA-256 hash algorithm. The algorithm is designed to be implemented efficiently on machines that can do bit operations on 32-bit words. Unfortunately, the IBM 1401 doesn't have 32-bit words or even bytes. It uses 6-bit characters and doesn't provide bit operations. It doesn't even handle binary arithmetic, using decimal arithmetic instead. Thus, implementing the algorithm on the 1401 is slow and inconvenient.

I ended up using one character per bit. A 32-bit value is stored as 32 characters, either "0" or "1". My code has to perform the bit operations and additions character-by-character, basically checking each character and deciding what to do with it. As you might expect, the resulting code is very slow.

The assembly code I wrote is below. The comments should give you a rough idea of how the code works. Near the end of the code, you can see the table of constants required by the SHA-256 algorithm, specified in hex. Since the 1401 doesn't support hex, I had to write my own routines to convert between hex and binary. I won't try to explain IBM 1401 assembly code here, except to point out that it is very different from modern computers. It doesn't even have subroutine calls and returns. Operations happen on memory, as there aren't any general-purpose registers.

               job  bitcoin
     * SHA-256 hash
     * Ken Shirriff  http://righto.com
               ctl  6641

               org  087
     X1        dcw  @000@
               org  092
     X2        dcw  @000@
               org  097
     X3        dcw  @000@
     
               org  333
     start     cs   299
               r
               sw   001
               lca  064, input0
               mcw  064, 264
               w
     * Initialize word marks on storage
               mcw  +s0, x3

     wmloop    sw   0&x3  
               ma   @032@, x3
               c    +h7+32, x3
               bu   wmloop
     
               mcw  +input-127, x3      * Put input into warr[0] to warr[15]
               mcw  +warr, x1
               mcw  @128@, tobinc
               b    tobin
     
     * Compute message schedule array w[0..63]
  
               mcw  @16@, i
     * i is word index 16-63   
     * x1 is start of warr[i-16], i.e. bit 0 (bit 0 on left, bit 31 on right)   
               mcw  +warr, x1
     wloop     c    @64@, i
               be   wloopd
     
     * Compute s0
               mcw  +s0, x2
               za   +0, 31&x2               * Zero s0
     * Add w[i-15] rightrotate 7
               sw   7&x2               * Wordmark at bit 7 (from left) of s0
               a    56&x1, 31&x2       * Right shifted: 32+31-7 = bit 24 of w[i-15], 31 = end of s0
               a    63&x1, 6&x2        * Wrapped: 32+31 = end of w[i-15], 7-1 = bit 6 of s0   
               cw   7&x2               * Clear wordmark
     * Add w[i-15] rightrotate 18
               sw   18&x2              * Wordmark at bit 18 (from left) of s0
               a    45&x1, 31&x2       * Right shifted: 32+31-18 = bit 13 of w[i-15], 31 = end of s0
               a    63&x1, 17&x2       * Wrapped: 32+31 = end of w[i-15], 18-1 = bit 17 of s0   
               cw   18&x2              * Clear wordmark
     * Add w[i-15] rightshift 3
               sw   3&x2               * Wordmark at bit 3 (from left) of s0
               a    60&x1, 31&x2       * Right shifted: 32+31-3 = bit 28 of w[i-15], 31 = end of s0
               cw   3&x2               * Clear wordmark
     * Convert sum to xor
               mcw  x1, x1tmp
               mcw  +s0+31, x1         * x1 = right end of s0
               mcw  @032@, x2          * Process 32 bits
               b    xor
               sw   s0                 * Restore wordmark cleared by xor
     
               mcw  x1tmp, x1
     
     * Compute s1         
               mcw  +s1, x2
               za   +0, 31&x2               * Zero s1
     * Add w[i-2] rightrotate 17
               sw   17&x2              * Wordmark at bit 17 (from left) of s1
               a    462&x1, 31&x2      * Right shifted: 14*32+31-17 = bit 14 of w[i-2], 31 = end of s1
               a    479&x1, 16&x2      * Wrapped: 14*32+31 = end of w[i-2], 17-1 = bit 16 of s1   
               cw   17&x2              * Clear wordmark
     * Add w[i-2] rightrotate 19
               sw   19&x2              * Wordmark at bit 19 (from left) of s1
               a    460&x1, 31&x2      * Right shifted: 14*32+31-19 = bit 12 of w[i-2], 31 = end of s1
               a    479&x1, 18&x2      * Wrapped: 14*32+31 = end of w[i-2], 19-1 = bit 18 of s1  
               cw   19&x2              * Clear wordmark
     * Add w[i-2] rightshift 10
               sw   10&x2              * Wordmark at bit 10 (from left) of s1
               a    469&x1, 31&x2      * Right shifted: 14*32+31-10 = bit 21 of w[i-2], 31 = end of s1
               cw   10&x2              * Clear wordmark
     * Convert sum to xor
               mcw  +s1+31, x1         * x1 = right end of s1
               mcw  @032@, x2          * Process 32 bits
               b    xor
               sw   s1                 * Restore wordmark cleared by xor
     
     * Compute w[i] := w[i-16] + s0 + w[i-7] + s1
               mcw  x1tmp, x1
               a    s1+31, s0+31       * Add s1 to s0
               a    31&x1, s0+31       * Add w[i-16] to s0
               a    319&x1, s0+31      * Add 9*32+31 = w[i-7] to s0
     * Convert bit sum to 32-bit sum
               mcw  +s0+31, x1         * x1 = right end of s0
               mcw  @032@, x2          * Process 32 bits
               b    sum
               sw   s0                 * Restore wordmark cleared by sum


               mcw  x1tmp, x1
               mcw  s0+31, 543&x1      * Move s0 to w[i]
       
              
               ma   @032@, x1
               a    +1, i
               mz   @0@, i
               b    wloop
     
     x1tmp     dcw  #5
     

     * Initialize: Copy hex h0init-h7init into binary h0-h7
     wloopd    mcw  +h0init-7, x3
               mcw  +h0, x1
               mcw  @064@, tobinc       * 8*8 hex digits
               b    tobin
     
     
     * Initialize a-h from h0-h7
               mcw  @000@, x1
     ilp       mcw  h0+31&x1, a+31&x1
               ma   @032@, x1
               c    x1, @256@
               bu   ilp
     
               mcw  @000@, bitidx      * bitidx = i*32 = bit index
               mcw  @000@, kidx        * kidx = i*8 = key index
                

     * Compute s1 from e        
     mainlp    mcw  +e, x1
               mcw  +s1, x2
               za   +0, 31&x2               * Zero s1
     * Add e rightrotate 6
               sw   6&x2               * Wordmark at bit 6 (from left) of s1
               a    25&x1, 31&x2       * Right shifted: 31-6 = bit 25 of e, 31 = end of s1
               a    31&x1, 5&x2        * Wrapped: 31 = end of e, 6-1 = bit 5 of s1   
               cw   6&x2               * Clear wordmark
     * Add e rightrotate 11
               sw   11&x2              * Wordmark at bit 11 (from left) of s1
               a    20&x1, 31&x2       * Right shifted: 31-11 = bit 20 of e, 31 = end of s1
               a    31&x1, 10&x2       * Wrapped: 31 = end of e, 11-1 = bit 10 of s1   
               cw   11&x2              * Clear wordmark
     * Add e rightrotate 25
               sw   25&x2              * Wordmark at bit 25 (from left) of s1
               a    6&x1, 31&x2        * Right shifted: 31-25 = bit 6 of e, 31 = end of s1
               a    31&x1, 24&x2       * Wrapped: 31 = end of e, 25-1 = bit 24 of s1   
               cw   25&x2              * Clear wordmark
     * Convert sum to xor
               mcw  +s1+31, x1         * x1 = right end of s1
               mcw  @032@, x2          * Process 32 bits
               b    xor
               sw   s1                 * Restore wordmark cleared by xor

     * Compute ch: choose function
               mcw  @000@, x1          * x1 is index from 0 to 31
     chl       c    e&x1, @0@
               be   chzero
               mn   f&x1, ch&x1        * for 1, select f bit
               b    chincr
     chzero    mn   g&x1, ch&x1        * for 0, select g bit
     chincr    a    +1, x1
               mz   @0@, x1
               c    @032@, x1
               bu   chl

     * Compute temp1: k[i] + h + S1 + ch + w[i]
               cs   299
               mcw  +k-7, x3            * Convert k[i] to binary in temp1
               ma   kidx, x3
               mcw  +temp1, x1
               mcw  @008@, tobinc       * 8 hex digits
               b    tobin
               mcw  @237@, x3
               mcw  +temp1, x1
               mcw  @008@, tobinc
               b    tohex
               a    h+31, temp1+31     * +h
               a    s1+31, temp1+31    * +s1
               a    ch+31, temp1+31    * +ch
               mcw  bitidx, x1
               a    warr+31&x1, temp1+31         * + w[i]
     * Convert bit sum to 32-bit sum
               mcw  +temp1+31, x1      * x1 = right end of temp1
               b    sum
  

     * Compute s0 from a
               mcw  +a, x1
               mcw  +s0, x2
               za   +0, 31&x2               * Zero s0
     * Add a rightrotate 2
               sw   2&x2               * Wordmark at bit 2 (from left) of s0
               a    29&x1, 31&x2       * Right shifted: 31-2 = bit 29 of a, 31 = end of s0
               a    31&x1, 1&x2        * Wrapped: 31 = end of a, 2-1 = bit 1 of s0   
               cw   2&x2               * Clear wordmark
     * Add a rightrotate 13
               sw   13&x2              * Wordmark at bit 13 (from left) of s0
               a    18&x1, 31&x2       * Right shifted: 31-13 = bit 18 of a, 31 = end of s0
               a    31&x1, 12&x2       * Wrapped: 31 = end of a, 13-1 = bit 12 of s0   
               cw   13&x2              * Clear wordmark
     * Add a rightrotate 22
               sw   22&x2              * Wordmark at bit 22 (from left) of s0
               a    9&x1, 31&x2        * Right shifted: 31-22 = bit 9 of a, 31 = end of s0
               a    31&x1, 21&x2       * Wrapped: 31 = end of a, 22-1 = bit 21 of s0   
               cw   22&x2              * Clear wordmark
     * Convert sum to xor
               mcw  +s0+31, x1         * x1 = right end of s0
               mcw  @032@, x2          * Process 32 bits
               b    xor
               sw   s0                 * Restore wordmark cleared by xor

     * Compute maj(a, b, c): majority function
               za   +0, maj+31
               a    a+31, maj+31
               a    b+31, maj+31
               a    c+31, maj+31
               mz   @0@, maj+31
               mcw  @000@, x1          * x1 is index from 0 to 31
     mjl       c    maj&x1, @2@
               bh   mjzero
               mn   @1@, maj&x1       * majority of the 3 bits is 1
               b    mjincr
     mjzero    mn   @0@, maj&x1       * majority of the 3 bits is 0
     mjincr    a    +1, x1
               mz   @0@, x1
               c    @032@, x1
               bu   mjl

     * Compute temp2: S0 + maj
               za   +0, temp2+31
               a    s0+31, temp2+31
               a    maj+31, temp2+31
     * Convert bit sum to 32-bit sum
               mcw  +temp2+31, x1      * x1 = right end of temp1
               b    sum
     
               mcw  g+31, h+31         * h := g
               mcw  f+31, g+31         * g := f
               mcw  e+31, f+31         * f := e
               za   +0, e+31           * e := d + temp1
               a    d+31, e+31
               a    temp1+31, e+31
               mcw  +e+31, x1          * Convert sum to 32-bit sum
               b    sum
               mcw  c+31, d+31         * d := c
               mcw  b+31, c+31         * c := b
               mcw  a+31, b+31         * b := a
               za   +0, a+31           * a := temp1 + temp2
               a    temp1+31, a+31
               a    temp2+31, a+31
               mcw  +a+31, x1          * Convert sum to 32-bit sum
               b    sum

               a    @8@, kidx          * Increment kidx by 8 chars
               mz   @0@, kidx
               ma   @032@, bitidx      * Increment bitidx by 32 bits
               c    @!48@, bitidx      * Compare to 2048
               bu   mainlp

     * Add a-h to h0-h7
               cs   299
               mcw  @00000@, x1tmp  
     add1      mcw  x1tmp, x1
               a    a+31&x1, h0+31&x1
               ma   +h0+31, x1          * Convert sum to 32-bit sum
               b    sum     
               ma   @032@, x1tmp
               c    @00256@, x1tmp
               bu   add1
               mcw  @201@, x3
               mcw  +h0, x1
               mcw  @064@, tobinc
               b    tohex
               w
               mcw  280, 180
               p
               p

     finis     h
               b    finis

      
     * Converts sum of bits to xor
     * X1 is right end of word
     * X2 is bit count    
     * Note: clears word marks
     xor       sbr  xorx&3
     xorl      c    @000@, x2
               be   xorx
     xorfix    mz   @0@, 0&x1          * Clear zone
               c    0&x1, @2@
               bh   xorok
               sw   0&x1               * Subtract 2 and loop
               s    +2, 0&x1
               cw   0&x1
               b    xorfix
     xorok     ma   @I9I@, x1         * x1 -= 1
               s    +1, x2             * x2 -= 1
               mz   @0@, x2
               b    xorl               * loop
     
     xorx      b    @000@
     
     * Converts sum of bits to sum (i.e. propagate carries if digit > 1)
     * X1 is right end of word
     * Ends at word mark
     sum       sbr  sumx&3
     suml      mz   @0@, 0&x1          * Clear zone
               c    0&x1, @2@          * If digit is <2, then ok
               bh   sumok
               s    +2, 0&x1           * Subtract 2 from digit
               bwz  suml, 0&x1, 1      * Skip carry if at wordmark
               a    @1@, 15999&x1      * Add 1 to previous position
               b    suml               * Loop
     sumok     bwz  sumx,0&x1,1        * Quit if at wordmark
               ma   @I9I@, x1          * x1 -= 1
               b    suml               * loop
     sumx      b    @000@              * return
     
     * Converts binary to string of hex digits
     * X1 points to start (left) of binary
     * X3 points to start (left) of hex buffer
     * X1, X2, X3 destroyed
     * tobinc holds count (# of hex digits)
     tohex     sbr  tohexx&3
     tohexl    c    @000@, tobinc      * check counter
               be   tohexx
               s    @1@, tobinc        * decrement counter
               mz   @0@, tobinc
               b    tohex4
               mcw  hexchr, 0&x3
               ma   @004@, X1
               ma   @001@, X3
               b    tohexl             * loop
     tohexx    b    @000@ 


     * X1 points to 4 bits
     * Convert to hex char and write into hexchr
     * X2 destroyed

     tohex4    sbr  tohx4x&3
               mcw  @000@, x2
               c    3&X1, @1@
               bu   tohx1
               a    +1, x2
     tohx1     c    2&X1, @1@
               bu   tohx2
               a    +2, x2
     tohx2     c    1&x1, @1@
               bu   tohx4
               a    +4, x2
     tohx4     c    0&x1, @1@
               bu   tohx8
               a    +8, x2
     tohx8     mz   @0@, x2
               mcw  hextab-15&x2, hexchr
     tohx4x    b    @000@
     
     * Converts string of hex digits to binary
     * X3 points to start (left) of hex digits
     * X1 points to start (left) of binary digits
     * tobinc holds count (# of hex digits)
     * X1, X3 destroyed
     tobin     sbr  tobinx&3
     tobinl    c    @000@, tobinc      * check counter
               be   tobinx
               s    @1@, tobinc        * decrement counter
               mz   @0@, tobinc
               mcw  0&X3, hexchr
               b    tobin4             * convert 1 char
               ma   @004@, X1
               ma   @001@, X3
               b    tobinl             * loop
     tobinx    b    @000@
               
     
     tobinc    dcw  @000@
     * Convert hex digit to binary
     * Digit in hexchr (destroyed)
     * Bits written to x1, ..., x1+3
     tobin4    sbr  tobn4x&3
               mcw  @0000@, 3+x1   * Start with zero bits
               bwz  norm,hexchr,2  * Branch if no zone
              
               mcw  @1@, 0&X1
               a    @1@, hexchr    * Convert letter to value: A (1) -> 2, F (6) -> 7
               mz   @0@, hexchr
               b    tob4
     norm      c    @8@, hexchr
               bl   tob4
               mcw  @1@, 0&X1
               s    @8@, hexchr
               mz   @0@, hexchr
     tob4      c    @4@, hexchr
               bl   tob2
               mcw  @1@, 1&X1
               s    @4@, hexchr
               mz   @0@, hexchr
     tob2      c    @2@, hexchr
               bl   tob1
               mcw  @1@, 2&X1
               s    @2@, hexchr
               mz   @0@, hexchr
     tob1      c    @1@, hexchr
               bl   tobn4x
               mcw  @1@, 3&X1
     tobn4x    b    @000@          


     * Message schedule array is 64 entries of 32 bits = 2048 bits.
               org  3000
     warr      equ  3000
     
     s0        equ  warr+2047                *32 bits
     s1        equ  s0+32 
     ch        equ  s1+32              *32 bits

     temp1     equ  ch+32               *32 bits
     
     temp2     equ  temp1+32                *32 bits
     
     maj       equ  temp2+32                *32 bits
     
     a         equ  maj+32
     b         equ  a+32
     c         equ  b+32
     d         equ  c+32
     e         equ  d+32
     f         equ  e+32
     g         equ  f+32
     h         equ  g+32
     h0        equ  h+32
     h1        equ  h0+32
     h2        equ  h1+32
     h3        equ  h2+32
     h4        equ  h3+32
     h5        equ  h4+32
     h6        equ  h5+32
     h7        equ  h6+32
               org  h7+32
 
     hexchr    dcw  @0@
     hextab    dcw  @0123456789abcdef@    
     i         dcw  @00@               * Loop counter for w computation
     bitidx    dcw  #3
     kidx      dcw  #3         
     
     * 64 round constants for SHA-256
     k         dcw  @428a2f98@
               dcw  @71374491@
               dcw  @b5c0fbcf@
               dcw  @e9b5dba5@
               dcw  @3956c25b@
               dcw  @59f111f1@
               dcw  @923f82a4@
               dcw  @ab1c5ed5@
               dcw  @d807aa98@
               dcw  @12835b01@
               dcw  @243185be@
               dcw  @550c7dc3@
               dcw  @72be5d74@
               dcw  @80deb1fe@
               dcw  @9bdc06a7@
               dcw  @c19bf174@
               dcw  @e49b69c1@
               dcw  @efbe4786@
               dcw  @0fc19dc6@
               dcw  @240ca1cc@
               dcw  @2de92c6f@
               dcw  @4a7484aa@
               dcw  @5cb0a9dc@
               dcw  @76f988da@
               dcw  @983e5152@
               dcw  @a831c66d@
               dcw  @b00327c8@
               dcw  @bf597fc7@
               dcw  @c6e00bf3@
               dcw  @d5a79147@
               dcw  @06ca6351@
               dcw  @14292967@
               dcw  @27b70a85@
               dcw  @2e1b2138@
               dcw  @4d2c6dfc@
               dcw  @53380d13@
               dcw  @650a7354@
               dcw  @766a0abb@
               dcw  @81c2c92e@
               dcw  @92722c85@
               dcw  @a2bfe8a1@
               dcw  @a81a664b@
               dcw  @c24b8b70@
               dcw  @c76c51a3@
               dcw  @d192e819@
               dcw  @d6990624@
               dcw  @f40e3585@
               dcw  @106aa070@
               dcw  @19a4c116@
               dcw  @1e376c08@
               dcw  @2748774c@
               dcw  @34b0bcb5@
               dcw  @391c0cb3@
               dcw  @4ed8aa4a@
               dcw  @5b9cca4f@
               dcw  @682e6ff3@
               dcw  @748f82ee@
               dcw  @78a5636f@
               dcw  @84c87814@
               dcw  @8cc70208@
               dcw  @90befffa@
               dcw  @a4506ceb@
               dcw  @bef9a3f7@
               dcw  @c67178f2@
     * 8 initial hash values for SHA-256
     h0init    dcw  @6a09e667@
     h1init    dcw  @bb67ae85@
     h2init    dcw  @3c6ef372@
     h3init    dcw  @a54ff53a@
     h4init    dcw  @510e527f@
     h5init    dcw  @9b05688c@
     h6init    dcw  @1f83d9ab@
     h7init    dcw  @5be0cd19@


     input0    equ  h7init+64
               org  h7init+65

               dc   @80000000000000000000000000000000@
     input     dc   @00000000000000000000000000000100@      * 512 bits with the mostly-zero padding

               end  start

I punched the executable onto a deck of about 85 cards, which you can see at the beginning of the article. I also punched a card with the input to the hash algorithm. To run the program, I loaded the card deck into the card reader and hit the "Load" button. The cards flew through the reader at 800 cards per minute, so it took just a few seconds to load the program. The computer's console (below) flashed frantically for 40 seconds while the program ran. Finally, the printer printed out the resulting hash (as you can see at the top of the article) and the results were punched onto a new card. Since Bitcoin mining used double SHA-256 hashing, hashing for mining would take twice as long (80 seconds).

The console of the IBM 1401 shows a lot of activity while computing a SHA-256 hash.

Performance comparison

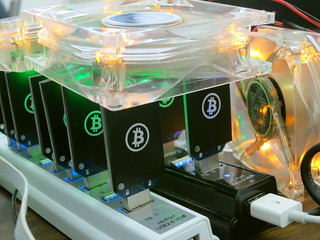
The IBM 1401 can compute a double SHA-256 hash in 80 seconds. It requires about 3000 Watts of power, roughly the same as an oven or clothes dryer. A basic IBM 1401 system sold for $125,600, which is about a million dollars in 2015 dollars. On the other hand, today you can spend $50 and get a USB stick miner with a custom ASIC integrated circuit. This USB miner performs 3.6 billion hashes per second and uses about 4 watts. The enormous difference in performance is due to several factors: the huge increase in computer speed in the last 50 years thanks to Moore's law, the performance lost by using a decimal business computer for a binary-based hash, and the giant speed gain from custom Bitcoin mining hardware.

To summarize, to mine a block at current difficulty, the IBM 1401 would take about 5x10^14 years (about 40,000 times the current age of the universe). The electricity would cost about 10^18 dollars. And you'd get 25 bitcoins worth about $6000. Obviously, mining Bitcoin on an IBM 1401 mainframe is not a profitable venture. The photos below compare the computer circuits of the 1960s with the circuits of today, making it clear how much technology has advanced.

Cards inside an IBM 1401 mainframe.The Bitfury ASIC chip for mining Bitcoins does 2-3 Ghash/second. Image from http://zeptobars.ru/en/read/bitfury-bitcoin-mining-chip (CC BY 3.0 license)

On the left, SMS cards inside the IBM 1401. Each card has a handful of components and implements a circuit such as a gate. The computer contains more than a thousand of these cards. On the right, the Bitfury ASIC chip for mining Bitcoins does 2-3 Ghash/second. Image from zeptobars (CC BY 3.0 license)

Networking

You might think that Bitcoin would be impossible with 1960s technology due to the lack of networking. Would one need to mail punch cards with the blockchain to the other computers? While you might think of networked computers as a modern thing, IBM supported what they call teleprocessing as early as 1941. In the 1960s, the IBM 1401 could be hooked up to the IBM 1009 Data Transmission Unit, a modem the size of a dishwasher that could transfer up to 300 characters per second over a phone line to another computer. So it would be possible to build a Bitcoin network with 1960s-era technology. Unfortunately I didn't have teleprocessing hardware available to test this out.

IBM 1009 Data Transmission Unit

IBM 1009 Data Transmission Unit. This dishwasher-sized modem was introduced in 1960 and can transmit up to 300 characters per second over phone lines. Photo from Introduction to IBM Data Processing Systems.

Conclusion

Implementing SHA-256 in assembly language for an obsolete mainframe was a challenging but interesting project. Performance was worse than I expected (even compared to my 12 minute Mandelbrot). The decimal arithmetic of a business computer is a very poor match for a binary-optimized algorithm like SHA-256. But even a computer that predates integrated circuits can implement the Bitcoin mining algorithm. And, if I ever find myself back in 1960 due to some strange time warp, now I know how to set up a Bitcoin network.

The Computer History Museum in Mountain View runs demonstrations of the IBM 1401 on Wednesdays and Saturdays so if you're in the area you should definitely check it out (schedule). Tell the guys running the demo that you heard about it from me and maybe they'll run my Pi program for you. Thanks to the Computer History Museum and the members of the 1401 restoration team, Robert Garner, Ed Thelen, Van Snyder, and especially Stan Paddock. The 1401 team's website (ibm-1401.info) has a ton of interesting information about the 1401 and its restoration.

Disclaimers

I would like to be clear that I am not actually mining real Bitcoin on the IBM 1401—the Computer History Museum would probably disapprove of that. As I showed above, there's no way you could make money off mining on the IBM 1401. I did, however, really implement and run the SHA-256 algorithm on the IBM 1401, showing that mining is possible in theory. And if you're wondering how I found a successful hash, I simply used a block that had already been mined: block #286819.

9 Hacker News comments I'm tired of seeing

$
0
0
As a long-time reader of Hacker News, I keep seeing some comments they don't really contribute to the conversation. Since the discussions are one of the most interesting parts of the site I offer my suggestions for improving quality.
  • Correlation is not causation: the few readers who don't know this already won't benefit from mentioning it. If there's some specific reason you think a a study is wrong, describe it.
  • "If you're not paying for it, you're the product" - That was insightful the first time, but doesn't need to be posted about every free website.
  • Explaining a company's actions by "the legal duty to maximize shareholder value" - Since this can be used to explain any action by a company, it explains nothing. Not to mention the validity of the statement is controversial.
  • [citation needed] - This isn't Wikipedia, so skip the passive-aggressive comments. If you think something's wrong, explain why.
  • Premature optimization - labeling every optimization with this vaguely Freudian phrase doesn't make you the next Knuth. Calling every abstraction a leaky abstraction isn't useful either.
  • Dunning-Kruger effect - an overused explanation and criticism.
  • Betteridge's law of headlines - this comment doesn't need to appear every time a title ends in a question mark.
  • A link to a logical fallacy, such as ad hominem or more pretentiously tu quoque - this isn't a debate team and you don't score points for this.
  • "Cue the ...", "FTFY", "This.", "+1", "Sigh", "Meh", and other generic internet comments are just annoying.
My readers had a bunch of good suggestions. Here are a few:
  • The plural of anecdote is not data
  • Cargo cult
  • Comments starting with "No.""Wrong." or "False."
  • Just use bootstrap / heroku / nodejs / Haskell / Arduino.
  • "How [or Why] did this make the front page of HN?" followed by http://ycombinator.com/newsguidelines.html
In general if a comment could fit on a bumper sticker or is simply a link to a Wikipedia page or is almost a Hacker News meme, it's probably not useful.

What comments bother you the most?

Check out the long discussion at Hacker News. Thanks for visiting, HN readers!

Amusing note: when I saw the comments below, I almost started deleting them thinking "These are the stupidest comments I've seen in a long time". Then I realized I'd asked for them :-)

Edit: since this is getting a lot of attention, I'll add my "big theory" of Internet discussions.

There are three basic types of online participants: "watercooler", "scientific conference", and "debate team". In "watercooler", the participants are having an entertaining conversation and sharing anecdotes. In "scientific conference", the participants are trying to increase knowledge and solve problems. In "debate team", the participants are trying to prove their point is right.

HN was originally largely in the "scientific conference" mode, with very smart people discussing areas in which they were experts. Now HN has much more "watercooler" flavor, with smart people chatting about random things they often know little about. And certain subjects (e.g. economics, Apple, sexism, piracy) bring out the "debate team" commenters. Any of the three types can carry on happily by themself. However, much of the problem comes when the types of conversation mix. The "watercooler" conversations will annoy the "scientific conference" readers, since half of what they say is wrong. Conversely, the "scientific conference" commenters come across as pedantic when they interrupt a fun conversation with facts and corrections. A conversation between "debate team" and one of the other groups obviously goes nowhere.

Reverse-engineering the Z-80: the silicon for two interesting gates explained

$
0
0
I've been reverse-engineering the Z-80 processor, using images from the Visual 6502 team. One interesting thing about the Z-80's silicon is it uses complex gates with multiple inputs and multiple levels of logic. It also implements an XOR gate with an unusual pass-transistor circuit. I thought it would be interesting to examine these gates at the silicon level and show how they work.

The image above shows the overall organization of the Z-80 chip. I'm going to zoom way in on the ALU and look at the silicon that implements one of the complex gates there: a 5-input, three-level gate. I'll walk through this gate and show how it works at the silicon level. While the silicon look like a jumble of lines, its operation is actually straightforward if you step through it.

Let's begin with an (oversimplified) description of how the chip is constructed. The chip starts with the silicon wafer. Regions are diffused with an element such as boron, yielding conductive diffusion regions. A layer of polysilicon strips is put on top. Finally, a layer of metal "wires" above the polysilicon provides more connections. For our purposes, diffusion regions, polysilicon, and metal can all be consider conductors.

In the image below, the bright vertical bands are metal wires. The slightly darker horizontal bands are polysilicon; the borders are more visible than the regions themselves. In this part of the Z-80, the polysilicon connections run mostly horizontally, and the metal wires run vertically. The large irregular regions outlined in black are doped silicon diffusion regions. The circles are vias between different layers.

Transistors are formed where a polysilicon line crosses a diffusion region. You might expect transistors to be very visible in the image, but a polysilicon line looks the same whether its a conductor or a transistor. So transistors just appear as long skinny regions in the image. The diagram below shows the physical structure of a transistor: the source and drain are connected if the gate is positive.

Structure of an NMOS transistor

Let's dive in and see how this circuit works. There's a lot going on, but the image below has been colored to make it clearer. Only three of the vertical metal lines are relevant. On the left, the yellow metal line ties together parts of the gate. In the middle is the blue ground line, which is critical to the operation of the gate. At the right, the red positive voltage line is used to pull the output high through a resistor. The large diffusion region has been tinted cyan. This region can be thought of as big conductive areas interrupted by transistors. There are 5 pinkish polysilicon input wires, labeled A, B, C, D, E. When they cross the diffusion region they still act as wires, but also form a transistor below in the diffusion region. For instance, input A is connected to two transistors.

With all the pieces labeled, we can figure out the operation of the circuit. If input A is high, the first transistor will conduct and connect the yellow strip to ground (dotted line 1). Likewise, if input B is high, the second transistor will conduct and ground the yellow strip (dotted line 2). C will ground the yellow strip via 3. So the yellow strip will be grounded for A or B or C. This forms a three-input OR gate.

If input D is high, transistor 4 will connect the yellow strip to the output. Likewise, if input E is high, transistor 5 will connect the yellow strip to the output. Thus, the output will be grounded if (A or B or C) and (D or E).

In the upper right, arrow 6/7/8 will ground the output if A and B and C are high and the three associated transistors (6, 7, 8) conduct. This computes A and B and C.

Putting this all together, the output will be grounded if [(A or B or C) and (D or E)] or [A and B and C]. If the output is not grounded, the resistor (actually a depletion transistor) will pull the output high. Thus, the final output is not [(A or B or C) and (D or E)] or [A and B and C].

The diagram below shows the gate logic implemented by this circuit. This rather complex gate is created from just nine transistors. Note that the final AND and NOR gates are "for free" - they are formed by wiring together previous outputs and don't require additional transistors. Another point of interest is that with NMOS, the output will be high unless something pulls it low, which explains why circuits are based on NAND and NOR gates rather than AND and OR gates.

If you want to see more low-level silicon analysis, see my article on the overflow circuit in the 6502 at the silicon level.

What does this gate do?

This gate is a key part of one bit of the Z-80's ALU. The gate generates the (inverted) sum, AND, OR, or XOR of B and C depending on the inputs. Specifically, B and C are the two operand inputs, and A is the carry in. D is a control input and E is an inverted intermediate carry from B plus C plus carry_in. By controlling D and overriding A and E, the operation is selected.

The Z-80's interesting XOR gate

The Z-80 uses an unusual circuit for its XOR gate. XOR is an inconvenient function to implement since it has a worst-case Karnaugh map, making it expensive to implement from simple gates. Instead, the Z-80 uses a combination of inverters and pass transistors, different from regular NMOS logic.

As before, the diagram below shows the power and ground metal lines, a connecting metal line in yellow, the polysilicon in pink, the polysilicon transistor gates in green, and diffusion in cyan. The two inputs are A and B.

Starting with input A: if it is high, transistor 1 will connect A' to ground. Otherwise the pullup resistor (way on the left), will pull A' high. (Note that A' is the whole diffusion region between transistor 1 and transistor 3 up to the resistor.) Thus transistor 1 forms a simple inverter with inverted output A'. Likewise, transistor 2 inverts input B to give inverted B' (in the whole diffusion region between transistors 2 and 4).

Now comes the tricky part. If A' is high, pass transistor 4 will connect B' to the yellow metal. If B' is high, pass transistor 3 will connect A' to the yellow metal. The third pullup resistor will pull the yellow metal high unless something ties it to ground . Working through the combinations, if A' and B' are both high, both A' and B' are connected to the yellow metal, which gets pulled high. If A' is high and B' is low, B' is connected to the yellow metal, pulling it low. Likewise, if A' is low and B' is high, A' pulls the yellow metal low. Finally if A' and B' are low, nothing gets connected to the yellow metal, so the resistor pulls it high.

To summarize, the yellow metal is pulled high if A' and B' are both high or both low. That is, it is the exclusive-nor of A' and B', which is also the exclusive-or of A and B.

Finally, the xnor value controls transistors 5a and 5b which form an inverter. If xnor is high, transistors 5a and 5b conduct and the xor output is connected to ground, and if xnor is low, the pullup resistors pull the xor output high. One unusual feature here is the parallel transistors 5a and 5b with separate pullup resistors. I haven't seen this in the 8085 or 6502; they use a single larger transistor instead of parallel transistors.

The schematic below summarizes the circuit. In case you're wondering, this XOR gate is used to compute the parity flag. All the bits are XORed together to generate the parity flag.

Comparison to other processors

From what I've seen so far, the Z-80 uses considerably more complex gates than the 8085 and the 6502. The 6502 uses mostly simple NAND/NOR gates and only a few two-level gates, not as complex as on the Z-80. The 8085 uses more complex gates, but still less than the Z-80. I don't know if the difference is due to technical limits on the number of gate levels, or the preferences of the designers.

The XOR circuit in the Z-80 is different from the 8085 and 6502. I'm not sure it saves any transistors, but it is unusual. I've seen other pass-transistorimplementations of XOR, but none like the Z-80.

Credits: The Visual 6502 team especially Chris Smith, Ed Spittles, Pavel Zima, Phil Mainwaring, and Julien Oster.

Intel x86 documentation has more pages than the 6502 has transistors

$
0
0
Microprocessors have become immensely more complex thanks to Moore's Law, but one thing that has been lost is the ability to fully understand them. The 6502 microprocessor was simple enough that its instruction set could almost be memorized. But now processors are so complex that understanding their architecture and instruction set even at a superficial level is a huge task. I've been reverse-engineering parts of the 6502, and with some work you can understand the role of each transistor in the 6502. After studying the x86 instruction set, I started wondering which was bigger: the number of transistors in the 6502 or the number of pages of documentation for the x86.

It turns out that Intel's Intel® 64 and IA-32 Architectures Software Developer Manuals (2011) have 4181 pages in total, while the 6502 has 3510 transistors. There are actually more pages of documentation for the x86 than the number of individual transistors in the 6502.

The above photo shows Intel's IA-32 software developer's manuals from 2004 on top of the 6502 chip's schematic. Since then the manuals have expanded to 7 volumes.

The 6502 has 3510 transistors, or 4528, or 6630, or maybe 9000?

As a slight tangent, it's actually hard to define the transistor count of a chip. The 6502 is usually reported as having 3510 transistors. This comes from the Visual 6502 team, which dissolved a 6502 chip in acid, photographed the die (below), traced every transistor in the image, and built a transistor-level simulator that runs 6502 code (which you really should try). Their number is 3510transistors.

The 6502 processor chip

One complication is the 6502 is built with NMOS logic which builds gates out of active "enhancement" transistors as well as pull-up "depletion" transistors which basically act as resistors. The count of 3510 is just the enhancement transistors. If you include the 2102 1018 depletion transistors, the total transistor count is 5612 4528.

A second complication is that when manufacturers report the transistor count of chips, they often report "potential" transistors. Chips that include a ROM or PLA will have different numbers of transistors depending on the values stored in the ROM. Since marketing doesn't want to publish different transistor numbers depending on the number of 1 bits and 0 bits programmed into the chip, they often count ROM or PLA sites: places that could have transistors, but might not. By my count, the 6502 decode PLA has 21×131=2751 PLA sites, of which 649 actually have transistors. Adding these 2102 "potential" transistors yields a count of 6630 transistors.

Finally, some sources such as Microsoft Encarta and A History of the Personal Computer state the 6502 contains 9000 transistors, but I don't know how they could have come up with that value.

(The number of pages of Intel documentation is also not constant; the latest 2013 Software Developer Manuals have shrunk to 3251 pages.)

Thus, the x86 has more pages of documentation than the 6502 has transistors, but it depends how you count.

The Z-80 has a 4-bit ALU. Here's how it works.

$
0
0
The 8-bit Z-80 processor is famed for use in many early personal computers such the Osborne 1, TRS-80, and Sinclair ZX Spectrum, and it is still used in embedded systems and TIgraphingcalculators. I had always assumed that the ALU (arithmetic-logic unit) in the Z-80 was 8 bits wide, like just about every other 8-bit processor. But while reverse-engineering the Z-80, I was shocked to discover the ALU is only 4 bits wide! The founders of Zilog mentioned the 4-bit ALU in a very interesting discussion at the Computer History Museum, so it's not exactly a secret, but it's not well-known either.

I have been reverse-engineering the Z-80 processor using images from the Visual 6502 team. The image below shows the overall structure of the Z-80 chip and the location of the ALU. The remainder of this article dives into the details of the ALU: its architecture, how it works, and exactly how it is implemented.

I've created the following block diagram to give an overview of the structure of the Z-80's ALU. Unlike Z-80 block diagrams published elsewhere, this block diagram is based on the actual silicon. The ALU consists of 4 single-bit units that are stacked to form a 4-bit ALU. At the left of the diagram, the register bus provides the ALU's connection to the register file and the rest of the CPU.

The operation of the ALU starts by loading two 8-bit operands from registers into internal latches. The ALU does a computation on the low 4 bits of the operands and stores the result internally in latches. Next the ALU processes the high 4 bits of the operands. Finally, the ALU writes the 8 bits of result (the 4 low bits from the latch, and the 4 high bits just computed) back to the registers. Thus, by doing two computation cycles, the ALU is able to process a full 8 bits of data. ("Full 8 bits" may not sound like much if you're reading this on a 64-bit processor, but it was plenty at the time.)

As the block diagram shows, the ALU has two internal 4-bit buses connected to the 8-bit register bus: the low bus provides access to bits 0, 1, 2, and 3 of registers, while the high bus provides access to bits 4, 5, 6, and 7. The ALU uses latches to store the operands until it can use them. The op1 latches hold the first operand, and the op2 latches hold the second operand. Each operand has 4 bits of low latch and 4 bits of high latch, to store 8 bits.

Multiplexers select which data is used for the computation. The op1 latches are connected to a multiplexer that selects either the low or high four bits. The op2 latches are connected to a multiplexer that selects either the low or high four bits, as well as selecting either the value or the inverted value. The inverted value is used for subtraction, negation, and comparison.

The two operands go to the "alu core", which performs the desired operation: addition, logical AND, logical OR, or logical XOR. The ALU first performs one computation on the low bits, storing the 4-bit result into the result low latch. The ALU then performs a second computation on the high bits, writing the latched low result and the freshly-computed high bits back to the bus. The carry from the first computation is used in the second computation if needed.

The Z-80 provides extensive bit-addressed operations, allowing a single bit in a byte to be set, reset, or tested. In a bit-addressed operation, bits 5, 4, and 3 of the instruction select which of the 8 bits to use. On the far right of the ALU block diagram is the bit select circuit that support these operations. In this circuit, simple logic gates select one of eight bits based on the instruction. The 8-bit result is written to the ALU bus, where it is used for the bit-addressed operation. Thus, decoding this part of an instruction happens right at the ALU, rather than in the regular instruction decode logic.

The Z-80's shift circuitry is interesting. The 6502 and 8085 have an additional ALU operation for shift right, and perform shift left by adding the number to itself. The Z-80 in comparison performs a shift while loading a value into the ALU. While the Z-80 reads a value from the register bus, the shift circuit selects which lines from the register bus to use. The circuit loads the value unchanged, shifted left one bit, or shifted right one bit. Values shifted in to bit 0 and 7 are handled separately, since they depend on the specific instruction.

The block diagram also shows a path from the low bus to the high op2 latch, and from the high bus to the low op1 latch. These are for the 4-bit BCD shifts RRD and RLD, which rotate a 4-bit digit in the accumulator with two digits in memory.

Not shown in the block diagram are the simple circuits to compute parity, test for zero, and check if a 4-bit value is less than 10. These values are used to set the condition flags.

The silicon that implements the ALU

The image above zooms in on the ALU region of the Z-80 chip. The four horizontal "slices" are visible. The organization of each slice approximately matches the block diagram. The register bus is visible on the left, running vertically with the shifter inputs sticking out from the ALU like "fingers" to obtain the desired bits. The data bus is visible on the right, also running vertically. The horizontal ALU low and ALU high lines are visible at the top and bottom of each slice. The yellow arrows show the locations of some ALU components in one of the slices, but the individual circuits of the ALU are not distinguishable at this scale. In a separate article, I zoom in to some individual gates in the ALU and show how they work: Reverse-engineering the Z-80: the silicon for two interesting gates explained.

The ALU's core computation circuit

The silicon that implements one bit of ALU processing

The heart of each bit of the ALU is a circuit that computes the sum, AND, OR, or XOR for two one-bit operands. Zooming in shows the silicon that implements this circuit; at this scale the transistors and connections that make up the gates are visible. Power, ground, and the control lines are the vertical metal stripes. The shiny horizontal bands are polysilicon "wires" which form the connections in the circuit as well as the transistors. I know this looks like mysterious gray lines, but by examining it methodically, you can figure out the underlying circuit. (For details on how to figure out the logic from this silicon, see my article on the Z-80's gates.) The circuit is shown in the schematic below.

The Z-80 ALU circuit that computes one bit

This circuit takes two operands (op1 and op2), and a carry in. It performs an operation (selected by control lines R, S, and V) and generates an internal carry, a carry-out, and the result.

ALU computation logic in detail

The first step is the "carry computation", which is done by one big multi-level gate. It takes the two operand bits (op1 and op2) and the carry in, and computes the (complemented) internal carry that results from adding op1 plus op2 plus carry-in. There are just two ways this sum can cause a carry: if op1 and op2 are both 1 (bottom AND gate); or if there's a carry-in and at least one of the operands is a 1 (top gates). These two possibilities are combined in the NOR gate to yield the (complemented) internal carry. The internal carry is inverted by the NOR gate at the bottom to yield the carry out, which is the carry in for the next bit. There are a couple control lines that complicate carry generation slightly. If S is 1, the internal carry will be forced to 0. If R is 1, the carry out will be forced to 0 (and thus the carry in for the next bit).

The multi-level result computation gate is interesting as it computes the SUM, XOR, AND or OR. It takes some work to step through the different cases, but if anyone wants the details:

  • SUM: If R is 0, S is 0, and V is 0, then the circuit generates the 1's bit of op1 plus op2 plus carry-in, i.e. op1 xor op2 xor carry-in. To see this, the output is 1 if all three of op1, op2, and carry-in are set, or if at least one is set and there's no internal carry (i.e. exactly one is set).
  • XOR: If R is 1, S is 0, and V is 0, then the circuit generates op1 xor op2 To see this, note that this is like the previous case except carry-in is 0 because of R.
  • AND: If R is 0, S is 1, and V is 0, then the circuit generates op1 and op2. To see this, first note the internal carry is forced to 0, so the lower AND gate can never be active. The carry-in is forced to 1, so the result is generated by the upper AND gate.
  • OR: If R is 1, S is 1, and V is 1, then the circuit generates op1 or op2. The internal carry is forced to 0 by S and the the carry-out (carry-in) is forced to 0 by R. Thus, the top AND gate is disabled, and the 3-input OR gate controls the result.

Believe it or not, this is conceptually a lot simpler than the 8085's ALU, which I described in detail earlier. It's harder to understand, though, then the 6502's ALU, which uses simple gates to compute the AND, OR, SUM, and XOR in parallel, and then selects the desired result with pass transistors.

Conclusion

The Z-80's ALU is significantly different from the 6502 or 8085's ALU. The biggest difference is the 6502 and 8085 use 8-bit ALUs, while the Z-80 uses a 4-bit ALU. The Z-80 supports bit-addressed operations, which the 6502 and 8085 do not. The Z-80's BCD support is more advanced than the 8085's decimal adjust, since the Z-80 handles addition and subtraction, while the 8085 only handles addition. But the 6502 has more advanced BCD support with a decimal mode flag and fast, patented BCD logic.

If you've designed an ALU as part of a college class, it's interesting to compare an "academic"ALU with the highly-optimized ALU used in a real chip. It's interesting to see the short-cuts and tradeoffs that real chips use.

I've created a more detailed schematic of the Z-80 ALU that expands on the block diagram and the core schematic above and shows the gates and transistors that make up the ALU.

I hope this exploration into the Z-80 has convinced you that even with a 4-bit ALU, the Z-80 could still do 8-bit operations. You didn't get ripped off on your old TRS-80.

Credits: This couldn't have been done without the Visual 6502 team especially Chris Smith, Ed Spittles, Pavel Zima, Phil Mainwaring, and Julien Oster.

The Z-80's 16-bit increment/decrement circuit reverse engineered

$
0
0
The 8-bit Z-80 processor was very popular in the late 1970s and early 1980s, powering many personal computers such as the Osborne 1, TRS-80, and Sinclair ZX Spectrum. It has a 16-bit incrementer/decrementer that efficiently updates the program counter and stack pointer, as well as supporting several 16-bit instructions and memory refresh. By reverse engineering detailed die photographs of the Z-80, we can see exactly how this increment/decrement circuit works and discover the interesting optimizations it uses for efficiency.

The Z-80 microprocessor die, showing the main components of the chip.

The Z-80 microprocessor die, showing the main components of the chip.

The increment/decrement circuit in the lower left corner of the chip photograph above. This circuit takes up a significant amount of space on the chip, illustrating its complexity. It is located close to the register file, allowing it to access the registers directly.

The fundamental use for an incrementer is to step the program counter from instruction to instruction as the program executes. Since this happens at least once for every instruction, a fast incrementer is critical to the performance of the chip. For this reason, the incrementer/decrementer is positioned close to the address pins (along the left and bottom of the photograph above). A second key use is to decrement the stack pointer as data is pushed to the stack, and increment the stack pointer as data is popped from the stack. (This may seem backwards, but the stack grows downwards so it is decremented as data is pushed to the stack.)

The incrementer/decrementer in the Z-80 is also used for a variety of other instructions. For example, the INC and DEC instructions allow 16-bit register pairs to be incremented and decremented. The Z-80 includes powerful block copy and compare instructions (LDIR, LDDR, CPIR, CPDR) that can process up to 64K bytes with a single instruction. These instructions use the 16-bit BC register pair as a loop counter, and the decrementer updates this register pair to count the iterations.

One of the innovative features of the Z-80 is that it includes a DRAM refresh feature. Because Dynamic RAM (DRAM) stores data in capacitors instead of flip flops, the data will drain away if not accessed and refreshed every few milliseconds. Early microcomputer memory boards required special refresh hardware to periodically step through the address space and refresh memory. The incrementer is used to update the address in the refresh register R on each instruction. (Current systems still require memory refresh, but it is handled by the DDR memory modules and memory controller).

Architecture

The architecture diagram below provides a simplified view of how the incrementer/decrementer works with the rest of the Z-80. The incrementer is closely associated with the 16-bit address bus. The data bus, on the other hand, is only 8 bits wide. Many of the registers are 8 bits, but can be paired together as 16-bit registers (BC, DE, HL).

A 16-bit latch feeds into the incrementer. This is needed since if a value were read from the PC, incremented, and written back to the PC at the same time a loop would occur. By latching the value, the read and write are done in separate cycles, avoiding instability. On the chip, the latch is between the incrementer and the register file.

The program counter and refresh register are separated from the rest of the registers and coupled closely to the incrementer. This allows the incrementer to be used in parallel with the rest of the Z-80. In particular, for each instruction fetch, the program counter (PC) is written to the address bus and incremented. Then the refresh address is written to the address bus for the refresh cycle, and the R register is incremented. (Note that the interrupt vector register I is in the same register pair as the R register. This explains why the I value is also written to the address bus during refresh.)

This diagram shows how the incrementer/decrementer is used in the Z-80 microprocessor.

This diagram shows how the incrementer/decrementer is used in the Z-80 microprocessor.

One of the interesting features of the Z-80 is a limited form of pipelining: fetch/execute overlap. Usually, the Z-80 fetches an instruction before the previous instruction has finished executing. The architecture above shows how this is possible. Because the PC and R registers are separated from the other registers, the other registers and ALU can continue to operate during the fetch and refresh steps.

The other registers are not entirely separated from the incrementer/decrementer, though. The stack pointer and other registers can communicate via the bus with the incrementer/decrementer when needed. Pass transistors allow this bus connection to be made as needed.

How a simple incrementer/decrementer works

To understand the circuit, it helps to start with a simple incrementer. If you've studied digital circuits, you've probably seen how two bits can be added with a half-adder, and several half-adders can be chained together to implement a simple multi-bit increment circuit.

The circuit below shows a half-adder, which can increment a single bit. The sum of two bits is computed by XOR, and if both bits are 1, there is a carry.

A simple half-adder that can be used to build an incrementer.

A simple half-adder that can be used to build an incrementer.

Chaining together 16 of these half-adder circuits creates a 16-bit incrementer. Each carry-out is connected to the carry-in of the next bit. A 1 value is fed into the initial carry-in to start the incrementing.

This circuit can be converted to a decrement circuit by renaming the carry signal as a borrow signal. If a bit is 0 and borrow is 1, then there must be a borrow from the next higher bit. (This is similar to grade-school decimal subtraction: 101000 - 1 = 100999 in decimal, since you keep borrowing until you hit a nonzero digit.) When decrementing, a 0 bit potentially causes a borrow, the opposite of incrementing, where a 1 bit potentially causes a carry.

The incrementer and decrementer can be combined into a single circuit by adding one more gate. When computing the carry/borrow for decrementing, each bit is flipped. This is accomplished by using an XOR gate with the decrement condition as an input. If decrement is 1, the input bit is flipped. To increment, the decrement input is set to 0 and the bit passes through the XOR gate unchanged.

A half-adder / subtractor that can be used to build an incrementer/decrementer.

A half-adder / subtractor that can be used to build an incrementer/decrementer.

Repeating the above circuit 16 times creates a 16-bit incrementer/decrementer.

Ripple carry: the problem and solutions

While the circuits above are simple, they have a big problem: they are slow. These circuits use what is called "ripple carry", since the carry value ripples through the circuit bit by bit. The consequence is each bit can't be computed until the carry/borrow is available from the previous bit. This propagation delay limits the clock speed of the system, since the final result isn't available until the carry has made it way through the entire circuit. For a 16-bit counter, this delay is significant.

Carry skip

The Z-80 uses two techniques to avoid ripple carry and speed up the incrementer. First, it uses a technique called carry-skip to compute the result and carry for two bits at a time, reducing the propagation delay.

The circuit diagram below shows how two bits at a time can be computed. Both carry values are computed in parallel, rather than the second carry depending on the first. If both input bits are 1 and there is a carry in, then there is a carry from the left bit. By computing this directly, the propagation delay is reduced.

A circuit to increment or decrement two bits at once.

A circuit to increment or decrement two bits at once.

Due to the MOS gates used in the Z-80, NOR and XNOR gates are more practical than AND and XOR gates, so instead of the carry skip circuit above, the similar circuit below is used in the Z-80. The output bits are inverted, but this is not a problem because many of the Z-80's internal buses are inverted. (The Z-80 uses an interesting pass-transistor XNOR gate, described here. The circuit below performs increment/decrement on two bits, and is repeated six times in the Z-80. To simplify the final schematic, the circuit in the dotted box will simply be shown as a box labeled "2-bit inc/dec".

The circuit used in the Z-80 to increment or decrement two bits.

The circuit used in the Z-80 to increment or decrement two bits.

Carry-lookahead

The second technique used by the Z-80 to avoid the ripple carry delay is carry lookahead, which computes some of the carry values directly from the inputs without waiting on the previous carries. If a sequence of bits is all 1's, there will be a carry from the sequence when it is incremented. Conversely, if there is a 0 anywhere in the sequence, any intermediate carry will be "extinguished". (Similarly, all 0's causes a borrow when decrementing.) By feeding the bits into an AND gate, a sequence of all 1's can be detected, and the carry immediately generated. (The Z-80 uses the inverted bits and a NOR gate, but the idea is the same.)

In the Z-80 three lookahead carries are computed. The carry from the lowest 7 bits is computed directly. If these bits are all 1, and there is a carry-in, then there will be a carry out. The second carry lookahead checks bits 7 through 11 in parallel. The third carry lookahead checks bits 12 through 14 in parallel. Thus, the last bit of the result (bit 15) depends on three carry lookahead steps, rather than 15 ripple steps. This reduces the time for the incrementer to complete.

For more information on carry optimization, see this or this discussion of adders.

The Z-80's increment/decrement circuit

The schematic below shows the actual circuit used in the Z-80 to implement the 16-bit incrementer/decrementer, as determined by reverse engineering the silicon. It uses six of the 2-bit inc/dec blocks described earlier in combination with the three carry-lookahead gates.

In the top half of the schematic, the seven low-order bits are incremented/decremented using the circuit block discussed above. In parallel, the carry/borrow from these bits is computed by the large NOR gate on the left.

Bits 7 through 11 are computed using the carry lookahead value, allowing them to be computed without waiting on the low-order bits. In parallel, the carry/borrow out of these bits is computed by the large NOR gate in the middle, and used to compute bits 12 through 14. The last carry lookahead value is computed at the left and used to compute bit 15. Note that the number of carry blocks decreases as the number of carry lookahead gates increases. For example, output 6 depends on three inc/dec blocks and no carry lookahead gates, while output 14 depends on one inc/dec block and two carry lookahead gates. If the inc/dec blocks and carry lookahead gates require approximately the same time, then the output bits will be ready at approximately the same time.

Schematic of the incrementer/decrementer circuit in the Z-80 microprocessor.

Schematic of the incrementer/decrementer circuit in the Z-80 microprocessor.

The image below shows what the incrementer/decrementer looks like physically, zooming in on the die photograph at the top of the article. The layout on the chip is slightly different from the schematic above. On the chip, the bits are arranged vertically with the low-order bit on top and the high-order bit on the bottom.

The image is a composite: the upper half is from the Z-80 die photograph, while the lower half shows the chip layers as tediously redrawn by the Visual 6502 team for analysis. You can see 8 horizontal "slices" of circuitry from top to bottom, since the bits are processed two at a time. The vertical metal wires are most visible (white in the photograph, blue in the layer drawing). These wires provide power, ground, control signals, and collect the lookahead carry from multiple bits. The polysilicon wires are reddish-orange in the layer diagram, while the diffused silicon is green. Transistors result where the two cross. If you look closely, you can see diagonal orange polysilicon wires about halfway across; these connect the carry-out from one bit to carry-in of the next.

The increment/decrement circuit in the Z-80 microprocessor. Top is the die photograph. Bottom is the layer drawing.

The increment/decrement circuit in the Z-80 microprocessor. Top is the die photograph. Bottom is the layer drawing.

Incrementing the refresh register

The refresh register R and interrupt vector I form a 16-bit pair. The refresh register gets incremented on every memory refresh cycle, but why doesn't the I register get incremented too? This would be a big problem since the value in the I register would get corrupted. The answer is the refresh input into the first carry lookahead gate in the schematic. During a refresh operation, a 1 value is fed into the gate here. This forces the carry to 0, stopping the increment at bit 6, leaving the I register unchanged (along with the top bit of the R register).

You might wonder why only 7 bits of the 8-bit refresh register get incremented. The explanation is that dynamic RAM chips store values in a square matrix. For refresh, only the row address needs to be updated, and all memory values in that row will be refreshed at once. When the Z-80 was introduced, 16K memory chips were popular. Since they held 2^14 bits, they had 7 row address bits and 7 column address bits. Thus, a 7 bit refresh value matched their need. Unfortunately, this rapidly became obsolete with the introduction of 64K memory chips that required 8 refresh bits. [Edit: it's a bit more complicated and depends on the specific chips. See the comments.] Some later chips based on the Z-80, such as the NSC800 had an 8-bit refresh to support these chips.

The non-increment feature

One unexpected feature of the Z-80's incrementer is that it can pass the value through unchanged. If the carry-in to the incrementer/decrementer is set to 0, no action will take place. This seems pointless, but it actually useful since it allows a 16-bit value to be latched and then read back unchanged. In effect, this provides a 16-bit temporary register. The Z-80 uses this action for EX (SP), HL, LD SP, HL, and the associated IX and IY versions. For the LD SP, HL, first HL is loaded into the incrementer latch. Then the unincremented value is stored in the SP register.

The EX (SP), HL is more complex, but uses the latch in a similar way. First the values at (SP+1) and (SP) are read into the WZ temporary register. Next the HL value is written to memory. Finally, WZ is loaded into the incrementer latch and then stored in HL.

You might wonder why values aren't copied between two registers directly. This is due to the structure of the register cells: they do not have separate load and store lines. Instead when a register is connected to the internal register bus, it will be overwritten if another value is on the bus, and otherwise it can be read. Even a simple register-to-register copy such as LD A,B cannot happen directly, but copy the data via the ALU. Since the Z-80's ALU is 4 bits wide, copying a 16-bit value would take at least 4 cycles and be slow. Thus, copying a 16-bit value via the incrementer latch is faster than using the WZ temporary registers.

One timing consequence of using the incrementer latch for 16-bit register-to-register transfers is that it cannot be overlapped with the instruction fetch. Many Z-80 instructions are pipelined and don't finish until several cycles into the next instruction, since register and ALU operations can take place while the Z-80 is fetching the next instruction from memory. However, the PC uses the incrementer during instruction fetch to advance to the next instruction. Thus, any transfer using the incrementer latch must finish before the next instruction starts.

The 0x0001 detector

Another unexpected feature of the incrementer/decrementer is it has a 16-input gate to test if the input is 0x0001 (not shown on the schematic). Why check for 1 and not zero? This circuit is used for the block transfer and search instructions mentioned earlier (LDIR, LDDR, CPIR, CPDR). These operations repeat a transfer or compare multiple times, decrementing the BC register until it reaches zero. But instead of checking for 0 after the decrement, the Z-80 checks if BC register is 1 before the decrement; this works out the same, but gives the Z-80 more time to detect the end of the loop and wrap up instruction execution.

No flags

Unlike the ALU, the incrementer/decrementer doesn't compute parity, negative, carry, or zero values. This is why the 16-bit increment/decrement instructions don't update the status flags.

Comparison with the 6502 and 8085

The 6502 has a 16-bit incrementer, but it is part of the program counter circuit. The 6502 only provides an incrementer, not a decrementer, as the PC doesn't need to be decremented. The other registers are 8 bits, so they don't need a 16-bit incrementer, but use the ALU to be incremented or decremented. (See the 6502 architecture diagram.) The 6502's incrementer uses a couple tricks for efficiency. It uses carry lookahead: the carry from the lowest 8 bits is computed in parallel, as is the carry from the next 4 bits. Alternating bits use a slightly different circuit to avoid inverters in the carry path, slightly reducing the propagation delay.

I've examined the 8085's register file and incrementer in detail. The incrementer/decrementer is implemented by a chain of half-adders with ripple carry. The 8085 has controls to select increment or decrement, similar to the Z-80. The 8085 also includes a feature to increment by two, which speeds up conditional jumps. As in the 6502, an optimization in the 8085 is that alternating bits are implemented with different circuits and the carry out of even bits is inverted. This avoids the inverters that would otherwise be needed to flip the carry back to its regular state. The 8085 uses the carry out from the incrementer to compute the undocumented K flag value.

Conclusion

Looking at the actual circuit for the incrementer/decrementer in the Z-80 shows the performance optimizations in a real chip, compared to a simple incrementer. The 6502 and 8085 also optimize this circuit, but in different ways. In addition, examining the circuitry sheds light on how some operations are implemented in the Z-80, as well as the way memory refresh was handled.

Credits: This couldn't have been done without the Visual 6502 team especially Pavel Zima, Chris Smith, Ed Spittles, Phil Mainwaring, and Julien Oster.

How Hacker News ranking really works: scoring, controversy, and penalties

$
0
0
The basic formula for Hacker News ranking has been known for years, but questions remained. Does the published code give the real algorithm? Are rankings purely based on votes or do invisible factors come into play? Do stories about the NSA get pushed down in the rankings? Why did that popular story suddenly disappear from the front page after you commented on it?
By carefully analyzing the top 60 HN stories for several days, I can answer those questions and more. The published formula is mostly accurate. There is much more tweaking of rankings than you'd expect, with 20% of front-page stories getting penalized in various ways. Anything with "NSA" in the title is penalized and drops off quickly. A "controversial" story gets severely penalized after hitting 40 comments. This article describes scoring and penalties in detail. [Edit: HN no longer penalizes NSA articles (details).]

How ranking works

Articles are scored based on their upvote score, the time since the article was submitted, and various penalties using the following formula: score=\frac{ \left( votes-1 \right) ^{.8}}{ \left( age _{hours} + 2 \right) ^ {1.8}} * penalties
Because the time has a larger exponent than the votes, an article's score will eventually drop to zero, so nothing stays on the front page too long. This exponent is known as gravity.
You might expect that every time you visit Hacker News, the stories are scored by the above formula and sorted to determine their rankings. But for efficiency, stories are individually reranked only occasionally. When a story is upvoted, it is reranked and moved up or down the list to its appropriate spot, leaving the other stories unchanged. Thus, the amount of reranking is significantly reduced. There is, however, the possibility that a story stops getting votes and ends up stuck in a high position. To avoid this, every 30 seconds one of the top 50 stories is randomly selected and reranked. The consequence is that a story may be "wrongly" ranked for many minutes if it isn't getting votes. In addition, pages can be cached for 90 seconds.

Raw scores and the #1 spot on a typical day

The following image shows the raw scores (excluding penalties) for the top 60 HN articles throughout the day of November 11. Each line corresponds to an article, colored according to its position on the page. The red line shows the top article on HN. Note that because of penalties, the article with the top raw score often isn't the top article. Hacker News raw article scores throughout a day. Red line indicates the #1 article. Due to penalties, the #1 article does not always have the top score.
This chart shows a few interesting things. The score for an article shoots up rapidly and then slowly drops over many hours. The scoring formula accounts for much of this: an article getting a constant rate of votes will peak quickly and then gradually descend. But the observed peak is even faster - this is because articles tend to get a lot of votes in the first hour or two, and then the voting rate drops off. Combining these two factors yields the steep curves shown.
There are a few articles each day that score much above the rest, along with a lot of articles in the middle. Some articles score very well but are unlucky and get stuck behind a more popular article. Other articles hit #1 briefly, between the fall of one and the climb of another.
Looking at the difference between the article with the top raw score (top of the graph) and the top-ranked article (red line), you can see when penalties have been applied. The article Getting website registration completely wrong hit #1 early in the morning, but was penalized for controversy and rapidly dropped down the page, letting Linux ate my RAM briefly get the #1 spot before Simpsons in CSS overtook it. A bit later, the controversy penalty was applied to Apple Maps shortly after it reached the #1 spot, causing it to lose its #1 spot and rapidly drop down the rankings. The Snapchat article reached the top of HN but was penalized so heavily at 8:22 am that it dropped off the chart entirely. Why you should never use MongoDB was hugely popular and would have spent much of the day in the #1 spot, except it was rapidly penalized and languished around #7. Severing ties with the NSA started off with a NSA penalty but was so hugely popular it still got the #1 spot. However, it was quickly given an even bigger penalty, forcing it down the page. Finally, near the end of the day $4.1m goes missing was penalized. As it turns out, it would have soon lost the #1 spot to FTL even without the penalty.
The green triangles and text show where "controversy" penalties were applied. The blue triangles and text show where articles were penalized into oblivion, dropping off the top 60. Milder penalties are not shown here.
It's clear that the content of the #1 spot on HN isn't "natural", but results from the constant application of penalties to many articles. It's unclear if these penalties result from HN administrators or from flagged articles.

Submissions that get automatically penalized

Some submissions get automatically penalized based on the title, and others get penalized based on the domain. It appears that any article with NSA in the title gets an automatic penalty of .4. I looked for other words causing automatic penalties, such as awesome, bitcoin, and bubble but they do not seem to get penalized. I observed that many websites appear to automatically get a penalty of .25 to .8: arstechnica.com, businessinsider.com, easypost.com, github.com, imgur.com, medium.com, quora.com, qz.com, reddit.com, rt.com, stackexchange.com, theguardian.com, theregister.com, theverge.com, torrentfreak.com, youtube.com. I'm sure the actual list is longer. (This is separate from "banned" sites, which were listed at one point.
One interesting theory by eterm is that news from popular sources gets submitted in parallel by multiple people resulting in more upvotes than the article "merits". Automatically penalizing popular websites would help counteract this effect.

The impact of penalties

Using the scoring formula, the impact of a penalty can be computed. If an article gets a penalty factor of .4, this is equivalent to each vote only counting as .3 votes. Alternatively, the article will drop in ranking 66% faster than normal. A penalty factor of .1 corresponds to each vote counting as .05 votes, or the article dropping at 3.6 times the normal rate. Thus, a penalty factor of .4 has a significant impact, and .1 is very severe.

Controversy

In order to prevent flamewars on Hacker News, articles with "too many" comments will get heavily penalized as "controversial". In the published code, the contro-factor function kicks in for any post with more than 20 comments and more comments than upvotes. Such an article is scaled by (votes/comments)^2. However, the actual formula is different - it is active for any post with more comments than upvotes and at least 40 comments. Based on empirical data, I suspect the exponent is 3, rather than 2 but haven't proven this. The controversy penalty can have a sudden and catastrophic effect on an article's ranking, causing an article to be ranked highly one minute and vanish when it hits 40 comments. If you've wondered why a popular article suddenly vanishes from the front page, controversy is a likely cause. For example, Why the Chromebook pundits are out of touch with reality dropped from #5 to #22 the moment it hit 40 comments, and Show HN: Get your health records from any doctor' was at #17 but vanished from the top 60 entirely on hitting 40 comments.

My methodology

I crawled the /news and /news2 pages every minute (staying under the 2 pages per minute guideline). I parsed the (somewhat ugly) HTML with Beautiful Soup, processed the results with a big pile of Python scripts, and graphed results with the incomprehensible but powerful matplotlib. The basic idea behind the analysis is to generate raw scores using the formula and then look for anomalies. At a point in time (e.g. 11/09 8:46), we can compute the raw scores on the top 10 stories:
2.802 Pyret: A new programming language from the creators of Racket
1.407 The Big Data Brain Drain: Why Science is in Trouble
1.649 The NY Times endorsed a secretive trade agreement that the public can't read
0.785 S.F. programmers build alternative to HealthCare.gov (warning: autoplay video)
0.844 Marelle: logic programming for devops
0.738 Sprite Lamp
0.714 Why Teenagers Are Fleeing Facebook
0.659 NodeKnockout is in Full Tilt. Checkout some demos
0.805 ISO 1
0.483 Shopify accepts Bitcoin.
0.452 Show HN: Understand closures
Note that three of the top 10 articles are ranked lower than expected from their score: The NY Times, Marelle and ISO 1. Since The NY Times is ranked between articles with 1.407 and 0.785, its penalty factor can be computed as between .47 and .85. Likewise, the other penalties must be .87 to .93, and .60 to .82. I observed that most stories are ranked according to their score, and the exceptions are consistently ranked much lower, indicating a penalty. This indicates that the scoring formula in use matches the published code. If the formula were different, for instance the gravity exponent were larger, I'd expect to see stories drift out of their "expected" ranking as their votes or age increased, but I never saw this.
This technique shows the existence of a penalty and gives a range for the penalty, but determining the exact penalty is difficult. You can look at the range over time and hope that it converges to a single value. However, several sources of error mess this up. First, the neighboring articles may also have penalties applied, or be scored differently (e.g. job postings). Second, because articles are not constantly reranked, an article may be out of place temporarily. Third, the penalty on an article may change over time. Fourth, the reported vote count may differ from the actual vote count because "bad" votes get suppressed. The result is that I've been able to determine approximate penalties, but there is a fair bit of numerical instability.

Penalties over a day

The following graph shows the calculated penalties over the course of a day. Each line shows a particular article. It should start off at 1 (no penalty), and then drop to a penalty level when a penalty is applied. The line ends when the article drops off the top 60, which can be fairly soon after the penalty is applied. There seem to be penalties of 0.2 and 0.4, as well as a lot in the 0.8-0.9 range. It looks like a lot of penalties are applied at 9am (when moderators arrive?), with more throughout the day. I'm experimenting with different algorithms to improve the graph since it is pretty noisy.
On average, about 20% of the articles on the front page have been penalized, while 38% of the articles on the second page have been penalized. (The front page rate is lower since penalized articles are less likely to be on the front page, kind of by definition.) There is a lot more penalization going on than you might expect.
Here's a list of the articles on the front page on 11/11 that were penalized. (This excludes articles that would have been there if they weren't penalized.) This list is much longer than I expected; scroll for the full list.

Why the Climate Corporation Sold Itself to Monsanto, Facebook Publications, Bill Gates: What I Learned in the Fight Against Polio, McCain says NSA chief Keith Alexander 'should resign or be fired', You are not a software engineer, What is a y-combinator?, Typhoon Haiyan kills 10,000 in Philippines, To Persuade People, Tell Them a Story, Tetris and The Power Of CSS, Microsoft Research Publications, Moscow subway sells free tickets for 30 sit-ups, The secret world of cargo ships, These weeks in Rust, Empty-Stomach Intelligence, Getting website registration completely wrong, The Six Most Common Species Of Code, Amazon to Begin Sunday Deliveries, With Post Office's Help, Linux ate my RAM, Simpsons in CSS, Apple maps: how Google lost when everyone thought it had won, Docker and Go: why did we decide to write Docker in Go?, Amazon Code Ninjas, Last Doolittle Raiders make final toast, Linux Voice - A new Linux magazine that gives back, Want to download anime? Just made a program for that, Commit 15 minutes to explain to a stranger why you love your job., Why You Should Never Use MongoDB, Show HN: SketchDeck - build slides faster, Zero to Peanut Butter Docker Time in 78 Seconds, NSA's Surveillance Powers Extend Far Beyond Counterterrorism, How Sentry's Open Source Service Was Born, Real World OCaml, Show HN: Get your health records from any doctor, Why the Chromebook pundits are out of touch with reality, Towards a More Modular Future for JavaScript Libraries, Why is virt-builder written in OCaml?, IOS: End of an Era, The craziest things you can plug into your iPhone's audio jack, RFC: Replace Java with Go in default languages, Show HN: Find your health plan on Health Sherpa, Web Latency Benchmark: A new kind of browser benchmark, Why are Amazon, Facebook and Yahoo copying Microsoft's stack ranking system?, Severing Ties with the NSA, Doctor performs surgery using Google Glass, Duplicity + S3: Easy, cheap, encrypted, automated full-disk backups, Bitcoin's UK future looks bleak, Amazon Redshift's New Features, You're only getting the nice feedback, Software is Easy, Hardware is of Medium Difficulty, Facebook Warns Users After Adobe Breach, International Space Station Infected With USB Stick Malware, Tidbit: Client-Side Bitcoin Mining, Go: "I have already used the name for *MY* programming language", Multi-Modal Drone: Fly, Swim & Drive, The Daily Go Programming Newspaper, "We have no food, we need water and other things to survive.", Introducing the Humble Store, The Six Most Common Species Of Code, $4.1m goes missing as Chinese bitcoin trading platform GBL vanishes, Could Bitcoin Be More Disruptive than the Internet?, Apple Store is updating.

The code for the scoring formula

The Arc source code for a version of the HN server is available, as well as an updated scoring formula:
  (= gravity* 1.8 timebase* 120 front-threshold* 1
       nourl-factor* .4 lightweight-factor* .17 gag-factor* .1)

    (def frontpage-rank (s (o scorefn realscore) (o gravity gravity*))
      (* (/ (let base (- (scorefn s) 1)
              (if (> base 0) (expt base .8) base))
            (expt (/ (+ (item-age s) timebase*) 60) gravity))
         (if (no (in s!type 'story 'poll))  .8
             (blank s!url)                  nourl-factor*
             (mem 'bury s!keys)             .001
                                            (* (contro-factor s)
                                               (if (mem 'gag s!keys)
                                                    gag-factor*
                                                   (lightweight s)
                                                    lightweight-factor*
                                                   1)))))
In case you don't read Arc code, the above snippet defines several constants: gravity* = 1.8, timebase* = 120 (minutes), etc. It then defines a method frontpage-rank that ranks a story s based on its upvotes (realscore) and age in minutes (item-age). The penalty factor is defined by an if with several cases. If the article is not a 'story' or 'poll', the penalty factor is .8. Otherwise, if the URL field is blank (Ask HN, etc.) the factor is nourl-factor*. If the story has been flagged as 'bury', the scale factor is 0.001 and the article is ranked into oblivion. Finally, the default case combines the controversy factor and the gag/lightweight factor. The controversy factor contro-factor is intended to suppress articles that are leading to flamewars, and is discussed more later.
The next factor hits an article flagged as a gag (joke) with a heavy value of .1, and a "lightweight" article with a factor of .17. The actual penalty system appears to be much more complex than what appears in the published code.

Conclusion

An article's position on the Hacker News home page isn't the meritocracy based on upvotes that you might expect. By carefully examining the articles that appear on the Hacker News page, we can learn a great deal about the scoring formula in use. While upvotes are the obvious factor controlling rankings, there is also a complex "penalty" system causing articles to be ranked lower or disappear entirely. This isn't just preventing spam, but affects many very popular articles. And if an article has more comments than votes, don't add your comment to it or you may kill it off entirely! See discussion on Hacker News.


Update (11/18): article on penalties is penalized

Ironically, this article was penalized on Hacker News. Minutes after reaching the front page, a heavy 0.2 penalty was applied to the article, forcing it off the front page. The black line in the graph below shows the position of this article on Hacker News. You can see the sharp drop when the penalty was applied. The gray line shows where the article would have been ranked without the penalty. Without the penalty, the article would have been in the #5 spot, but with the penalty it never made it back onto the front page (positions 1-30). The lower green line shows the raw score of this article. (11/26: I'm told that the penalty was because the "voting ring detection" triggered erroneously.)
This article was penalized shortly after reaching the front page of Hacker News


Bitcoins the hard way: Using the raw Bitcoin protocol

$
0
0
All the recent media attention on Bitcoin inspired me to learn how Bitcoin really works, right down to the bytes flowing through the network. Normal people use software[1] that hides what is really going on, but I wanted to get a hands-on understanding of the Bitcoin protocol. My goal was to use the Bitcoin system directly: create a Bitcoin transaction manually, feed it into the system as hex data, and see how it gets processed. This turned out to be considerably harder than I expected, but I learned a lot in the process and hopefully you will find it interesting.

(Feb 23: I have a new article that covers the technical details of mining. If you like this article, check out my mining article too.)

This blog post starts with a quick overview of Bitcoin and then jumps into the low-level details: creating a Bitcoin address, making a transaction, signing the transaction, feeding the transaction into the peer-to-peer network, and observing the results.

A quick overview of Bitcoin

I'll start with a quick overview of how Bitcoin works[2], before diving into the details. Bitcoin is a relatively new digital currency[3] that can be transmitted across the Internet. You can buy bitcoins[4] with dollars or other traditional money from sites such as Coinbaseor MtGox[5], send bitcoins to other people, buy things with them at some places, and exchange bitcoins back into dollars.

To simplify slightly, bitcoins consist of entries in a distributed database that keeps track of the ownership of bitcoins. Unlike a bank, bitcoins are not tied to users or accounts. Instead bitcoins are owned by a Bitcoin address, for example 1KKKK6N21XKo48zWKuQKXdvSsCf95ibHFa.

Bitcoin transactions

A transaction is the mechanism for spending bitcoins. In a transaction, the owner of some bitcoins transfers ownership to a new address.

A key innovation of Bitcoin is how transactions are recorded in the distributed database through mining. Transactions are grouped into blocks and about every 10 minutes a new block of transactions is sent out, becoming part of the transaction log known as the blockchain, which indicates the transaction has been made (more-or-less) official.[6] Bitcoin mining is the process that puts transactions into a block, to make sure everyone has a consistent view of the transaction log. To mine a block, miners must find an extremely rare solution to an (otherwise-pointless) cryptographic problem. Finding this solution generates a mined block, which becomes part of the official block chain.

Mining is also the mechanism for new bitcoins to enter the system. When a block is successfully mined, new bitcoins are generated in the block and paid to the miner. This mining bounty is large - currently 25 bitcoins per block (about $19,000). In addition, the miner gets any fees associated with the transactions in the block. Because of this, mining is very competitive with many people attempting to mine blocks. The difficulty and competitiveness of mining is a key part of Bitcoin security, since it ensures that nobody can flood the system with bad blocks.

The peer-to-peer network

There is no centralized Bitcoin server. Instead, Bitcoin runs on a peer-to-peer network. If you run a Bitcoin client, you become part of that network. The nodes on the network exchange transactions, blocks, and addresses of other peers with each other. When you first connect to the network, your client downloads the blockchain from some random node or nodes. In turn, your client may provide data to other nodes. When you create a Bitcoin transaction, you send it to some peer, who sends it to other peers, and so on, until it reaches the entire network. Miners pick up your transaction, generate a mined block containing your transaction, and send this mined block to peers. Eventually your client will receive the block and your client shows that the transaction was processed.

Cryptography

Bitcoin uses digital signatures to ensure that only the owner of bitcoins can spend them. The owner of a Bitcoin address has the private key associated with the address. To spend bitcoins, they sign the transaction with this private key, which proves they are the owner. (It's somewhat like signing a physical check to make it valid.) A public key is associated with each Bitcoin address, and anyone can use it to verify the digital signature.

Blocks and transactions are identified by a 256-bit cryptographic hash of their contents. This hash value is used in multiple places in the Bitcoin protocol. In addition, finding a special hash is the difficult task in mining a block.

Bitcoin statistic coin ANTANA

Bitcoins do not really look like this. Photo credit: Antana, CC:by-sa

Diving into the raw Bitcoin protocol

The remainder of this article discusses, step by step, how I used the raw Bitcoin protocol. First I generated a Bitcoin address and keys. Next I made a transaction to move a small amount of bitcoins to this address. Signing this transaction took me a lot of time and difficulty. Finally, I fed this transaction into the Bitcoin peer-to-peer network and waited for it to get mined. The remainder of this article describes these steps in detail.

It turns out that actually using the Bitcoin protocol is harder than I expected. As you will see, the protocol is a bit of a jumble: it uses big-endian numbers, little-endian numbers, fixed-length numbers, variable-length numbers, custom encodings, DER encoding, and a variety of cryptographic algorithms, seemingly arbitrarily. As a result, there's a lot of annoying manipulation to get data into the right format.[7]

The second complication with using the protocol directly is that being cryptographic, it is very unforgiving. If you get one byte wrong, the transaction is rejected with no clue as to where the problem is.[8]

The final difficulty I encountered is that the process of signing a transaction is much more difficult than necessary, with a lot of details that need to be correct. In particular, the version of a transaction that gets signed is very different from the version that actually gets used.

Bitcoin addresses and keys

My first step was to create a Bitcoin address. Normally you use Bitcoin client software to create an address and the associated keys. However, I wrote some Python code to create the address, showing exactly what goes on behind the scenes.

Bitcoin uses a variety of keys and addresses, so the following diagram may help explain them. You start by creating a random 256-bit private key. The private key is needed to sign a transaction and thus transfer (spend) bitcoins. Thus, the private key must be kept secret or else your bitcoins can be stolen.

The Elliptic Curve DSA algorithm generates a 512-bit public key from the private key. (Elliptic curve cryptography will be discussed later.) This public key is used to verify the signature on a transaction. Inconveniently, the Bitcoin protocol adds a prefix of 04 to the public key. The public key is not revealed until a transaction is signed, unlike most systems where the public key is made public.

How bitcoin keys and addresses are related

How bitcoin keys and addresses are related

The next step is to generate the Bitcoin address that is shared with others. Since the 512-bit public key is inconveniently large, it is hashed down to 160 bits using the SHA-256 and RIPEMD hash algorithms.[9] The key is then encoded in ASCII using Bitcoin's custom Base58Check encoding.[10] The resulting address, such as 1KKKK6N21XKo48zWKuQKXdvSsCf95ibHFa, is the address people publish in order to receive bitcoins. Note that you cannot determine the public key or the private key from the address. If you lose your private key (for instance by throwing out your hard drive), your bitcoins are lost forever.

Finally, the Wallet Interchange Format key (WIF) is used to add a private key to your client wallet software. This is simply a Base58Check encoding of the private key into ASCII, which is easily reversed to obtain the 256-bit private key. (I was curious if anyone would use the private key above to steal my 80 cents of bitcoins, and sure enough someone did.)

To summarize, there are three types of keys: the private key, the public key, and the hash of the public key, and they are represented externally in ASCII using Base58Check encoding. The private key is the important key, since it is required to access the bitcoins and the other keys can be generated from it. The public key hash is the Bitcoin address you see published.

I used the following code snippet[11] to generate a private key in WIF format and an address. The private key is simply a random 256-bit number. The ECDSA crypto library generates the public key from the private key.[12] The Bitcoin address is generated by SHA-256 hashing, RIPEMD-160 hashing, and then Base58 encoding with checksum. Finally, the private key is encoded in Base58Check to generate the WIF encoding used to enter a private key into Bitcoin client software.[1] Note: this Python random function is not cryptographically strong; use a better function if you're doing this for real.

Inside a transaction

A transaction is the basic operation in the Bitcoin system. You might expect that a transaction simply moves some bitcoins from one address to another address, but it's more complicated than that. A Bitcoin transaction moves bitcoins between one or more inputs and outputs. Each input is a transaction and address supplying bitcoins. Each output is an address receiving bitcoin, along with the amount of bitcoins going to that address.

A sample Bitcoin transaction. Transaction C spends .008 bitcoins from Transactions A and B.

A sample Bitcoin transaction. Transaction C spends .008 bitcoins from Transactions A and B.

The diagram above shows a sample transaction "C". In this transaction, .005 BTC are taken from an address in Transaction A, and .003 BTC are taken from an address in Transaction B. (Note that arrows are references to the previous outputs, so are backwards to the flow of bitcoins.) For the outputs, .003 BTC are directed to the first address and .004 BTC are directed to the second address. The leftover .001 BTC goes to the miner of the block as a fee. Note that the .015 BTC in the other output of Transaction A is not spent in this transaction.

Each input used must be entirely spent in a transaction. If an address received 100 bitcoins in a transaction and you just want to spend 1 bitcoin, the transaction must spend all 100. The solution is to use a second output for change, which returns the 99 leftover bitcoins back to you.

Transactions can also include fees. If there are any bitcoins left over after adding up the inputs and subtracting the outputs, the remainder is a fee paid to the miner. The fee isn't strictly required, but transactions without a fee will be a low priority for miners and may not be processed for days or may be discarded entirely.[13] A typical fee for a transaction is 0.0002 bitcoins (about 20 cents), so fees are low but not trivial.

Manually creating a transaction

For my experiment I used a simple transaction with one input and one output, which is shown below. I started by bying bitcoins from Coinbase and putting 0.00101234 bitcoins into address 1MMMMSUb1piy2ufrSguNUdFmAcvqrQF8M5, which was transaction 81b4c832.... My goal was to create a transaction to transfer these bitcoins to the address I created above, 1KKKK6N21XKo48zWKuQKXdvSsCf95ibHFa, subtracting a fee of 0.0001 bitcoins. Thus, the destination address will receive 0.00091234 bitcoins.

Structure of the example Bitcoin transaction.

Structure of the example Bitcoin transaction.

Following the specification, the unsigned transaction can be assembled fairly easily, as shown below. There is one input, which is using output 0 (the first output) from transaction 81b4c832.... Note that this transaction hash is inconveniently reversed in the transaction. The output amount is 0.00091234 bitcoins (91234 is 0x016462 in hex), which is stored in the value field in little-endian form. The cryptographic parts - scriptSig and scriptPubKey - are more complex and will be discussed later.

version01 00 00 00
input count01
inputprevious output hash
(reversed)
48 4d 40 d4 5b 9e a0 d6 52 fc a8 25 8a b7 ca a4 25 41 eb 52 97 58 57 f9 6f b5 0c d7 32 c8 b4 81
previous output index00 00 00 00
script length
scriptSigscript containing signature
sequenceff ff ff ff
output count01
outputvalue62 64 01 00 00 00 00 00
script length
scriptPubKeyscript containing destination address
block lock time00 00 00 00

Here's the code I used to generate this unsigned transaction. It's just a matter of packing the data into binary. Signing the transaction is the hard part, as you'll see next.

How Bitcoin transactions are signed

The following diagram gives a simplified view of how transactions are signed and linked together.[14] Consider the middle transaction, transferring bitcoins from address B to address C. The contents of the transaction (including the hash of the previous transaction) are hashed and signed with B's private key. In addition, B's public key is included in the transaction.

By performing several steps, anyone can verify that the transaction is authorized by B. First, B's public key must correspond to B's address in the previous transaction, proving the public key is valid. (The address can easily be derived from the public key, as explained earlier.) Next, B's signature of the transaction can be verified using the B's public key in the transaction. These steps ensure that the transaction is valid and authorized by B. One unexpected part of Bitcoin is that B's public key isn't made public until it is used in a transaction.

With this system, bitcoins are passed from address to address through a chain of transactions. Each step in the chain can be verified to ensure that bitcoins are being spent validly. Note that transactions can have multiple inputs and outputs in general, so the chain branches out into a tree.

How Bitcoin transactions are chained together.

How Bitcoin transactions are chained together.[14]

The Bitcoin scripting language

You might expect that a Bitcoin transaction is signed simply by including the signature in the transaction, but the process is much more complicated. In fact, there is a small program inside each transaction that gets executed to decide if a transaction is valid. This program is written in Script, the stack-based Bitcoin scripting language. Complex redemption conditions can be expressed in this language. For instance, an escrow system can require two out of three specific users must sign the transaction to spend it. Or various types of contracts can be set up.[15]

The Script language is surprisingly complex, with about 80 different opcodes. It includes arithmetic, bitwise operations, string operations, conditionals, and stack manipulation. The language also includes the necessary cryptographic operations (SHA-256, RIPEMD, etc.) as primitives. In order to ensure that scripts terminate, the language does not contain any looping operations. (As a consequence, it is not Turing-complete.) In practice, however, only a few types of transactions are supported.[16]

In order for a Bitcoin transaction to be valid, the two parts of the redemption script must run successfully. The script in the old transaction is called scriptPubKey and the script in the new transaction is called scriptSig. To verify a transaction, the scriptSig executed followed by the scriptPubKey. If the script completes successfully, the transaction is valid and the Bitcoin can be spent. Otherwise, the transaction is invalid. The point of this is that the scriptPubKey in the old transaction defines the conditions for spending the bitcoins. The scriptSig in the new transaction must provide the data to satisfy the conditions.

In a standard transaction, the scriptSig pushes the signature (generated from the private key) to the stack, followed by the public key. Next, the scriptPubKey (from the source transaction) is executed to verify the public key and then verify the signature.

As expressed in Script, the scriptSig is:

PUSHDATA
signature data and SIGHASH_ALL
PUSHDATA
public key data
The scriptPubKey is:
OP_DUP
OP_HASH160
PUSHDATA
Bitcoin address (public key hash)
OP_EQUALVERIFY
OP_CHECKSIG

When this code executes, PUSHDATA first pushes the signature to the stack. The next PUSHDATA pushes the public key to the stack. Next, OP_DUP duplicates the public key on the stack. OP_HASH160 computes the 160-bit hash of the public key. PUSHDATA pushes the required Bitcoin address. Then OP_EQUALVERIFY verifies the top two stack values are equal - that the public key hash from the new transaction matches the address in the old address. This proves that the public key is valid. Next, OP_CHECKSIG checks that the signature of the transaction matches the public key and signature on the stack. This proves that the signature is valid.

Signing the transaction

I found signing the transaction to be the hardest part of using Bitcoin manually, with a process that is surprisingly difficult and error-prone. The basic idea is to use the ECDSA elliptic curve algorithm and the private key to generate a digital signature of the transaction, but the details are tricky. The signing process has been described through a 19-step process (more info). Click the thumbnail below for a detailed diagram of the process.

The biggest complication is the signature appears in the middle of the transaction, which raises the question of how to sign the transaction before you have the signature. To avoid this problem, the scriptPubKey script is copied from the source transaction into the spending transaction (i.e. the transaction that is being signed) before computing the signature. Then the signature is turned into code in the Script language, creating the scriptSig script that is embedded in the transaction. It appears that using the previous transaction's scriptPubKey during signing is for historical reasons rather than any logical reason.[17] For transactions with multiple inputs, signing is even more complicated since each input requires a separate signature, but I won't go into the details.

One step that tripped me up is the hash type. Before signing, the transaction has a hash type constant temporarily appended. For a regular transaction, this is SIGHASH_ALL (0x00000001). After signing, this hash type is removed from the end of the transaction and appended to the scriptSig.

Another annoying thing about the Bitcoin protocol is that the signature and public key are both 512-bit elliptic curve values, but they are represented in totally different ways: the signature is encoded with DER encoding but the public key is represented as plain bytes. In addition, both values have an extra byte, but positioned inconsistently: SIGHASH_ALL is put after the signature, and type 04 is put before the public key.

Debugging the signature was made more difficult because the ECDSA algorithm uses a random number.[18] Thus, the signature is different every time you compute it, so it can't be compared with a known-good signature.

Update (Feb 2014): An important side-effect of the signature changing every time is that if you re-sign a transaction, the transaction's hash will change. This is known as Transaction Malleability. There are also ways that third parties can modify transactions in trivial ways that change the hash but not the meaning of the transaction. Although it has been known for years, malleability has recently caused big problems (Feb 2014) with MtGox (press release).

With these complications it took me a long time to get the signature to work. Eventually, though, I got all the bugs out of my signing code and succesfully signed a transaction. Here's the code snippet I used.

The final scriptSig contains the signature along with the public key for the source address (1MMMMSUb1piy2ufrSguNUdFmAcvqrQF8M5). This proves I am allowed to spend these bitcoins, making the transaction valid.

PUSHDATA 4747
signature
(DER)
sequence30
length44
integer02
length20
X2c b2 65 bf 10 70 7b f4 93 46 c3 51 5d d3 d1 6f c4 54 61 8c 58 ec 0a 0f f4 48 a6 76 c5 4f f7 13
integer02
length20
Y 6c 66 24 d7 62 a1 fc ef 46 18 28 4e ad 8f 08 67 8a c0 5b 13 c8 42 35 f1 65 4e 6a d1 68 23 3e 82
SIGHASH_ALL01
PUSHDATA 4141
public keytype04
X14 e3 01 b2 32 8f 17 44 2c 0b 83 10 d7 87 bf 3d 8a 40 4c fb d0 70 4f 13 5b 6a d4 b2 d3 ee 75 13
Y 10 f9 81 92 6e 53 a6 e8 c3 9b d7 d3 fe fd 57 6c 54 3c ce 49 3c ba c0 63 88 f2 65 1d 1a ac bf cd

The final scriptPubKey contains the script that must succeed to spend the bitcoins. Note that this script is executed at some arbitrary time in the future when the bitcoins are spent. It contains the destination address (1KKKK6N21XKo48zWKuQKXdvSsCf95ibHFa) expressed in hex, not Base58Check. The effect is that only the owner of the private key for this address can spend the bitcoins, so that address is in effect the owner.

OP_DUP76
OP_HASH160a9
PUSHDATA 1414
public key hashc8 e9 09 96 c7 c6 08 0e e0 62 84 60 0c 68 4e d9 04 d1 4c 5c
OP_EQUALVERIFY88
OP_CHECKSIGac

The final transaction

Once all the necessary methods are in place, the final transaction can be assembled. The final transaction is shown below. This combines the scriptSig and scriptPubKey above with the unsigned transaction described earlier.

version01 00 00 00
input count01
inputprevious output hash
(reversed)
48 4d 40 d4 5b 9e a0 d6 52 fc a8 25 8a b7 ca a4 25 41 eb 52 97 58 57 f9 6f b5 0c d7 32 c8 b4 81
previous output index00 00 00 00
script length8a
scriptSig47 30 44 02 20 2c b2 65 bf 10 70 7b f4 93 46 c3 51 5d d3 d1 6f c4 54 61 8c 58 ec 0a 0f f4 48 a6 76 c5 4f f7 13 02 20 6c 66 24 d7 62 a1 fc ef 46 18 28 4e ad 8f 08 67 8a c0 5b 13 c8 42 35 f1 65 4e 6a d1 68 23 3e 82 01 41 04 14 e3 01 b2 32 8f 17 44 2c 0b 83 10 d7 87 bf 3d 8a 40 4c fb d0 70 4f 13 5b 6a d4 b2 d3 ee 75 13 10 f9 81 92 6e 53 a6 e8 c3 9b d7 d3 fe fd 57 6c 54 3c ce 49 3c ba c0 63 88 f2 65 1d 1a ac bf cd
sequenceff ff ff ff
output count01
outputvalue62 64 01 00 00 00 00 00
script length19
scriptPubKey76 a9 14 c8 e9 09 96 c7 c6 08 0e e0 62 84 60 0c 68 4e d9 04 d1 4c 5c 88 ac
block lock time00 00 00 00

A tangent: understanding elliptic curves

Bitcoin uses elliptic curves as part of the signing algorithm. I had heard about elliptic curves before in the context of solving Fermat's Last Theorem, so I was curious about what they are. The mathematics of elliptic curves is interesting, so I'll take a detour and give a quick overview.

The name elliptic curve is confusing: elliptic curves are not ellipses, do not look anything like ellipses, and they have very little to do with ellipses. An elliptic curve is a curve satisfying the fairly simple equation y^2 = x^3 + ax + b. Bitcoin uses a specific elliptic curve called secp256k1 with the simple equation y^2=x^3+7. [25]

Elliptic curve formula used by Bitcoin.

Elliptic curve formula used by Bitcoin.

An important property of elliptic curves is that you can define addition of points on the curve with a simple rule: if you draw a straight line through the curve and it hits three points A, B, and C, then addition is defined by A+B+C=0. Due to the special nature of elliptic curves, addition defined in this way works "normally" and forms a group. With addition defined, you can define integer multiplication: e.g. 4A = A+A+A+A.

What makes elliptic curves useful cryptographically is that it's fast to do integer multiplication, but division basically requires brute force. For example, you can compute a product such as 12345678*A = Q really quickly (by computing powers of 2), but if you only know A and Q solving n*A = Q is hard. In elliptic curve cryptography, the secret number 12345678 would be the private key and the point Q on the curve would be the public key.

In cryptography, instead of using real-valued points on the curve, the coordinates are integers modulo a prime.[19] One of the surprising properties of elliptic curves is the math works pretty much the same whether you use real numbers or modulo arithmetic. Because of this, Bitcoin's elliptic curve doesn't look like the picture above, but is a random-looking mess of 256-bit points (imagine a big gray square of points).

The Elliptic Curve Digital Signature Algorithm (ECDSA) takes a message hash, and then does some straightforward elliptic curve arithmetic using the message, the private key, and a random number[18] to generate a new point on the curve that gives a signature. Anyone who has the public key, the message, and the signature can do some simple elliptic curve arithmetic to verify that the signature is valid. Thus, only the person with the private key can sign a message, but anyone with the public key can verify the message.

For more on elliptic curves, see the references[20].

Sending my transaction into the peer-to-peer network

Leaving elliptic curves behind, at this point I've created a transaction and signed it. The next step is to send it into the peer-to-peer network, where it will be picked up by miners and incorporated into a block.

How to find peers

The first step in using the peer-to-peer network is finding a peer. The list of peers changes every few seconds, whenever someone runs a client. Once a node is connected to a peer node, they share new peers by exchanging addr messages whenever a new peer is discovered. Thus, new peers rapidly spread through the system.

There's a chicken-and-egg problem, though, of how to find the first peer. Bitcoin clients solve this problem with several methods. Several reliable peers are registered in DNS under the name bitseed.xf2.org. By doing a nslookup, a client gets the IP addresses of these peers, and hopefully one of them will work. If that doesn't work, a seed list of peers is hardcoded into the client. [26]

nslookup can be used to find Bitcoin peers.

nslookup can be used to find Bitcoin peers.

Peers enter and leave the network when ordinary users start and stop Bitcoin clients, so there is a lot of turnover in clients. The clients I use are unlikely to be operational right now, so you'll need to find new peers if you want to do experiments. You may need to try a bunch to find one that works.

Talking to peers

Once I had the address of a working peer, the next step was to send my transaction into the peer-to-peer network.[8] Using the peer-to-peer protocol is pretty straightforward. I opened a TCP connection to an arbitrary peer on port 8333, started sending messages, and received messages in turn. The Bitcoin peer-to-peer protocol is pretty forgiving; peers would keep communicating even if I totally messed up requests.

Important note: as a few people pointed out, if you want to experiment you should use the Bitcoin Testnet, which lets you experiment with "fake" bitcoins, since it's easy to lose your valuable bitcoins if you mess up on the real network. (For example, if you forget the change address in a transaction, excess bitcoins will go to the miners as a fee.) But I figured I would use the real Bitcoin network and risk my $1.00 worth of bitcoins.

The protocol consists of about 24 different message types. Each message is a fairly straightforward binary blob containing an ASCII command name and a binary payload appropriate to the command. The protocol is well-documented on the Bitcoin wiki.

The first step when connecting to a peer is to establish the connection by exchanging version messages. First I send a version message with my protocol version number[21], address, and a few other things. The peer sends its version message back. After this, nodes are supposed to acknowledge the version message with a verack message. (As I mentioned, the protocol is forgiving - everything works fine even if I skip the verack.)

Generating the version message isn't totally trivial since it has a bunch of fields, but it can be created with a few lines of Python. makeMessage below builds an arbitrary peer-to-peer message from the magic number, command name, and payload. getVersionMessage creates the payload for a version message by packing together the various fields.

Sending a transaction: tx

I sent the transaction into the peer-to-peer network with the stripped-down Python script below. The script sends a version message, receives (and ignores) the peer's version and verack messages, and then sends the transaction as a tx message. The hex string is the transaction that I created earlier.

The following screenshot shows how sending my transaction appears in the Wireshark network analysis program[22]. I wrote Python scripts to process Bitcoin network traffic, but to keep things simple I'll just use Wireshark here. The "tx" message type is visible in the ASCII dump, followed on the next line by the start of my transaction (01 00 ...).

A transaction uploaded to Bitcoin, as seen in Wireshark.

A transaction uploaded to Bitcoin, as seen in Wireshark.

To monitor the progress of my transaction, I had a socket opened to another random peer. Five seconds after sending my transaction, the other peer sent me a tx message with the hash of the transaction I just sent. Thus, it took just a few seconds for my transaction to get passed around the peer-to-peer network, or at least part of it.

Victory: my transaction is mined

After sending my transaction into the peer-to-peer network, I needed to wait for it to be mined before I could claim victory. Ten minutes later my script received an inv message with a new block (see Wireshark trace below). Checking this block showed that it contained my transaction, proving my transaction worked. I could also verify the success of this transaction by looking in my Bitcoin wallet and by checking online. Thus, after a lot of effort, I had successfully created a transaction manually and had it accepted by the system. (Needless to say, my first few transaction attempts weren't successful - my faulty transactions vanished into the network, never to be seen again.[8])

A new block in Bitcoin, as seen in Wireshark.

A new block in Bitcoin, as seen in Wireshark.

My transaction was mined by the large GHash.IO mining pool, into block #279068 with hash 0000000000000001a27b1d6eb8c405410398ece796e742da3b3e35363c2219ee. (The hash is reversed in inv message above: ee19...) Note that the hash starts with a large number of zeros - finding such a literally one in a quintillion value is what makes mining so difficult. This particular block contains 462 transactions, of which my transaction is just one.

For mining this block, the miners received the reward of 25 bitcoins, and total fees of 0.104 bitcoins, approximately $19,000 and $80 respectively. I paid a fee of 0.0001 bitcoins, approximately 8 cents or 10% of my transaction. The mining process is very interesting, but I'll leave that for a future article.

Untitled

Bitcoin mining normally uses special-purpose ASIC hardware, designed to compute hashes at high speed. Photo credit: Gastev, CC:by

Conclusion

Using the raw Bitcoin protocol turned out to be harder than I expected, but I learned a lot about bitcoins along the way, and I hope you did too. My code is purely for demonstration - if you actually want to use bitcoins through Python, use a real library[24] rather than my code.

Notes and references

[1] The original Bitcoin client is Bitcoin-qt. In case you're wondering why qt, the client uses the common Qt UI framework. Alternatively you can use wallet software that doesn't participate in the peer-to-peer network, such as Electrum or MultiBit. Or you can use an online wallet such as Blockchain.info.

[2] A couple good articles on Bitcoin are How it works and the very thorough How the Bitcoin protocol actually works.

[3] The original Bitcoin paper is Bitcoin: A Peer-to-Peer Electronic Cash System written by the pseudonymous Satoshi Nakamoto in 2008. The true identity of Satoshi Nakamoto is unknown, although there are many theories.

[4] You may have noticed that sometimes Bitcoin is capitalized and sometimes not. It's not a problem with my shift key - the "official" style is to capitalize Bitcoin when referring to the system, and lower-case bitcoins when referring to the currency units.

[5] In case you're wondering how the popular MtGox Bitcoin exchange got its name, it was originally a trading card exchange called "Magic: The Gathering Online Exchange" and later took the acronym as its name.

[6] For more information on what data is in the blockchain, see the very helpful article Bitcoin, litecoin, dogecoin: How to explore the block chain.

[7] I'm not the only one who finds the Bitcoin transaction format inconvenient. For a rant on how messed up it is, see Criticisms of Bitcoin's raw txn format.

[8] You can also generate transaction and send raw transactions into the Bitcoin network using the bitcoin-qt console. Type sendrawtransaction a1b2c3d4.... This has the advantage of providing information in the debug log if the transaction is rejected. If you just want to experiment with the Bitcoin network, this is much, much easier than my manual approach.

[9] Apparently there's no solid reason to use RIPEMD-160 hashing to create the address and SHA-256 hashing elsewhere, beyond a vague sense that using a different hash algorithm helps security. See discussion. Using one round of SHA-256 is subject to a length extension attack, which explains why double-hashing is used.

[10] The Base58Check algorithm is documented on the Bitcoin wiki. It is similar to base 64 encoding, except it omits the O, 0, I, and l characters to avoid ambiguity in printed text. A 4-byte checksum guards against errors, since using an erroneous bitcoin address will cause the bitcoins to be lost forever.

[11] Some boilerplate has been removed from the code snippets. For the full Python code, see my repository shirriff/bitcoin-code on GitHub. You will also need the ecdsa cryptography library.

[12] You may wonder how I ended up with addresses with nonrandom prefixes such as 1MMMM. The answer is brute force - I ran the address generation script overnight and collected some good addresses. (These addresses made it much easier to recognize my transactions in my testing.) There are scripts and websites that will generate these "vanity" addresses for you.

[13] For a summary of Bitcoin fees, see bitcoinfees.com. This recent Reddit discussion of fees is also interesting.

[14] The original Bitcoin paper has a similar figure showing how transactions are chained together. I find it very confusing though, since it doesn't distinguish between the address and the public key.

[15] For details on the different types of contracts that can be set up with Bitcoin, see Contracts. One interesting type is the 2-of-3 escrow transaction, where two out of three parties must sign the transaction to release the bitcoins. Bitrated is one site that provides these.

[16] Although Bitcoin's Script language is very flexible, the Bitcoin network only permits a few standard transaction types and non-standard transactions are not propagated (details). Some miners will accept non-standard transactions directly, though.

[17] There isn't a security benefit from copying the scriptPubKey into the spending transaction before signing since the hash of the original transaction is included in the spending transaction. For discussion, see Why TxPrev.PkScript is inserted into TxCopy during signature check?

[18] The random number used in the elliptic curve signature algorithm is critical to the security of signing. Sony used a constant instead of a random number in the PlayStation 3, allowing the private key to be determined. In an incident related to Bitcoin, a weakness in the random number generator allowed bitcoins to be stolen from Android clients.

[19] For Bitcoin, the coordinates on the elliptic curve are integers modulo the prime2^256 - 2^32 - 2^9 -2^8 - 2^7 - 2^6 -2^4 -1, which is very nearly 2^256. This is why the keys in Bitcoin are 256-bit keys.

[20] For information on the historical connection between elliptic curves and ellipses (the equation turns up when integrating to compute the arc length of an ellipse) see the interesting article Why Ellipses Are Not Elliptic Curves, Adrian Rice and Ezra Brown, Mathematics Magazine, vol. 85, 2012, pp. 163-176. For more introductory information on elliptic curve cryptography, see ECC tutorial or A (Relatively Easy To Understand) Primer on Elliptic Curve Cryptography. For more on the mathematics of elliptic curves, see An Introduction to the Theory of Elliptic Curves by Joseph H. Silverman. Three Fermat trails to elliptic curves includes a discussion of how Fermat's Last Theorem was solved with elliptic curves.

[21] There doesn't seem to be documentation on the different Bitcoin protocol versions other than the code. I'm using version 60002 somewhat arbitrarily.

[22] The Wireshark network analysis software can dump out most types of Bitcoin packets, but only if you download a recent "beta release - I'm using version 1.11.2.

[24] Several Bitcoin libraries in Python are bitcoin-python, pycoin, and python-bitcoinlib.

[25] The elliptic curve plot was generated from the Sage mathematics package:

var("x y")
implicit_plot(y^2-x^3-7, (x,-10, 10), (y,-10, 10), figsize=3, title="y^2=x^3+7")

[26] The hardcoded peer list in the Bitcoin client is in chainparams.cpp in the array pnseed. For more information on finding Bitcoin peers, see How Bitcoin clients find each other or Satoshi client node discovery.

Bitcoin transaction malleability: looking at the bytes

$
0
0
"Malleability" of Bitcoin transactions has recently become a major issue. This article looks at how transactions are modified, at the byte level.

I have a new article The malleability attack graphed hour-by-hour. Check it out too.

An attacker has been modifying Bitcoin transactions, causing them to have a different hash. Recently an attacker has been taking transactions on the Bitcoin peer-to-peer network, modifying them slightly, and rapidly sending them to a miner. The modified transaction often gets mined first, pre-empting the original transaction. The attacker can only make "trivial" changes to a transaction, so exactly the same Bitcoin transfer happens as was intended - the same amount is moved between the same addresses, so this attack seems entirely pointless. However, each transaction is identified by a cryptographic hash, and even a trivial change to the transaction causes the transaction hash to change. Changing the hash of a transaction can have unexpected effects on the Bitcoin system.

A very quick explanation of transactions

A Bitcoin transaction moves bitcoins from one address to another. A transaction must be signed with the private key corresponding to the address, so only the owner of the bitcoins can move them. (This signing process is surprisingly complex.) The signature is then put in the middle of the transaction. Finally, the entire transaction (including the signature) is cryptographically hashed, and this hash is used to identify the transaction in the Bitcoin system. The important data is protected by the signature and can't be modified by an attacker. But there are few ways the signature itself can be changed, but still remain valid.

(This is oversimplified. For more details, see Bitcoins the hard way.)

Looking at a modified transaction

To find a transaction suffering from malleability, I looked at the unconfirmed transactions page. If a transaction gets modified, only one version will get mined successfully (and actually transfer bitcoins), and the other will remain unconfirmed (and have no effect). Among the many conditions enforced in mined blocks, the same bitcoins can't be spent twice, so both transactions will never be mined. This is why having two versions of a transaction doesn't result in two payments.

I picked a random unconfirmed transaction from Feb 11 to examine. (Unfortunately this transaction has been discarded since I wrote this article, breaking my links. But you can look up a different one if you want.) Blockchain.info helpfully includes a banner warning that something is wrong:

Warning! this transaction is a double spend of 112593804. You should be extremely careful when trusting any transactions to/from this sender.

Looking at the transactions, everything seems fine:

The confirmed transaction takes 0.01 BTC from 1JRQExbG6WAhPCWC5W5H7Rn1LannTx1Dix and transfers 0.0099 BTC to 1Hbum99G9Lp7PyQ2nYqDcN3jh5aw878bFt (the remainder is a mining fee of 0.001 BTC). This transaction has hash bba8c3d044828f099ae3bc5f3beaff2643e0202d6c121753b53536a49511c63f.

The unconfirmed transaction takes 0.01 BTC from 1JRQExbG6WAhPCWC5W5H7Rn1LannTx1Dix and transfers 0.0099 BTC to 1Hbum99G9Lp7PyQ2nYqDcN3jh5aw878bFt (the remainder is a mining fee of 0.001 BTC). This transaction has hash d36a0fcdf4b3ccfe114e882ef4159094d2012bc8b72dc6389862a7dc43dfa61c.

The scripts of both transactions appear identical:

Input Scripts
30450220539901ea7d6840eea8826c1f3d0d1fca7827e491deabcf17889e7a2e5a39f5a1022100fe745667e444978c51fdba6981505f0a68619f0289e5ff2352acbd31b3d23d8701 046c4ea0005563c20336d170e35ae2f168e890da34e63da7fff1cc8f2a54f60dc402b47574d6ce5c6c5d66db0845c7dabcb5d90d0d6ca9b703dc4d02f4501b6e44 OK
Output Scripts
OP_DUP OP_HASH160 b61c32ac39c63f919c4ce3a5df77590c5903d975 OP_EQUALVERIFY OP_CHECKSIG 
Both transactions look identical: the bitcoins are moving between the same accounts in both cases, the amounts are equal, and the scripts look identical. So why do they have different hashes? A clue is the unconfirmed transaction is 224 bytes and the confirmed transaction is 228 bytes.

Looking at the raw transactions also fails to show what is happening:

{
  "hash":"bba8c3d044828f099ae3bc5f3beaff2643e0202d6c121753b53536a49511c63f",
  "ver":1,
  "vin_sz":1,
  "vout_sz":1,
  "lock_time":0,
  "size":228,
  "in":[
    {
      "prev_out":{
        "hash":"3ceafb1d6864091a6c40f0f0fa7d4072d71a909820444ac307dcaa7a2d4b88d4",
        "n":1
      },
      "scriptSig":"30450220539901ea7d6840eea8826c1f3d0d1fca7827e491deabcf17889e7a2e5a39f5a1022100fe745667e444978c51fdba6981505f0a68619f0289e5ff2352acbd31b3d23d8701 046c4ea0005563c20336d170e35ae2f168e890da34e63da7fff1cc8f2a54f60dc402b47574d6ce5c6c5d66db0845c7dabcb5d90d0d6ca9b703dc4d02f4501b6e44"
    }
  ],
  "out":[
    {
      "value":"0.00990000",
      "scriptPubKey":"OP_DUP OP_HASH160 b61c32ac39c63f919c4ce3a5df77590c5903d975 OP_EQUALVERIFY OP_CHECKSIG"
    }
  ]
}

Even though the scripts are mostly in hex in this raw display, they have been parsed slightly, which hides what is going on. We need to get the full scripts here and here.

The unconfirmed transaction has script:

4830450220539901ea7d6840eea8826c1f3d0d1fca7827e491deabcf17889e7a2e5a39f5a1022100fe745667e444978c51fdba6981505f0a68619f0289e5ff2352acbd31b3d23d870141046c4ea0005563c20336d170e35ae2f168e890da34e63da7fff1cc8f2a54f60dc402b47574d6ce5c6c5d66db0845c7dabcb5d90d0d6ca9b703dc4d02f4501b6e44
The confirmed transaction has script:
4d480030450220539901ea7d6840eea8826c1f3d0d1fca7827e491deabcf17889e7a2e5a39f5a1022100fe745667e444978c51fdba6981505f0a68619f0289e5ff2352acbd31b3d23d87014d4100046c4ea0005563c20336d170e35ae2f168e890da34e63da7fff1cc8f2a54f60dc402b47574d6ce5c6c5d66db0845c7dabcb5d90d0d6ca9b703dc4d02f4501b6e44
There are a couple differences (highlighted in red). But what do they mean?

This script is the scriptSig, the signature of the transaction using the sender's private key. This signature proves the sender owns the bitcoins. However, the scriptSig isn't just a simple signature, but is actually a program written in Bitcoin's Script language. This program pushes the signature data onto the execution stack. The program from the unconfirmed script is interpreted as follows:

PUSHDATA 4848
signature
(DER)
sequence30
length45
integer02
length20
X539901ea7d6840eea8826c1f3d0d1fca7827e491deabcf17889e7a2e5a39f5a1
integer02
length21
Y 00fe745667e444978c51fdba6981505f0a68619f0289e5ff2352acbd31b3d23d87
SIGHASH_ALL01
PUSHDATA 4141
public keytype04
X6c4ea0005563c20336d170e35ae2f168e890da34e63da7fff1cc8f2a54f60dc4
Y 02b47574d6ce5c6c5d66db0845c7dabcb5d90d0d6ca9b703dc4d02f4501b6e44

The program from the confirmed script is interpreted as follows:

OP_PUSHDATA2 00484d 48 00
signature
(DER)
sequence30
length45
integer02
length20
X539901ea7d6840eea8826c1f3d0d1fca7827e491deabcf17889e7a2e5a39f5a1
integer02
length21
Y 00fe745667e444978c51fdba6981505f0a68619f0289e5ff2352acbd31b3d23d87
SIGHASH_ALL01
OP_PUSHDATA2 00414d 41 00
public keytype04
X6c4ea0005563c20336d170e35ae2f168e890da34e63da7fff1cc8f2a54f60dc4
Y 02b47574d6ce5c6c5d66db0845c7dabcb5d90d0d6ca9b703dc4d02f4501b6e44

Note the highlighted differences. The original transaction has a byte 0x48, which says to push (hex) 48 bytes of data. The modified transaction has a OP_PUSHDATA2 (0x4d), which says the next two bytes (48 00) are the number of bytes to push. In other words, both transactions do exactly the same thing (push the signature), but the original indicates this with 48, while the modified transaction indicates this with 4d 48 00. (Pushing the public key has a similar modification.) Since both scripts do exactly the same thing, both transactions are equally valid. However, since the data has changed, the transactions have two different hashes.

Why does malleability matter?

Transaction Malleability has been discussed for years and treated as a minor inconvenience. Both transactions have exactly the same effect, moving bitcoins between the same addresses. Only one transaction will be confirmed by miners, and the other will be discarded, so nobody gets paid twice even though there are two transactions.

There are, however, three problems that have turned up recently due to malleability.

First, the major Mt.Gox exchange stated they would stop processing bitcoin withdrawals until the Bitcoin network approves and standardizes on a new non-malleable hash. Apparently they were using the hash to track transactions, and would re-send bitcoins if the transaction didn't appear to go through. This is obviously a problem if the transaction did go through, but with a different hash.

Second, some wallet software would use both transactions to compute the balance, which caused it to show the wrong value.

Finally, due to the way Bitcoin handles change, malleability could cause a second transaction to fail. This requires a bit more explanation.

Failures due to change and malleability

The Bitcoin protocol doesn't really move bitcoins from address to address. Instead, it takes bitcoins from a set of inputs, and sends them to a set of outputs. Each output is an address (actually a script, but let's ignore that for now). Each input is an output from a previous transaction, and each input must be entirely spent.

As a result, if you have 3 bitcoins, and you want to spend one of them, the other two bitcoins get returned to you as change, sent to an address you control. If you then want to spend some of the change, your second transaction references the previous transaction that generates the change, referencing it by the hash of the first transaction. This is where malleability becomes a problem - if the first transaction's hash changed, the second transaction is not valid and the transaction will fail. Note that the change will still go to your proper address, so you can spend it as long as you use the correct (modified) transaction hash, so you don't lose any bitcoins. You just have the inconvenience of having a transaction rejected, and you'll need to redo it with the right hash.

The change problem only happens because some wallet software takes a shortcut, letting you (attempt to) spend the change before the transaction has been confirmed. The reasoning is that since it's your change from your transaction, you should be able to trust yourself. But that breaks down with malleability.

Malleability has been known for a long time

Transaction malleability has been known since 2011. The exact OP_PUSHDATA2 malleability used above was described four months ago here. There are many other types of malleability, which are explained here. The script code can be modified in several ways while leaving its operation unchanged. The signature itself can be encoded slightly differently. And interestingly, due to the mathematics of elliptic curves the numeric value of the signature can be negated, yielding a second valid signature.

Conclusion

Hopefully this has helped to make malleability more understandable. If you want to know more details of the Bitcoin protocol, including signing and hashing, see my previous article Bitcoins the hard way.

The Bitcoin malleability attack graphed hour by hour

$
0
0
I have a new Bitcoin article: Hidden surprises in the Bitcoin blockchain
The Bitcoin network was subject to a strange attack this week. Up to 25% of the recorded transactions were modified using a technique called transaction malleability. By examining the Bitcoin blockchain, I've created an hour-by-hour look at the attack.

For details on how transaction malleability works, see my article Bitcoin transaction malleability: looking at the bytes. As a quick summary, the attacker takes a new Bitcoin transaction, modifies it in a trivial way that changes the transaction hash, and sends it back into the Bitcoin system. The modified transaction functions exactly the same (transferring the bitcoins between the same addresses), but results in two slightly different versions of the transaction in the system. However, if client software or exchange software depends on the transaction hash, temporarily having two different hashes for the transaction can cause a variety of problems.

The reason malleability is possible is that inside a Bitcoin transaction is a tiny program that provides the signature data. This script pushes the (hex) 48 byte signature by using the instruction 48. An attacker can change the script to use the OP_PUSHDATA2 instruction (4d) followed by a two-byte length (48 00). The modified transaction is still valid, since the script has exactly the same action.

Tracking the malleability attack

I created the graph below, which shows the hourly progress of the attack: the blue line is the total number of Bitcoin transactions, and the green line is the number of transactions that were modified by the malleability attack.

Graph of Bitcoin transactions suffering from malleability attack, Feb 2014.

Graph of Bitcoin transactions suffering from malleability attack, Feb 2014.

The attack started off affecting a fairly small number of transactions on Feb 9. The malleability attack itself appears to have started in block 284980 (Feb 9, 8:12 PST), which contains 36 modified transactions. Since the number of affected transactions in this block and following blocks was small, I wonder if this was a test phase for the attack.

The attack really took off the morning of February 10. At the peak, up to 25% of Bitcoin transactions were modified.

The attack ended fairly abruptly the morning of Feb 11. I made a bunch of transactions that evening, hoping to see a modified one, but I was disappointed that they all went through untouched.

A few modified transactions continued to trickle in for the next few days, with some even today (Feb 14). Some of these are older transactions that were mined very slowly because they didn't include any fees. For example, this transaction was modified on Feb 10, but not mined until Feb 14.

History of OP_PUSHDATA2 usage

I wanted to find out if there were any precursors to the malleability attack, or any similar attacks earlier. I scanned the entire blockchain looking for transactions using the OP_PUSHDATA2 opcode, which is used in the malleability attack. (As an aside, the Bitcoin data is a pain to parse for several reasons.)

Up until the attack, OP_PUSHDATA2 was very rare. I saw OP_PUSHDATA2 used in July 2013 here for a strange - but not modified (malleated?) - transaction. OP_PUSHDATA2 was used again in November 5 (here)when someone used OP_PUSHDATA to include a joke signature in the transaction: I should not run the washing machine while listening to WZBC. I managed to convince myself that the machine was slowly failing -- that a rythmic, squeaking noise it had been making had gotten a little worse. Ten minutes later, though, the machine had paused. But the noise was still there. All that text is stored inside the Bitcoin transaction. There are a bunch of ways to "hide"text messages in the blockchain, and this transaction used an unusual one.

On Feb 4, this transaction used OP_PUSHDATA2 in a strange broken transaction that wasted 0.001 BTC. Interestingly, the sibling transaction wasted 0.03201 BTC in a broken MULTISIG transaction with the "correct horse battery staple" public key. I conclude that someone was trying out strange things on Feb 4, including the rare OP_PUSHDATA2 instruction. Was this debugging for the malleability attack a few days later or was this unrelated experimentation?

Some conclusions

There has been some speculation that the malleability attack directed the modified transactions to a specific miner. However, I looked at the blocks containing these transactions, and they come from a variety of well-known miners. So there's nothing miner-specific about this attack. The attackers don't have their own mining pool.

There's a 100-millisecond sleep in the Bitcoin peer's message processing loop. There has been speculation that the attacker could beat regular peers by avoiding this loop: regular peers would wait 100ms to pass along messages, while the attacker could get a transaction, modify it, and send it to a miner immediately. This seems plausible to me.

One puzzle is that Mt.Gox announced their difficulties on Feb 7, and then explained Feb 10 that they were stopping withdrawals due to a malleability attack. Since the OP_PUSHDATA2 attack didn't start until Feb 9, this attack can't be responsible for the Feb 7 problems. One possibility is there was a different type of malleability attack that affected Mt.Gox. It would be interesting to get the hash for one of the affected transactions from before Feb 7, to see what was going on.

Around the same time as the malleability attack, many people received tiny payments from 1Enjoy and 1Sochi addresses. I believe all these payments were rejected by miners as junk and remain unconfirmed. As far as I know, there is no connection between these tiny spam payments and the malleability attack, but the timing is suspicious.

Hidden surprises in the Bitcoin blockchain and how they are stored: Nelson Mandela, Wikileaks, photos, and Python software

$
0
0
Every Bitcoin transaction is stored in the distributed database known as the Bitcoin blockchain. However, people have found ways to hack the Bitcoin protocol to store more than just transactions. I've searched through the blockchain and found many strange and interesting things - from images to source code in JavaScript, Python, and Basic. If you're running a Bitcoin client, you probably have all this data stored on your system.[1]

Nelson Mandela tribute

The Bitcoin blockchain contains this image of Nelson Mandela and the tribute text. Someone encoded this data into fake addresses in Bitcoin transactions, causing it to be stored in the Bitcoin system.

Image of Nelson Mandela found in the Bitcoin blockchain.

Nelson Mandela (1918-2013)
"I am fundamentally an optimist. Whether that comes from nature or nurture, I cannot say. Part of being optimistic is keeping one’s head pointed toward the sun, one’s feet moving forward. There were many dark moments when my faith in humanity was sorely tested, but I would not and could not give myself up to despair. That way lays defeat and death."
"I learned that courage was not the absence of fear, but the triumph over it. The brave man is not he who does not feel afraid, but he who conquers that fear."
"Difficulties break some men but make others. No axe is sharp enough to cut the soul of a sinner who keeps on trying, one armed with the hope that he will rise even in the end."
"It always seems impossible until it’s done."
"When a man has done what he considers to be his duty to his people and his country, he can rest in peace."
"Real leaders must be ready to sacrifice all for the freedom of their
"Everyone can rise above their circumstances and achieve success if they are dedicated to and passionate about what they do."
"Education is the most powerful weapon which you can use to change the world."
"For to be free is not merely to cast off one’s chains, but to live in a way that respects and enhances the freedom of others."
"There is no passion to be found playing small – in settling for a life that is less than the one you are capable of living."
“There is nothing like returning to a place that remains unchanged to find the ways in which you yourself have altered.” -Nelson Mandela

The data is stored in the blockchain by encoding hex values into the addresses. Below is an excerpt of one of the transactions storing the Mandela information. In this transaction, tiny amounts of bitcoins are being sent to fake addresses such as 15gHNr4TCKmhHDEG31L2XFNvpnEcnPSQvd. This address is stored in the blockchain as hex 334E656C736F6E2D4D616E64656C612E6A70673F. If you convert those hex bytes to Unicode, you get the string 3Nelson-Mandela.jpg?, representing the image filename. Similarly, the following addresses encode the data for the image. Thus, text, images, and other content can be stored in Bitcoin by using the right fake addresses.

Secret message in the first Bitcoin block

It is well known that the Genesis block, the very first block of data in Bitcoin contained a "secret" message. This message was stored in the coinbase[2], a part of a Bitcoin block that is filled in by the miner who mines a Bitcoin block. Along with the standard data, the original transaction also contains the message: 'The Times 03/Jan/2009 Chancellor on brink of second bailout for banks'[3]. Presumably this is a political commentary on Bitcoin compared to the insolvency of "real" banks.

Bitcoin logo

People rapidly figured out how to encode arbitrary content into the Bitcoin blockchain by using hex data in place of Bitcoin addresses.[4] One of the first uses of this technique was to store the Bitcoin logo in the blockchain. I extracted the following image from the blockchain, where it was hidden among normal transactions.[5]

Image found in the Bitcoin blockchain: Bitcoin logo

The Bitcoin logo, hidden in the blockchain.

Prayers from miners

Early on, the miner Eligius started putting Catholic prayers in English and Latin in the coinbase field of blocks they mined. Here are some samples:
Benedictus Sanguis eius pretiosissimus.
Benedictus Iesus in sanctissimo altaris Sacramento.
Ave Maria, gratia plena, Dominus tecum. Benedicta tu in mulieribus, ...
...and life everlasting, through the merits of Jesus Christ, my Lord and Redeemer.
O Heart of Jesus, burning with love for us, inflame our hearts with love for Thee.
Jesus, meek and humble of heart, make my heart like unto thine!
These prayers turned out to be surprisingly controversial, leading to insults being exchanged through the blockchain: "Oh, and god isn't real, sucka. Stop polluting the blockchain with your nonsense.", "FFS Luke-Jr leave the blockchain alone!", and a rickroll in response: "Militant atheists, http://bit.ly/naNhG2 -- happy now?".[6]

The codebase technique has since been used by many other miners as advertising. Typical messages are: Hi from 50BTC.com, For Pierce and Paul, Mined at GIVE-ME-COINS.com, EclipseMC: Aluminum Falcon?, Happy NY! Yours GHash.IO, Mined By ASICMiner, BTC Guild, Made in China, BitMinter, /bitparking, hi from poolserverj, /ozcoin/stratum/, /slush/.[7]

XSS demo

I've found JavaScript code in the blockchain that demonstrates a potential XSS attack. A common security hole on websites is cross-site scripting (XSS)[8], where an attacker can inject hostile JavaScript into a web page viewed by the victim. Surprisingly, such an attack was possible with Bitcoin. The transaction's output script was set to the hex corresponding to:
<script>window.alert("If this were an actual exploit, your mywallet would be empty.")</script>
Apparently some Bitcoin websites would fail to escape the tags, causing the script to run if you viewed the page. The above script just created a harmless dialog box, but a more malicious transaction could potentially steal the user's bitcoins stored on the website.

Len Sassaman Tribute

A tribute to cryptographer Len Sassaman was put in the Bitcoin blockchain a couple weeks after his death by Dan Kaminsky.[9]
---BEGIN TRIBUTE---
#./BitLen
:::::::::::::::::::
:::::::.::.::.:.:::
:.: :.''''' : :
:.:'' ,,xiW,"4x, ''
:  ,dWWWXXXXi,4WX,
' dWWWXXX7"     `X,
 lWWWXX7   __   _ X
:WWWXX7 ,xXX7'"^^X
lWWWX7, _.+,, _.+.,
:WWW7,. `^"-" ,^-'
 WW",X:        X,
 "7^^Xl.    _(_x7'
 l ( :X:       __ _
 `. " XX  ,xxWWWWX7
  )X- "" 4X" .___.
,W X     :Xi  _,,_
WW X      4XiyXWWXd
"" ,,      4XWWWWXX
, R7X,       "^447^
R, "4RXk,      _, ,
TWk  "4RXXi,   X',x
lTWk,  "4RRR7' 4 XH
:lWWWk,  ^"     `4
::TTXWWi,_  Xll :..
=-=-=-=-=-=-=-=-=-=
LEN "rabbi" SASSAMA
     1980-2011
Len was our friend.
A brilliant mind,
a kind soul, and
a devious schemer;
husband to Meredith
brother to Calvin,
son to Jim and
Dana Hartshorn,
coauthor and
cofounder and
Shmoo and so much
more.  We dedicate
this silly hack to
Len, who would have
found it absolutely
hilarious.
--Dan Kaminsky,
Travis Goodspeed
P.S.  My apologies,
BitCoin people.  He
also would have
LOL'd at BitCoin's
new dependency upon
   ASCII BERNANKE
:'::.:::::.:::.::.:
: :.: '''' : :':
:.:     _.__    '.:
:   _,^""^x,   :
'  x7'        `4,
 XX7            4XX
 XX              XX
 Xl ,xxx,   ,xxx,XX
( ' _,+o, | ,o+,"
 4   "-^' X "^-'" 7
 l,     ( ))     ,X
 :Xx,_ ,xXXXxx,_,XX
  4XXiX'-___-`XXXX'
   4XXi,_   _iXX7'
  , `4XXXXXXXXX^ _,
  Xx,  ""^^^XX7,xX
W,"4WWx,_ _,XxWWX7'
Xwi, "4WW7""4WW7',W
TXXWw, ^7 Xk 47 ,WH
:TXXXWw,_ "), ,wWT:
::TTXXWWW lXl WWT:
----END TRIBUTE----

A creature simulator in Basic

I found a simple character-based simulator in Basic. The idea is 5 creatures wander around the screen eating food blocks and breeding or dying. Unfortunately the code has a bunch of bugs and doesn't work.[10]

The original Bitcoin paper

In this transaction the Bitcoin blockchain contains the PDF for the original Bitcoin paper.

Thumbnail of the original Bitcoin paper.

Thumbnail of the original Bitcoin paper.

Rickrolls

Rickrolling is a popular internet prank, and Bitcoin is not immune. One rickroll was described above as part of the prayer dispute.[6] The lyrics to Never Gonna Give You Up! are found in a second rickroll.[11]

A third rickroll has the song metadata and lyrics encoded in Base-64.[12]

Catagory: Poetry
Title: Never Gonna Give You Up
Performer: Rick Astley
Writer: Mike Stock, Matt Aitken, Pete Waterman
Label: RCA Records
Released: 27, July, 1987

We're no strangers to love
You know the rules and so do I
A full commitment's what I'm thinking of
You wouldn't get this from any other guy
I just wanna tell you how I'm feeling
Gotta make you understand

Never gonna give you up,
Never gonna let you down
Never gonna run around and desert you
...

Photographs in a messaging system

Recently someone has built a message/storage system on top of Bitcoin that allows a growing sequence of messages, text, and images to be stored in the blockchain.[13]

Among other things, this system contains text from the Bhagavad Gita, 1000 digits of pi, multiple JPG and PNG images, a Shel Silverstein poem, a Rumi poem, and quotes from a random party. Here are some of the images stored in the blockchain using this system:

EMBIICompressedLogo.png: Image found in the Bitcoin blockchain.KruseEMBII.jpg: Image found in the Bitcoin blockchain.EhrichWeAreStarStuff.jpg: Image found in the Bitcoin blockchain.DriveHugPuddle.jpg: Image found in the Bitcoin blockchain.ILoveYouMore.jpg: Image found in the Bitcoin blockchain.

Some images found in the Bitcoin blockchain.

Wikileaks cablegate data

A 2.5 megabyte Wikileak files ('cablegate-201012041811.7z') was embedded in the Bitcoin blockchain.[14] The data is followed by a message explaining how to access it.[15]
Wikileaks Cablegate Backup

cablegate-201012041811.7z

Download the following transactions with Satoshi Nakamoto's download tool which
can be found in transaction 6c53cd987119ef797d5adccd76241247988a0a5ef783572a9972e7371c5fb0cc

Free speech and free enterprise! Thank you Satoshi!

5c593b7b71063a01f4128c98e36fb407b00a87454e67b39ad5f8820ebc1b2ad5
221d900b5ac701028f9dfab7dfba326f608308386d45c05432e721b7c122cba7
... 128 lines of transaction ids deleted ...
Downloading the data from the blockchain is inconvenient since the download tool needs to be used on the 130 chunks of 20 KB separately. (It's much easier to download the file from the internet.)

Cablegate data stored in Bitcoin

The blockchain contains the source code for Python tools to insert data into the blockchain and to download it.[16] In a weird self-referential twist, the downloader can be used to download itself. The uploader/downloader puts data into the destination address, but extends the previous technique by using Bitcoin escrow / multi-sig to put three addresses in each destination. It also uses a checksum to make storage more reliable.

Here's the code in the blockchain to insert data into the blockchain. While it says it was written by Satoshi Nakamoto (the pseudonymous author of Bitcoin), that's probably not true.

And here's the code to extract data from the blockchain.
The download tool is slightly buggy - the crc32 has a signed-vs-unsigned problem which suggests it wasn't used extensively.

Leaked firmware key and illegal primes

This transaction has a link about a leaked private key, followed by 1K of hex bytes as text, which supposedly is the private key for some AMI firmware.

The change from that transaction was used for this transaction, which references the Wikipedia page on illegal primes, followed by two supposedly-illegal primes from that page.

The change from that transaction was then used for the Wikileaks Cablegate messages, implying the same person was behind all these messages. It looks like someone was trying to store a variety of dodgy stuff in the Bitcoin blockchain, either to cause trouble or to make some sort of political point.

Email from Satoshi Nakamoto

The following email message allegedly from Bitcoin inventor Satoshi Nakamoto appears in the blockchain.[17] (It's almost certainly not really from him.) It seems to be referring to the removal of some Script opcodes from the Bitcoin server earlier and making the corresponding change to the Electrum server. My guess is this message is someone pointing out a bug fix for Electrum in a joking way.
From a3a61fef43309b9fb23225df7910b03afc5465b9 Mon Sep 17 00:00:00 2001
From: Satoshi Nakamoto <satoshin@gmx.com>
Date: Mon, 12 Aug 2013 02:28:02 -0200
Subject:[PATCH] Remove (SINGLE|DOUBLE)BYTE

I removed this from Bitcoin in f1e1fb4bdef878c8fc1564fa418d44e7541a7e83
in Sept 7 2010, almost three years ago. Be warned that I have not
actually tested this patch.
---
 backends/bitcoind/deserialize.py |    8 +-------
 1 file changed, 1 insertion(+), 7 deletions(-)

diff --git a/backends/bitcoind/deserialize.py b/backends/bitcoind/deserialize.py
index 6620583..89b9b1b 100644
--- a/backends/bitcoind/deserialize.py
+++ b/backends/bitcoind/deserialize.py
@@ -280,10 +280,8 @@ opcodes = Enumeration("Opcodes", [
     "OP_WITHIN", "OP_RIPEMD160", "OP_SHA1", "OP_SHA256", "OP_HASH160",
     "OP_HASH256", "OP_CODESEPARATOR", "OP_CHECKSIG", "OP_CHECKSIGVERIFY", "OP_CHECKMULTISIG",
     "OP_CHECKMULTISIGVERIFY",
-    ("OP_SINGLEBYTE_END", 0xF0),
-    ("OP_DOUBLEBYTE_BEGIN", 0xF000),
     "OP_PUBKEY", "OP_PUBKEYHASH",
-    ("OP_INVALIDOPCODE", 0xFFFF),
+    ("OP_INVALIDOPCODE", 0xFF),
 ])


@@ -293,10 +291,6 @@ def script_GetOp(bytes):
         vch = None
         opcode = ord(bytes[i])
         i += 1
-        if opcode >= opcodes.OP_SINGLEBYTE_END and i < len(bytes):
-            opcode <<= 8
-            opcode |= ord(bytes[i])
-            i += 1

         if opcode <= opcodes.OP_PUSHDATA4:
             nSize = opcode
--
1.7.9.4

Text in Bitcoin addresses

Bitcoin addresses are 34 characters long, so it is possible to put something interesting in the text address, although there are limitations.

The first option for putting text into an address is to test millions or billions of private keys by brute force in the hope of randomly getting a few characters you want in the public address. This generates a "vanity" address which is a valid working Bitcoin address. An example is Bitcoin Armory, which uses the donation address 1ArmoryXcfq7TnCSuZa9fQjRYwJ4bkRKfv. Note that only six desirable characters were found, and the rest are random. You can use the vanitygen command-line tool or a website like bitcoinvanity to generate these addresses.

Many people have recently received tiny spam payments from vanity addresses with the prefixes 1Enjoy... and 1Sochi... addresses. These payments don't get confirmed by miners and the purpose of them is puzzling.

The second option is to use whatever ASCII address you want (starting with a 1 and ending with a six-character checksum). Since there is no known private key for this address, any bitcoins sent to this address are lost forever. Despite this, some addresses have received significant amounts: 1BitcoinEaterAddressDontSendf59kuE. has received over 1.6 bitcoins (over $1000). 1111111111111111111114oLvT2 (hex 0) has received almost 3 bitcoins.

A very strange activity is the large-scale deliberate "burning" of bitcoins by sending them to 1CounterpartyXXXXXXXXXXXXXXXUWLpVr, where nobody can ever use them. Amazingly, this address has received over 2,130 bitcoins (about $1.5 million dollars worth) that are now lost forever. The motivation is that Counterparty is issuing their own crypto-currency (XCP) in exchange for destroyed bitcoins. The idea is that "proof-of-burn" is a more fair way of distributing currency than mining.

Mysterious encrypted data in the blockchain

There are many mysterious things in the blockchain that I couldn't figure out, that appear to be encrypted data.

Between June and September 2011, there were thousands of tiny mystery transactions from a few addresses to hundreds of thousands of random addresses sorted in decreasing order. These transactions are for 1 to 45 Satoshis, and have never been redeemed. As far as I can tell, the data is totally random. But maybe there is a secret message in the addresses or in the amounts. In any case, somewone went to a lot of work to do this, so there must be some meaning. [20]

One interesting thing is that the change address from the cablegate description was then used for three 86 kilobyte GPG-encoded files.[18] From the "magic numbers" at the beginning of these files I know that these are GPG files encrypted using CAST5, but what is in these files is a mystery. Without the passphrase, they can't be decrypted.

By following the change addresses, we can see that after submitting the "Satoshi" uploader and downloader, the same person submitted the Bitcoin PDF. The same person then submitted five mysterious files.[19] These files appear entirely random, so they may contain encrypted data.

Valentine's day messages

There are a bunch of Valentine's day messages in the blockchain from a couple days ago. I assume someone set up a service to do this.

How to put your own message in the blockchain

It's pretty easy to put your own 20-character message into the blockchain. The following steps explain how.
  1. Take your 20-character string and convert it to hex. E.g. in Python:
    'http://righto.com/bc'.encode('hex')
    
  2. Convert the resulting hex string to an address. An easy way is online: https://blockchain.info/q/hashtoaddress/your hex value yields 1AXJnNiDijKUnY9UJZkV5Ggdgh36aWDBYj.
  3. Send bitcoins to that address and your message will show up in the blockchain when your transaction gets mined. Important: those bitcoins will be lost forever, so send a very small amount, like 10 cents. My test message can be seen at the end of blk00113 here.

Summary

People have found a variety of ways to store strange things in the Bitcoin blockchain. I have touched on some of them here, but undoubtedly there are many other hidden treasures.

The notes to this article provides hashes for the interesting transactions, in case anyone wants to investigate further.

ASCII image of Bernanke from the Bitcoin blockchain.

ASCII image of Bernanke from the Bitcoin blockchain.

Notes and references

[1] Clients store the 16-gigabyte blockchain in the data directory. On Windows, this is C:\Users\userid\AppData\Roaming\Bitcoin. The blocks are stored in a sequence of 128 megabyte files blknnnnnn.dat. Syncing these files is why a full Bitcoin client takes hours to start up.

An easy way to see the ASCII contents of the blockchain is to visit bitcoinstrings.com.

[2] In the Bitcoin protocol, every mined block has a transaction that creates new bitcoins. Part of that transaction is an arbitrary coinbase field of up to 100 bytes in the Script language. Normally the coinbase field has data such as the block number, timestamp, difficulty, and an arbitrary nonce number.

The full coinbase in the genesis block is:

PUSHDATA: 04
bits value (mining difficulty): FFFF001D
PUSHDATA: 01
nonce value: 04
PUSHDATA: 45
'The Times 03/Jan/2009 Chancellor on brink of second bailout for banks': 5468652054696D65732030332F4A616E2F32303039204368616E63656C6C6F72206F6E206272696E6B206F66207365636F6E64206261696C6F757420666F722062616E6B73

[3] The message in the Genesis block is slightly different from the actual newspaper article: Chancellor Alistair Darling on brink of second bailout for banks.

[4] A brief overview of Bitcoin addresses will make this technique easier to understand. Normally, you start with a random 256-bit private key, which is necessary to redeem Bitcoins. From this, you generate a public key, which is hashed to a 160-bit address. This address is displayed in ASCII using a technique called Base58Check encoding. This ASCII address, such as 1LLLfmFp8yQ3fsDn7zKVBHMmnMVvbYaAE6, is the address used for transferring Bitcoins. But inside the transaction, the address is stored as the 160-bit (20 byte) hex value.

In normal use, you have no control over the 20-byte hex value used as an address. The trick for storing data in the transaction is to replace the address with 20 bytes of data that you want to store. For instance, the string This is my test data turns into the hex data '54686973206973206d7920746573742064617461'. If you send some bitcoins to that address, the bitcoins are lost forever (since you don't have the private key matching that address), but your message is now recorded in the Bitcoin blockchain.

See my earlier article for details on how Bitcoin addresses are generated.

[5] The Bitcoin logo was hidden in two transactions: ceb1a7fb57ef8b75ac59b56dd859d5cb3ab5c31168aa55eb3819cd5ddbd3d806 and 9173744691ac25f3cd94f35d4fc0e0a2b9d1ab17b4fe562acc07660552f95518.

If you look at the first ScriptPubKey of the first transaction, the address is 3d79626567696e206c696e653d3132382073697a, which turns into the ASCII text =ybegin line=128 siz. If you do this for all the addresses, you get an ecoded file. This file turns out to be encoded in the obscure yEnc encoding, designed in 2001 for transmitting binaries on Usenet. I hacked together some code to extract and decode the file, resulting in the bitcoin.jpg file shown above. There was some discussion of this logo in 2011, but I don't know if anyone has actually extracted the image until now.

[6] The prayers can be found in blk00003 and blk00004. Eligius is appropriately named after Saint Eligius the patron saint of goldsmiths and coin collectors. The Rickroll is here.

[7] For a while, the mysterious message /P2SH/ appeared in the coinbase field over and over. This string is an indication that the miner supports the pay-to-script-hash Bitcoin feature. The purpose of this was to ensure that more than 50% of the miners supported the feature before it was rolled out.

[8] The XSS attack demo is in transaction 59bd7b2cff5da929581fc9fef31a2fba14508f1477e366befb1eb42a8810a000. The JavaScript for the attack was put in the transaction's output script. The blockchain.info website displays the contents of the output script, but apparently didn't escape it as HTML. Thus, the contents <script> would not be displayed as text, but would be executed as part of the page. The demo only popped up an alert box, rather than running malicious JavaScript. The creator of the attack describes it on Reddit.

[9] A talk presents some details on the tribute (here). The data is in transaction 930a2114cdaa86e1fac46d15c74e81c09eee1d4150ff9d48e76cb0697d8e1d72. This tribute cost 1 BTC, 0.01 BTC per line.

[10] The Basic code is in block 3a1c1cc760bffad4041cbfde56fbb5e29ea58fda416e9f4c4615becd65576fe7, and it is stored in "uploader" format, with a donation to Satoshi's genesis block address 1A1zP1eP5QGefi2DMPTfTL5SLmv7DivfNa.

Unfortunately the code is a mess with GOSUBs without RETURNs, broken loops, half-implemented ideas, and unused variables, so the code doesn't work, which is disappointing. It's a mystery why someone would put this BASIC code into the blockchain.

[11] The Rick Astley lyrics are in transaction d29c9c0e8e4d2a9790922af73f0b8d51f0bd4bb19940d9cf910ead8fbe85bc9b. This data is included using the OP_RETURN technique, which was later supported as a non-hacky way to put data into the blockchain.

[12] The third rickroll has the data encoded in a structured format, maybe from some music database. The data format is base-64 metadatabase-64 lyrics The transaction is 0b4efe49ea1454020c4d51a163a93f726a20cd75ad50bb9ed0f4623c141a8008.

[13] The messaging system references "AtomSea & EMBII", who I assume are the creators. The chain started with address 12KPNWdQ3sesPzMGHLMHrWbSkZvaeKZgHt with 0.269 BTC on 2013-12-01 23:54:35 Each output is 0.000055 bitcoins, just over the current network minimum of .0000546 bitcoin. The next transaction in the chain can be found by looking at each change address, which pays for the next block. The chain ended when it ran out of bitcoins, at address 1DQwj8BDLWy9BMzX8uUcDYze3hx8q7uBy4.

In total, the data chain has 85KB of data including images, random quotes, and HTML. The system embeds filenames, lengths, and the data. There are also a lot of transaction ids stored in the data, presumably serving as an index.

[14] The 2.5 megabyte Cablegate file was stored in 130 separate transactions each holding 20,000 bytes of data, transactions 5c593b7b71063a01f4128c98e36fb407b00a87454e67b39ad5f8820ebc1b2ad5 to 2663cfa9cf4c03c609c593c3e91fede7029123dd42d25639d38a6cf50ab4cd44#o6". Each transaction includes a trivial 0.00000001 bitcoin donation to the Wikileaks donation address 1HB5XMLmzFVj8ALj6mfBsbifRoD4miY36v. This data is stored in checksummed download tool format.

[15] The cablegate description is in 691dd277dc0e90a462a3d652a1171686de49cf19067cd33c7df0392833fb986a, and is stored in "uploader" format. It's a bit circular that this message describes where to find the download tool, but the message itself needs the download tool to be read. Fortunately it's not too hard to read the message without the tool.

[16] The uploader is in transaction 4b72a223007eab8a951d43edc171befeabc7b5dca4213770c88e09ba5b936e17". The downloader is in transaction 6c53cd987119ef797d5adccd76241247988a0a5ef783572a9972e7371c5fb0cc.

In a cute touch, these transactions both donate 0.00000001 bitcoins to address 1A1zP1eP5QGefi2DMPTfTL5SLmv7DivfNa, which is Satoshi Nakamoto's address from the Genesis Block.

[17] This transaction, 77822fd6663c665104119cb7635352756dfc50da76a92d417ec1a12c518fad69 has an unusual scriptPubKey: OP_IF OP_INVALIDOPCODE 4effffffff 1443 bytes of data OP_ENDIF.

[18] The encrypted GPG files are in transactions 7379ab5047b143c0b6cfe5d8d79ad240b4b4f8cced55aa26f86d1d3d370c0d4c#o448, d3c1cb2cdbf07c25e3c5f513de5ee36081a7c590e621f1f1eab62e8d4b50b635#o448, and cce82f3bde0537f82a55f3b8458cb50d632977f85c81dad3e1983a3348638f5c.

[19] To "follow the money", the PDF transaction put change into address 1HT8vpTV1wj2ck6jgW7my6vCtJQv14Cdp. This address funded the embedding of a 10KB mystery file in this transaction. The change from that was used for another file here, followed by this, this, and this. These uploaded file transactions all included 0.001 BTC donations to 1JVQw1siukrxGFTZykXFDtcf6SExJVuTVE, the 50BTC.com address.

[20] Some addresses associated with the mystery transactions are: 18qr2srETSvQq4kP7yBYRqQ4LzmjhtRmcD, 1MaZAHzEFfinRJ2dwK6YtNDfvWMBkiAxDr, 1AgwESN7RKNZtaqzbqu6kPg3RS6C2qCgHi, 1AZUPm5PC5QguquNsBg7HhWUYz5dfm2nU9, and 1J1aR7ayNp9sma8QVyyWGF87PzDU1vp5BD.

Examining the core memory module inside a vintage IBM 1401 mainframe

$
0
0
The IBM 1401 mainframe computer was announced in 1959 and by the mid-1960s had become the best-selling computer, extremely popular with medium and large businesses because of its low cost. A key component of the 1401's success was its 4,000 character core memory, which stored data on tiny magnetized rings called cores.

The core memory module from the IBM 1401 mainframe. The core plane at the right counts holes as part of card read validation. This plane is only partially filled with cores, strung along the red wires. The yellow wires connect the read brushes and the print hammers directly to cores.

The 4000-character core memory module from the IBM 1401 mainframe.

The core module is surprisingly complex, as can be seen above, with thousands of tiny cores mounted on red wires. The module consists of 16 frames stacked together and requires a large amount of wiring. The remainder of the article will dive into the details of this core module. (For an overview of the 1401, see my articles about Bitcoin mining and fractals on the 1401.)

The IBM 1401 mainframe from the 1960s. The 1403 line printer is to the right, and a 792 tape drive at the back.

The IBM 1401 mainframe from the 1960s. The 1403 line printer is to the right, and a 792 tape drive at the back.

The IBM 1401 mainframe (above) is about the size of two refrigerators. The core memory module in the 1401 can be accessed by swinging open the computer's front panel, as seen below. The console switches, lights, and wiring are on the left. The core module itself is in the center, mostly hidden behind the brown circuit board.

Opening the console panel (left) of the IBM 1401 mainframe shows the 4K core memory unit (center).

Opening the console panel (left) of the IBM 1401 mainframe shows the 4K core memory unit (center).

The diagram below illustrates how the character 'A' is stored in core memory. Each bit of data in memory is stored in a tiny ferrite ring or core. These cores can be magnetized in one of two directions, corresponding to a 0 or 1 bit. The cores are arranged into a grid of 4000 cores, called a plane. To select an address, an X wire and a Y wire are activated, selecting the cores where those two wires cross. Each plane stores one bit and planes are stacked up to store a character. You might expect 8 planes are used to store a byte, but the IBM 1401 predates bytes; it uses 6-bit characters based on BCD (binary-coded decimal). Each location also has a special metadata bit called the "word mark", indicating the start of a field or instruction. Adding the parity bit yields eight bits of storage at each address.

Diagram from the 1401 Reference Manual representing how the character 'A' is stored in core memory.

Diagram from the 1401 Reference Manual representing how the character 'A' is stored in core memory.

Because the IBM 1401 was a business computer, it uses decimal arithmetic rather than binary arithmetic; each character is a binary-coded decimal value, along with two extra "zone bits" for alphanumeric characters. Since the 1401 uses three-character addresses, you might expect that it could only access 1000 locations. The trick is the two zone bits of the hundreds character provided the thousands digit 0 to 3. A consequence is that addresses above 1000 turn into alphanumerics instead of digits; location 2345 is addressed as L45.

Properties of ferrite cores

The physical properties of ferrite cores are critical to the operation of the core memory, so it is important to understand them. First, if a wire through a core carries a strong current, the core will be magnetized according to the direction of the current (following the right-hand rule). Current in one direction will write a 1 to the core, while the opposite current will cause the opposite magnetization and write a 0 to the core.

Hysteresis is a key property of the cores: current must exceed a threshold to affect a core's magnetization. A small current will have no effect on the core, but a current above a threshold will cause the core to "snap" into the magnetized state aligned with the current.

Closeup of the ferrite cores from the IBM 1401 mainframe's 4K storage. Four wires run through each core: X select, inhibit, Y select, and sense.

Closeup of the ferrite cores from the IBM 1401 mainframe's 4K storage. Four wires run through each core: X select, inhibit, Y select, and sense.

The hysteresis property makes it possible to select a particular core. A "half-write" current is sent through the appropriate X select wire and a "half-write" current through the Y select wire. The single core with the selected X and Y wires will have enough current to change state, but the other cores will not have enough current, and will remain unchanged.

The final important property is that when a core switches its direction of magnetization, it induces a current in a sense wire through the core (kind of like a transformer). If the core already has the target state and doesn't change magnetization, no current is induced. This induced current is used to read the state of a core. A consequence is that reading a core erases it, and the desired value must be written back to the core.

Structure of a core plane

Each core plane has 4000 cores arranged as a 50x80 grid of cores. (The I/O planes are configured differently, and will be explained later.) To reduce interference, the ferrite cores are arranged in a "checkerboard" pattern with each core arranged diagonally in the opposite direction from its neighbors. Four wires pass through each core. The horizontal wires are the X select line and the inhibit line (used for writing). The vertical wires are the Y select line and the sense line (used for reading). The X and Y select lines go through all the planes, so all planes are accessed in parallel.

Core memory in the IBM 1401. Each plane of cores has 4000 cores in a 80x50 grid.

Core memory in the IBM 1401. Each plane of cores has 4000 cores in a 80x50 grid.

To read a core, the X and Y select lines magnetize the selected cores to the "0" direction. If the core was previously in the "1" state, the core's state change induces a current in the sense wire. If the core was already in the "0" state, no current is induced. Thus, the sense wire allows the bit stored in the core to be determined. The read process destroys the previous value of the core, leaving it in the 0 state. Each plane has a sense wire threaded through all the cores in the plane.

To write a core, current of the opposite polarity is sent through the X and Y select lines to magnetize the core into the 1 state. To keep the core in the 0 state, a current is sent through the plane's inhibit line. The inhibit wire runs through all the cores in a plane parallel to the X select lines. By running the reverse current through the inhibit wire, the X line's current is canceled out, and the core remains unchanged. The inhibit current is too low to flip a core by itself, so other cores are not zeroed out.

The diagram below shows the reverse-engineered wiring topology of an IBM 1401 core memory plane. Most of the core has been cut out of the diagram, as indicated by the dotted gray lines. The sides of the plane are labeled A through D, matching the 1401 documentation. The A and C sides have 56 pins, while the B and D sides of the plane have 104 pins. Not all the pins are connected.

The wiring topology of the IBM 1401's core memory plane.

The wiring topology of the IBM 1401's core memory plane.

The X select lines are in green and the Y select lines are in red. The select lines are generated in a complex way by matrix switches, so core addresses are not arranged sequentially. Each matrix switch takes two sets of input lines and activates an output line based on the input values. The 5x10 X matrix switch has 5 row inputs and 10 column inputs, producing 50 outputs, which are the X select lines. The 10 column inputs come from the units digit, and the 5 row inputs are the "even hundreds" digit. The 8x10 Y matrix switch has 8 row inputs and 10 column inputs, producing 80 outputs for the Y select lines. The 10 column inputs are from the tens digit and the 8 row inputs are a tricky combination of the thousands and "odd hundreds". This scheme may seem overly complicated, but it minimizes the hardware required for address decoding.

Each half of the core plane (0-1999 and 2000-3999) has a separate sense line loop, but they are usually wired together. The two sense lines are in blue and run in the Y direction. The sense lines are carefully arranged to avoid picking up interference. The lines cross over along the midpoint to cancel out noise from the Y select lines - the sense line runs in the opposite direction along half of each Y select line, so any induced signal will be canceled out. In addition, the sense lines are twisted as they exit the middle of the plane, to avoid picking up interference. (Many other core memory systems avoid interference by running the sense line diagonally, but the 1401 uses a rectangular layout.)

Each half of the plane has a separate inhibit line. The two inhibit lines are in brown and run next to the X select lines, which they inhibit. The two lines are normally driven separately to reduce noise, but have the same signal. Since the inhibit line switches direction each row, alternating X select lines are also driven in opposite directions.

The card reader/punch, the printer, and the I/O cores

One unusual feature of the core module is the eight special-purpose I/O frames: six core planes and two terminal frames. To understand the I/O cores, some background on the IBM 1401 is necessary. The 1401 was used in business applications such as accounting and payroll, so accuracy was extremely important. If a malfunction caused bad payroll checks to be printed, it would be a catastrophe. To catch problems, IBM put many types of validity checking into the 1401, making it much more reliable than competitors. The basic I/O devices for the 1401 were the card reader/punch and the line printer, separate units from the computer itself and the I/O cores detected problems with these devices.

The I/O planes are addressed exactly the same as the data planes. However, the I/O planes are very sparse, with only 297 cores rather than 4000 cores, so most locations have no storage as can be seen in the photo below. These planes are accessed by the I/O circuitry, and are invisible to the programmer.

Closeup of the IBM 1401's core memory. The row bit core planes are used for I/O and are sparsely populated.

Closeup of the IBM 1401's core memory. The row bit core planes are used for I/O and are sparsely populated.

The IBM 1401 uses 80-character punch cards. You might expect the card reader to read each character on the card in sequence and send the character to the computer, but that's not at all how it works. Instead, the card reader processes each card "sideways" for speed, using 80 metal brushes to read a row at a time. If a card has a hole in a position, the brush contacts a metal roller under the card, completing a circuit. The brushes are connected to the IBM 1401 by 80 wires, one for each brush. Each wire is connected directly to a "row-bit core" in the core memory module, setting the core if a hole was detected. There's no driver circuitry or memory addressing; it's literally a separate wire from each brush that is wrapped 5 times around a core. Let me emphasize how unusual this is: it's like having a separate wire from each key on your keyboard directly to a specific transistor in your memory chip.

The card reader/punch has three read stations: RD1 and RD2 for reading, and PCH for reading after punching. Since each read station has 80 brushes, 240 wires connect the brushes to the 240 row-bit cores. (As you might have guessed, the cables between the 1401 computer and the reader/punch are very thick.) As well as the row-bit cores, reading/punching uses core planes called XU, YU, XL, and YL to count the number of holes detected in each position. If the two read stations have different hole counts, the computer stops and reports a fault. Likewise, the count is checked after punching a card to make sure all holes were punched correctly.

The high-speed line printer uses 132 hammers to produce 132-column output. A chain with the 48 printable characters whizzes around horizontally. As each character on the chain passes a position where it should be printed, a hammer fires at the precise time, hitting the paper against the inked ribbon to print the character. The I/O cores are also used to detect problems in the printing process.

Printing uses several different core planes for multiple validity checks. Each of the 132 print hammers is wired directly to a "hammer-fire core" in the memory module. The XU core plane is used during printing for the print-compare check: a bit is set in the XU plane if a hammer should fire for the character position. These 132 bits are compared with the hammer-fire cores to verify that the correct hammers fired. Plane YL holds print-line complete cores that verify that every character position either printed a character or holds a non-printable character. Finally, to aid printer maintenance, plane YU records the location of any fault in print-error storage core.

Physical layout of the core module

The core module consists of 16 frames in a stack - 14 core planes and two terminal frames. The upper 8 frames hold the character data planes and the lower 8 frames are the I/O frames. The following table shows the usage of each frame. The terminal frames do not contain cores, but provide connections for the large wire bundles from the reader brushes and the print hammers.

1:Bit 8
2:Bit 4
3:Bit 2
4:Bit 1
5:Bit A
6:Bit B
7:Parity
8:Word Mark
9:Terminals for frame 10
10:Card reader brushes (RD2), punch brushes (PCH)
11:Terminals for frame 12
12:Card reader brushes (RD1), print hammers (PRT)
13:XU (I/O)
14:YU (I/O)
15:XL (I/O)
16:YL (I/O)

The picture below shows the large amount of wiring required by the core module. Frame 16 (YL) is at the left and frame 1 (bit 8) is at the right. The two matrix switches are on the front of the module: the 8x10 switch for the Y select lines is at top, and the 5x10 switch for the X select lines is at the bottom.

The core memory module from the IBM 1401 mainframe.

The core memory module from the IBM 1401 mainframe.

The yellow wires at the left and right connect the Y select lines on frame 16 and frame 1 to the 8x10 matrix switch. Two bundles of wires connect to I/O planes near the middle of the module. One connects the brushes in the card reader and the printer hammer drivers to terminals on frame 11. The other bundle connects read brushes and punch check brushes to terminals on frame 9. The horizontal wire bundle across the middle of the planes connects the inhibit lines of each plane.

The photo below provides another view, focusing on the data plane wiring. At front is frame 1, the core plane for data bit 8, with the gray cores visible on red wires. The other 15 frames are layered behind frame 1. The two matrix switches are on top. The 8x10 matrix switch is connected to the Y select lines on the top and the 5x10 matrix switch is connected to the X select lines on the left.

The core memory module from the IBM 1401 mainframe. The cores in one of the planes are visible, strung along red wires. At the top, two matrix decoder boards generate the 50 X select lines and 80 Y select lines, addressing one of 4000 storage locations. The X select lines are connected to the core planes by the yellow wires on the left side of the core module, while the Y select lines are connected on top.

The core memory module from the IBM 1401 mainframe. The cores in one of the planes are visible, strung along red wires. At the top, two matrix decoder boards generate the 50 X select lines and 80 Y select lines, addressing one of 4000 storage locations. The X select lines are connected to the core planes by the yellow wires on the left side of the core module, while the Y select lines are connected on top.

The detailed block diagram below shows how the components are connected in the 1401's core memory system. This diagram shows the physical arrangement of the 16 frames in the core memory module, along with the driver circuitry. The inhibit drivers are at the upper left, feeding each core plane. The sense amplifiers are at the upper right. The 5x10 X matrix switch is in the lower left, and the 8x10 Y matrix switch is in the lower right. Note the read brushes, punch brushes, and print hammer drivers are wired directly into the core module through the terminal frames. The diagram also shows the timing of the read and write pulses, and how they have opposite polarity, writing 0 and 1 respectively.

Diagram of the core memory system in the IBM 1401 mainframe.

Diagram of the core memory system in the IBM 1401 mainframe from ALD 42.41.11.2.

The matrix switches

Generating the X and Y select signals is a tricky problem. The drive signals must have a positive pulse of the right current and duration for reading, followed by a negative pulse for writing. In addition, the number of select lines is large (50 X and 80 Y), so hardware costs would be excessive if each line had its own driver circuitry.

The 1401 uses an interesting solution to drive the select signals. Matrix switches generate the select signals by using a set of ferrite cores. But instead of storage, these cores are used for their switching properties. As with storage, the matrix switch depends on the "coincident current" property, where two signals of sufficient current will cause a core to snap to the opposite magnetization. But instead of being used for storage, the cores in the matrix switch generate a drive signal.

The 5x10 matrix switch in the IBM 1401 mainframe.
This board provides the drive signals for the core module.

The 5x10 matrix switch in the IBM 1401 mainframe. This board provides the drive signals for the core module.

The photo above shows the X matrix switch, with 5 row inputs, 8 column inputs, and 40 outputs (connected on the back). The switch consists of 50 cores in a 5 by 10 grid, with 5 lines driving the rows and 10 lines driving the columns. Each core also has an output winding and a bias winding. When two input lines are triggered, the corresponding core flips state, generating a pulse on the output winding. When the input lines are released, the bias winding flips the core back to its original state, generating a negative pulse on the output winding. Thus, the desired one of the 50 outputs has a positive pulse followed by a negative pulse, which is just what the core module requires for read followed by write.

The photo below shows the wiring of the matrix switch cores. The bias wire (black) is wound through pairs of cores three times. Each horizontal input wire (red) is wound through pairs of cores about twelve times, as are the vertical input wires. Each core has an output wire wound diagonally about twelve times.

Closeup of the matrix switch used in the IBM core memory.
Each ferrite ring drives one of the select lines in the core memory.

Closeup of the matrix switch used in the IBM core memory. Each ferrite ring drives one of the select lines in the core memory.

How core memory is mounted in the 1401

The following picture shows the core memory module mounted in its rack, along with the many SMS cards required by the core module. (IBM built computers from Standard Modular System cards, each about the size of a playing card and holding a few transistors and other components.) At the left are the driver cards and current source cards that drive the matrix switch boards, and the driver cards for the inhibit lines. The next column holds the address decode cards. The address lines plug into the empty sockets at the bottom. The next column holds the sense line pre-amplifier and amplifier cards. The core module itself is mounted with the matrix switch cards on top. At the far right are the sockets for the hundreds of wires from the brushes and print hammers.

Core memory module and associated circuit board from an IBM 1401 mainframe. Photo courtesy of Rob Storey.

Core memory module and associated circuit board from an IBM 1401 mainframe. Photo courtesy of Rob Storey.

The photo below shows the core module mounted inside the IBM 1401 mainframe, looking into the left end of the computer. The core module is behind the bundle of black and yellow wires, mostly address lines. The matrix switches are on the left. The colorful brush and hammer wires are connected via paddles underneath the core module. The SMS driver cards are above the core module, mostly behind a metal cover for airflow.

The core memory module inside the IBM 1401 mainframe. The module is in the lower right, with the driver cards above

The core memory module inside the IBM 1401 mainframe. The module is in the lower right, with the driver cards above

The photo shows some other interesting features of the 1401. At the top of the computer is the time meter that records how much time the computer has been running. IBM usually leased the 1401 and if you used the computer more than 8 hours per day, they would charge you for the excess. (Unless, of course, you paid for the 24/7 lease.) In the upper right is the "convenience" outlet located inside the computer, a standard electrical outlet. Below the outlet is the wiring on the back of the front console. The computer didn't use a backplane; instead, many loose bundles of wires connected circuitry modules, as you can see at the bottom of the photo.

Conclusion

Core memory was the leading memory technology from the mid-1950s until it was replaced by semiconductor memory in the early 1970s. For its time, core memory provided dense, reliable, and inexpensive storage, but memory technology has improved incredibly since then. The 1401 had a 11.5 microsecond memory cycle time, compared to 5 nanoseconds for modern RAM. While the 1401 had 4000 characters of storage (expandable to 16K), modern computers have many gigabytes. Adding a 4K memory expansion to the 1401 cost $20,100 ($162,000 in current dollars). Now a 16 gigabyte memory costs under $100. But even though it is obsolete, core memory is still an interesting technology to examine.

Thanks to the members of the 1401 restoration team and the Computer History Museum for their assistance The IBM 1401 is demonstrated at the Computer History Museum on Wednesdays and Saturdays (subject to hardware problems) so check it out if you're in Silicon Valley (schedule).

References

The IBM 1401 core module is documented in detail in 1401 ALD 42 and 1401 Instructional Logic Diagrams. For more information on core memory, see Coincident Current Ferrite Core Memories and Magnetic Core Memory Systems.

Fixing the core memory in a vintage IBM 1401 mainframe

$
0
0
I recently had the chance to help fix one of the vintage IBM 1401 computer systems at the Computer History Museum when its core memory started acting up. As you might imagine, keeping old mainframes running is a difficult task. Most of the IBM 1401 restoration and repairs are done by a team of retired IBM engineers. But after I studied the 1401's core memory system in detail, they asked if I wanted to take a look at a puzzling memory problem: some addresses ending in 2, 4 or 6 had started failing.

An IBM 1401 mainframe computer at the Computer History Museum. Behind it is the IBM 1406 Storage Unit, providing an additional 12,000 characters of storage. IBM 729 tape drives are at the right and an IBM 1402 Card Read Punch is at the far left.

An IBM 1401 mainframe computer at the Computer History Museum. Behind it to the left is the IBM 1406 Storage Unit, providing an additional 12,000 characters of storage. IBM 729 tape drives are at the right and an IBM 1402 Card Read Punch is at the far left.

The IBM 1401 was low-end business computer that became the most popular computer of the early 1960s due to its low cost: $2500 a month, Like most computers of its era it uses ferrite core memory, which stores bits on tiny magnetized rings. The photo below shows a closeup of the ferrite cores, strung on red wires.

Closeup of the core memory in the IBM 1401 mainframe, showing the tiny ferrite cores.

Closeup of the core memory in the IBM 1401 mainframe, showing the tiny ferrite cores.

The 1401 had only 4,000 characters of storage internally, but could hold 16,000 characters with the addition of the IBM 1406 Storage Unit. This core memory expansion unit was about the size of a dishwasher and was connected to the 1401 computer by two thick cables.[1] This 12,000 character expansion box could be leased for $1575 a month or purchased for $55,100. (In comparison, a new house in San Francisco was about $27,000 at the time.) The failing memory locations were all in the same 4K block in the IBM 1406, which helped narrow down the problem.

A view inside the IBM 1406 Storage Unit, which provides 12,000 characters of storage for the IBM 1401 mainframe. At the left is the 8,000 character core module below the cards that control it.

A view inside the IBM 1406 Storage Unit, which provides 12,000 characters of storage for the IBM 1401 mainframe. At the left is the 8,000 character core module below the cards that control it.
The 1406 contains two separate core memory modules: one with 8,000 characters and one with 4,000 characters. In the picture above, the 8K core module is visible on the left, while the 4K core module is out of sight at the back right. Associated with each core module is circuitry to decode addresses, drive the core module, and amplify signals from the module; these circuits are in three rows of cards above each module. The 1406 also provided an additional machine opcode (Modify Address) for handling extended addresses. Surprisingly, the logic for this new opcode is implemented in the external 1406 box (the cards on the right), not in the 1401 computer itself. The 1406 box also contains hardware to dump the entire contents of memory to the line printer, performing a core dump.

The circuits in the 1406 (and the 1401) are made up of Standardized Module System (SMS) cards. A typical card has a few transistors and implements a logic gate or two. Unlike modern transistors, these transistors are made from germanium, not silicon. The photo below shows rows of SMS cards inside the 1406. Note the metal heat sinks on the high-current transistors driving the core module.

A closeup of SMS cards inside an IBM 1406 Storage Unit. The top cards have heat sinks on high-current driver transistors.

A closeup of SMS cards inside an IBM 1406 Storage Unit. The top cards have heat sinks on high-current driver transistors.
The core memory is made from planes of 4,000 cores, as seen below. Each plane is built from a grid of 50 by 80 wires, with cores where the wires cross. By simultaneously energizing one of the 50 horizontal (X) wires and one of the 80 vertical (Y) wires, the core at the intersection of the two wires is selected. Each plane holds one bit of each character, so 8 planes are stacked to hold a full character.

Core memory in the IBM 1401 mainframe. Each layer (plane) has 4,000 tiny cores in an 80x50 grid. Multiple planes are stacked to form the memory.

Core memory in the IBM 1401 mainframe. Each layer (plane) has 4,000 tiny cores in an 80x50 grid. Multiple planes are stacked to form the memory.
The photo below shows the 8K memory module inside the 1406, built from a stack of 16 core planes. (Since a stack of 8 planes makes 4K, 16 planes make 8K.) Mounted on the right of the core module are the "matrix switches", which drive the X and Y select lines; my previous core memory article explains them.

The 8,000 character core memory in the IBM 1406 Storage Unit consists of 16 layers (planes) of cores wired together. The matrix switches at the right (behind plastic) drive the control lines.

The 8,000 character core memory in the IBM 1406 Storage Unit consists of 16 layers (planes) of cores wired together. The matrix switches at the right (behind plastic) drive the control lines.
The IBM 1401 is a decimal machine and it uses 3-digit decimal addresses to access memory. The obvious question is how can it access 16,000 locations with a 3-digit address. To understand that requires a look at the characters used by the IBM 1401.

The IBM 1401 predates 8-bit bytes, and it used 6-bit characters. Each character consisted of a 4-bit BCD (binary-coded decimal) digit along with two extra "zone" bits. By setting zone bits, letters and a few symbols could be stored. For instance, with both zone bits set, the BCD digit values 1 through 9 corresponded to the characters "A" through "I". Other zone bit combinations provided the rest of the alphabet. While this encoding may seem strange, it maps directly onto IBM punched cards, which have 10 rows for the digit and two rows for zone punches. This encoding was called BCDIC (Binary-Coded Decimal Interchange Code), and later became the much-derided EBCDIC (Extended BCDIC) encoding. (You may have noticed that 8 planes are used for 6-bit characters. One extra plane holds special "word mark" bits, and the other holds parity.)

The point of this digression into IBM character encoding is that a three-digit address also included 6 zone bits. Four of these bits were used as part of the address, allowing 16,000 addresses in total.[2] For example, the address 14,578 would be represented as the digits 578 along with the appropriate zone bits, so the resulting address would be represented as the three characters "N7H".[3]

Getting back to the problem with the memory unit, the 4K bank was failing with addresses ending in 2, 4 and 6. Looking at 2, 4 and 6, I immediately concluded that what these all had in common was the 2 bit was set. Except 4 doesn't have the 2 bit set. So maybe the problem was with even addresses. Except 0 and 8 worked. After staring at bit patterns a while, I became puzzled because 2, 4 and 6 didn't really have anything in common.

Looking at the logic diagrams reveals the hardware optimization that makes 2, 4, and 6 have something in common. Since the problem happened with specific unit digits, the problem was most likely in the address decoding circuitry that translates the unit digit to a particular select line.[4] The normal way of decoding a digit is to look at the 4 bits of the digit to determine the value. Unexpectedly, the decoder only looks at 3 bits; this reduces the hardware required, saving money. For instance, the digit 2 is detected below if the 4 bit is clear, the 1 bit is clear, and the 8 bit is clear. The digit 4 is detected if the parity (CD) bit is clear, the 4 bit is set, and the 1 bit is clear. The digit 6 is detected if the 1 bit is clear, the 2 bit is set, and the 4 bit is set.[5] Looking at the decode logic, decoding of the digits 2, 4, and 6 (and only these digits) tests that the 1 bit is clear. Now the failure starts to make sense. If something is wrong with the units 1-bit-clear signal, these digits would not be decoded properly and memory would fail in the way observed.

The Instructional Logic Diagrams (ILD) for the IBM 1401 explain the circuitry of the computer. The above diagram shows the address decode logic used for the core memory.

The Instructional Logic Diagrams (ILD) for the IBM 1401 explain the circuitry of the computer. The above diagram shows part of the address decode logic used for the core memory.
The next step was to figure out how the units 1-bit-clear signal could be wrong. You'd expect a failure of one address bit to be catastrophic, not just limited to one memory bank. Looking at the specifics of the decoder circuitry revealed the problem.

Every connection and circuit of the IBM 1401 is documented in an Automated Logic Diagram (ALD). These diagrams were generated by computer and put in a set of binders for use by service engineers. The code number 42.73.11.2 on the previous diagram provides the page number of the related ALD. While these diagrams are extremely detailed, they are nearly incomprehensible. Since I'm using copies of reduced 50-year-old line printer output, the ALDs are also barely readable.

The Automated Logic Diagrams (ALD) for the IBM 1401 mainframe computer consist of hundreds of pages that show every card and connection in the computer. The above diagram shows part of the address decode circuitry in the IBM 1406 Storage Unit.

The Automated Logic Diagrams (ALD) for the IBM 1401 mainframe computer consist of hundreds of pages that show every card and connection in the computer. The above diagram shows part of the address decode circuitry in the IBM 1406 Storage Unit.
The diagram above shows part of the ALD for the units memory address decoding. Each box corresponds to a logic component on an SMS card and the lines show the wiring between cards. At the bottom of each box, "AEM-" indicates the type of SMS card. The reference information for an AEM/AQU card reveals that it is a Switch Decode card with two circuits. Each circuit combines an inverter, a three-input AND gate, and a high-current driver.[6]

Now we can see the root cause of the problem. The unit address bit 1 (highlighted in red on the ALD) goes into pin A of the Units 4 card and is inverted. The inverted value (pin D, yellow) then goes to the Units 2 and Units 6 cards, generating the decode outputs (green). If something is wrong with this signal, addresses 2, 4, and 6 won't decode, which is exactly the problem encountered. Thus, the Units 4 card seemed like the problem.

This IBM Standard Modular System (SMS) card is used by the core memory to decode addresses. It has two high-current outputs, driven by the germanium transistors at the top with red heat sinks.

This IBM Standard Modular System (SMS) card is used by the core memory to decode addresses. It has two high-current outputs, driven by the germanium transistors at the top with red heat sinks. The card type "AEM" is stamped into the bottom left of the card.
The diagram above indicates that the Units 4 card is card E15 in rack 06B5, which is in the right rear of the 1406 unit.[7] Once I'd located the right rack, I needed to find card E15. The three rows of cards are D through F (top). I counted to position 15 of 26 in row E. The photo below shows the position of the card (red arrow).

Circuitry inside the IBM 1406 Storage Unit. The green arrow indicates the 4,000 character core memory. The cards above it control the memory. The top row of cards has high-current drivers for the memory. The cards in the middle row decode addresses. The bottom row contains amplifiers to read the signals from the memory. The red arrow indicates the position of the faulty card. The fan above the cards provides cooling airflow. At the right, colorful wire bundles connect the circuitry.

Circuitry inside the IBM 1406 Storage Unit. The green arrow indicates the 4,000 character core memory. The cards above it control the memory. The top row of cards has high-current drivers for the memory. The cards in the middle row decode addresses. The bottom row contains amplifiers to read the signals from the memory. The red arrow indicates the position of the faulty card. The fan above the cards provides cooling airflow. At the right, colorful wire bundles connect the circuitry.

One convenient thing about the IBM 1401 and its peripherals is they are designed for easy maintenance. In many cases, you don't even need any tools. To get inside the IBM 1406, you just pop the front or side panels off (as shown below). The SMS cards have a metal cover to guide the cooling airflow, but that just pops off too. It's easy to attach an oscilloscope to see what's happening, although I didn't need to do that. The SMS cards themselves are easily pulled from their sockets. I'm told you don't even need to power down the system to replace cards, but of course I turned off the power.

Inside the IBM 1406 Storage Unit. At the left are the power supplies, including a 450W ferro-resonant regulator. The 8K core memory is at the right, connected by yellow wire bundles to the control circuitry above.

Inside the IBM 1406 Storage Unit. At the left are the power supplies, including a 450W ferro-resonant regulator. The 8K core memory is at the right, connected by yellow wire bundles to the control circuitry above.

I pulled out the card in slot E15, plugged in a replacement card from the 1401 lab's collection, and powered up the system. Much to my surprise, the memory worked perfectly after replacing the card. Some of the engineers (Stan, Marc, and Dave) tested the transistors on the bad card but didn't find any problems. After cleaning the bad card and swapping it back, the memory still worked, so there must have been some dirt or corrosion making a bad connection. They say this is the first problem they've seen due to bad connections, so the thick gold plating on the SMS card contacts must work well.

Conclusion

It's not every day one gets the chance to help fix a 50 year old mainframe, so it was an interesting experience. I was lucky that this problem turned out to be easy to resolve. The guys repairing the tape drives and card reader have much harder problems, since those devices are full of mechanical parts that haven't aged well.

Thanks to the members of the 1401 restoration team and the Computer History Museum for their assistance. Special thanks to Stan Paddock, Marc Verdiell and Dave Lion for inviting me to investigate this problem.

The IBM 1401 is demonstrated at the Computer History Museum on Wednesdays and Saturdays (unless there is a hardware problem) so check it out if you're in Silicon Valley (schedule).

Notes and references

[1] The 1406 expansion unit was 29" wide, 30 5/8" deep and 39 5/8" high and weighed 350 lbs. The 10 foot cables between the 1401 computer and the 1406 storage unit are each 1 1/4" thick; one provides power and the other has signals. The 1406 generates 250 watts of heat, which is less than I would have expected. Details are in the installation manual.

[2] The three-digit address has six zone bits in total. Four are used as part of the address. The other two zone bits to indicate an indexed address using one of three index registers (which are actually part of core, not separate registers). Indexed addressing was part of the "Advanced Programming" option which cost an extra $105 per month.

[3] For full information on converting addresses to characters, see the IBM 1401 Pocket Reference Manual, page 3.

[4] Scans of the Instructional Logic Diagrams (ILDs) are available online. The memory decode circuits are on page 56. Scans of the Automated Logic Diagrams (ALDs) are also available online; the core memory is in section 42.

[5] The IBM 1401 predates standardized logic symbols, so the logic diagram symbols may be confusing: the triangular symbol is an AND gate. The SWD (Switch Decode) card inverts its inputs, but that isn't shown on the logic diagram.

There are few subtleties in the decoding logic. You might think that the circuit described would decode a 0 digit as a 2 digit since the 1, 4, and 8 bits are clear. However, the IBM 1401 stores the digit 0 as the value 10 (8 bit and 2 bit set), since a blank is stored with all bits clear.

For the decoding using the parity bit, note that the IBM 1401 uses odd parity. For instance, the digit 4 (binary 0100) already has odd parity, so the CD (check digit) parity bit is clear. The digit 5 (binary 0101) has the CD parity bit set so three bits are set in total.

[6] The original idea of SMS cards was to build computers from a small set of standardized cards, but as you can guess from the complexity of the AEM card, engineers created highly-specialized SMS cards for specific purposes. IBM ended up with thousands of different SMS card types, defeating the advantages of standardization. I've created an SMS card database that describes a thousand different SMS cards.

[7] The 06B5 designation indicates which gate holds the card. (Each rack of cards is called a "gate" in IBM terminology. Confusingly, this has nothing to do with a logic gate.) The 06 indicates the 1406 frame. The B indicates a lower frame. Position 5 is in the back right. The same numbering system is used in the IBM 1401 itself. The 1401 is built around the same frame structure as the 1406, except with four frames, stacked 2x2. The left frames are numbered 01, and the right frames are 02. The frames on top are A, and the frames on the bottom are B. Gates 1 through 4 are in the front, and 5 through 8 continue around the back. A typical 1401 gate identifier is "01B2", which indicates the rack on the front of the 1401 below the console. (The use of frames to build computers and peripherals led to the term "main frame" to describe the processing unit itself.)

Qui-binary arithmetic: how a 1960s IBM mainframe does math

$
0
0

The IBM 1401 computer uses an unusual technique called qui-binary arithmetic to perform arithmetic. In the early 1960s, the IBM 1401 was the most popular computer, used by many businesses for the low monthly price of $2500. For a business computer, error detection was critical: if a company sent out bad payroll checks because of a hardware fault, it would be catastrophic. By using qui-binary arithmetic, the IBM 1401 detects arithmetic errors.

If you've studied digital circuits, you've seen the standard binary adder circuits that add two numbers. But the IBM 1401 uses a totally different approach. Unlike modern computers, the IBM 1401 operates on decimal digits, not binary numbers, using BCD (binary-coded decimal). To add two numbers, digits are converted from BCD to qui-binary, added together with a special qui-binary adder, and then converted back to digits in BCD. This may seem pointlessly complex, but it allows easy error detection.

The photo below shows the IBM 1401 with one panel opened to show the addition/subtraction circuitry, made up of dozens of Standard Module System (SMS) cards. Each SMS card holds a simple circuit with a few germanium transistors (the computer predates silicon transistors). This article explains in detail how these circuits implement it.

The IBM 1401 mainframe with gate 01B3 opened. This gate contains the arithmetic circuitry, made up of many SMS cards.

The IBM 1401 mainframe with gate 01B3 opened. This gate contains the arithmetic circuitry, made up of many SMS cards.

What is qui-binary?

Qui-binary code is a way of representing a decimal digit with 7 bits. The number is split into a qui part (0, 2, 4, 6, or 8) and a binary part (0 or 1).[1] For example, 3 is split into 2+1, and 8 is split into 8+0. The qui part is labeled Q0, Q2, Q4, Q6, or Q8 and the binary part is B0 or B1. The number is then represented by seven bits: Q8Q6Q4Q2Q0B1B0. The following table summarizes the qui-binary representation.

DigitQuiBinaryBits: Q8Q6Q4Q2Q0B1B0
0Q0B00000101
1Q0B10000110
2Q2B00001001
3Q2B10001010
4Q4B00010001
5Q4B10010010
6Q6B00100001
7Q6B10100010
8Q8B01000001
9Q8B11000010

The advantage of qui-binary is error detection, since it is straightforward to detect an invalid qui-binary number.[2] A valid qui-binary number has exactly one qui bit and exactly one binary bit. Any other qui-binary number is faulty. For instance, Q4 Q2 B0 is bad, as is Q8. A problem in any bit creates a bad qui-binary number and can be detected.

Overview of the 1401's qui-binary circuit

The IBM 1401's arithmetic unit operates on one digit at a time, adding them with a qui-binary adder.[3] The block diagram below[4] shows how the adder takes two binary-coded decimal digits, stored in the A and B temporary registers, and produces their sum. The digit from the A register enters on the left, and is translated to qui-binary by the translation circuit (labeled XLATOR). This qui-binary value goes through a translate/complement circuit which is used for subtraction. The digit in the B register enters on the right and is also converted to qui-binary. The binary bits (B0/B1) are added by the binary adder at the bottom. The quinary values are added with a special quinary adder. The adder output circuit combines the quinary bits with any carry, generating the qui-binary result. Finally, the translation circuit at the top converts the qui-binary result back to a BCD digit, sending the BCD value to core memory and to the console display lights.[5]

Overview of the arithmetic unit in the IBM 1401 mainframe.

Overview of the arithmetic unit in the IBM 1401 mainframe.

The photo below shows the IBM 1401 console during an addition instruction. The numbers are displayed in binary-coded decimal; the qui-binary representation is entirely hidden from the programmer. At this point in the addition instruction, the digit 1 was read from address 423 into the B register, and is added to the digit 2 already in the A register. The result from the qui-binary adder is 3 (binary 2 + 1), which is stored back to memory.[6]

The IBM 1401 console, showing an addition operation.

The IBM 1401 console, showing an addition operation.

BCD to qui-binary translation

To examine the addition/subtraction circuitry in more detail, we'll start with the logic that converts a BCD digit to qui-binary. The logic is implement with an AND-OR structure that is common in the 1401. Note that the logic gate symbols are different from modern symbols: an AND gate is represented as a triangle, and an OR gate is represented as a semi-circle. Each bit of the BCD digit, as well as the bit's complement, is provided as input. Each AND gate matches a specific bit pattern, and then the results are combined with an OR gate to generate an output.

The circuit in an IBM 1401 mainframe to translate a BCD digit into qui-binary code.

The circuit in an IBM 1401 mainframe to translate a BCD digit into qui-binary code.

To see how this works, look at the AND gate at the bottom (labeled 8, 9). Tracing the wires to the inputs, this gate will be active if input 8 AND input not-4 AND input not-2 are set, i.e. if the input is binary 1000 or 1001. Thus, output Q8 will be set if the input digit is 8 or 9, just as required for the qui-binary code.

For a slightly more complicated case, the first AND gate matches binary 1010 (decimal 10), and the second AND gate matches binary 000x (decimal 0 or 1). Thus, Q0 will be set for inputs 0, 1, or 10. Likewise, Q2 is set for inputs 2, 3, or 11. The other Q outputs are simpler, computed with a single AND gate.[7]

The B0 and B1 outputs are simply wires from the not-1 and 1 inputs. If the input is even, B0 is set, and if the input is odd, B1 is set.

9's complement circuit

To perform subtraction, the IBM 1401 adds the 9's complement of the digit. The 9's complement is simply 9 minus the digit. The complement circuit below passes the qui-binary number through unchanged for addition or complemented for subtraction.[8] The complement input selects which mode to use; it is generated from the operation (addition or subtraction), and the signs of the input numbers.

To see how complementation works in qui-binary, consider 3 (Q2 B1). Its complement is 6 (Q6 B0). The general pattern for complementation is B0 and B1 get swapped. Q0 and Q8 are swapped, and Q2 and Q6 are swapped. Q4 is unchanged; for example, 4 (Q4 B0) is complemented to 5 (Q4 B1).[9]

The complement circuit from the IBM 1401 mainframe. This converts a digit to its 9's complement value.

The complement circuit from the IBM 1401 mainframe. This converts a digit to its 9's complement value.

Quinary adder

The circuit below adds the quinary parts of the two numbers and can be considered the "meat" of the adder. The qui part from the A register is on the left, the qui part from the B register is on the top, and the qui output is on the right. The outputs with "+c" indicate a carry if the result is 10 or more. The addition logic is implemented with a "brute force" matrix, connecting each pair of inputs to the appropriate output. An example is Q2 + Q6, shown in red. If these two inputs are set, the indicated AND gate will trigger the Q8 output.[10]

The quinary addition circuit in the IBM 1401 mainframe. This adds the quinary parts of two qui-binary digits. Highlighted in red is the addition of Q2 and Q6 to form Q8.

The quinary addition circuit in the IBM 1401 mainframe. This adds the quinary parts of two qui-binary digits. Highlighted in red is the addition of Q2 and Q6 to form Q8.

In the photo below, we can find the exact card in the IBM 1401 that performs this addition. The card in the upper left marked with a red asterisk computes the output Q8.[11]

The SMS cards in the IBM 1401 that perform arithmetic.

The SMS cards in the IBM 1401 that perform arithmetic.

The circuitry in the IBM 1401 is simple enough that you can follow it all the way to the function of individual transistors.[12] The asterisk-marked card is a 3JMX SMS card containing 4 AND gates, and is shown below. Each of the round metal transistors corresponds to one AND gate for one of the sums that generates the output Q8. The top transistor is activated by inputs 8+0, the next for 0+8, the next 6+2, and the bottom one 2+6. Thus, the bottom transistor corresponds to the red AND gate in the schematic above.[13]

The SMS card of type 3JMX has four AND gates.

The SMS card of type 3JMX has four AND gates.

Qui-binary to BCD translation

The diagram below shows the remainder of the qui-binary adder, which combines the qui and binary parts of the output, converts the output back to BCD, and detects errors. I'll just give an overview here, with more explanation in the footnotes.[14] The qui-binary carry circuit, in the blue box, processes the carry signals from the adder circuit. The next circuit, in the green box, applies any carry from the B bits, incrementing the qui component if necessary. The translation circuit, in red, converts the qui-binary result to BCD, using AND-OR logic. It also generates the parity output used for error detection in memory. The final circuit, in purple, is the error detection circuit which verifies the qui-binary result is valid and halts the computer if there is a fault.

The circuitry in the IBM 1401 mainframe to convert a qui-binary sum to a BCD result.

The circuitry in the IBM 1401 mainframe to convert a qui-binary sum to a BCD result.

The photo below shows the functions of the different cards in the arithmetic rack.[15] The cards in the left half perform arithmetic operations. Each function takes multiple cards, since a single SMS card has a small amount of circuitry. "Q8" indicates the card discussed earlier that computes Q8. The right half is taken up with clock and timing circuits, which generate the clock signals that control the 1401.

This rack of circuitry in the IBM 1401 contains arithmetic logic (left) and timing circuitry (right).

This rack of circuitry in the IBM 1401 contains arithmetic logic (left) and timing circuitry (right).

Conclusion

This article has discussed how the 1401 adds or subtracts a single digit. The complete addition/subtraction process in the 1401 is even more complex because the 1401 handles numbers of arbitrary length; the hardware loops over each digit to process the entire numbers.[16][17]

Studying old computers such as the IBM 1401 is interesting because they use unusual, forgotten techniques such as qui-binary arithmetic. While qui-binary arithmetic seems strange at first, its error-detection properties made it useful for the IBM 1401. Old computers are also worth studying because their circuitry can be thoroughly understood. After careful examination, you can see how arithmetic, for instance, works, down to the function of individual transistors.

Thanks to the 1401 restoration team and the Computer History Museum for their assistance with this article. The IBM 1401 is regularly demonstrated at the Computer History Museum, usually on Wednesdays and Saturdays (schedule), so check it out if you're in Silicon Valley.

Notes and references

[1] Qui-binary is the opposite of bi-quinay encoding used in abacuses and old computers such as the IBM 650. In bi-quinary, the bi part is 0 or 5, and the quinary part is 0, 1, 2, 3, or 4.

[2] You might wonder why IBM didn't just use parity instead of qui-binary numbers. While parity detects bit errors, it doesn't work well for detecting errors during addition. There's no easy way to figure out what the parity should be for a sum.

[3] The IBM 1401 has hardware to multiply and divide numbers of arbitrary length. The multiplication and division operations are based on repeated addition and subtraction, so they use the qui-binary addition circuit, along with qui-binary doublers.

[4] The logic diagrams are all from the 1401 Instructional Logic Diagrams (ILD). Pages 25 and 26 show the addition and subtraction logic if you want to see the diagrams in context.

[5] The IBM 1401 performs operations on memory locations and the A and B registers provide temporary storage for digits as they are read from core memory. They are not general-purpose registers as in most microprocessors.

[6] A few more details about the console display. The "C" bit at the top of each register is the check (parity) bit used for error detection. The 1401 uses odd parity, so if an even number of bits are set, the C bit is also set. The "M" bit at the bottom is the word mark, which indicates the end of a variable-length field. The machine opcode character is zone B + zone A + 1, which indicates the letter "A".

Unlike modern computers, the 1401 uses intuitive opcodes so "A" means add, "S" means subtract, "B" means branch and so forth. (This is the actual opcode in memory, not the assembly mnemonic.) In the lower right, the mode knob is set to "Single cycle process", which allowed me to step through the instruction to get this picture. Normally this knob is set to "Run" and the console flashes frantically as instructions are executed.

[7] One surprising feature of the BCD translator is that it accepts binary inputs from 0 to 15, not just "valid" inputs 0 to 9. Input 10 is treated as 0, since the 1401 stores the digit 0 as decimal 10 in core. Values 11 through 15 are treated as 3 through 7. Thus, every binary input results in a valid (but probably unexpected) qui-binary value. As a result, the 1401 can perform addition on non-decimal characters, but the results aren't very useful.

[8] The IBM 1401 uses 9's complements since it is a decimal machine, unlike modern binary computers which use 2's complements. For example, the complement of 1 is 8, and the complement of 4 is 5. To subtract a number, the 9's complement of each digit is added (along with a carry). An example of using complements for subtration is 432 - 145. The 9's complement of 145 is 854. 432 + 854 + 1 = 1287. Discarding the top digit yields the desired result 432 - 145 = 287. Complements are explained in more detail in Wikipedia.

[9] If you trace through the AND-OR logic in the complement circuit, you can see that each pair of AND gates and and OR gate forms a multiplexer, selecting one input or the other. For example for the B1 output: if complement is 0 AND B1 is 1, the output is 1. OR, if complement is 1 AND B0 is 1, the output is 1. In other words, the output matches the B1 input if complement is 0, and matches the B0 input if complement is 1. The box labeled I in the schematic is an inverter.

[10] The quinary adder is implemented using wired-OR logic. Instead of an explicit OR gate, the AND outputs are simply wired together to produce the OR output. While the quinary adder looks symmetrical and regular in the schematic, its implementation uses three different SMS cards: 3JMX and 4JMX AND/OR gates, and JGVW AND gates, depending on the number of AND gates feeding the output.

[11] One component of interest in the photo of SMS cards is the silver rectangle on the lower right card. This is the quartz crystal that generates timing for the 1401. The SMS card is type RK, and the crystal runs the 347.5kHz oscillator. Eight oscillator half-cycles make up the 11.5 microsecond cycle time of the 1401. At the top of the photo are the wiring bundles connecting these circuits to other parts of the computer.

[12] Due to the simplicity of the IBM 1401 compared to modern computers, it's possible to understand how the IBM 1401 works at every level all the way to quantum physics. I'll give an outline here. The gates in an SMS card use a simple form of logic called CTDL by IBM and DTL (Diode-Transistor Logic) by the rest of the world. The 3JMX card schematic shows that each input is connected through a diode to the output transistor. If any input is high, current flows through the diode and turns off the transistor. The result is an AND gate (with inverted inputs). IBM Transistor Component Circuits (page 108) explains this circuit in detail.

Going deeper, we can look inside the transistor. The board uses type 034 germanium alloy-junction transistors (details, details), very different from modern silicon-based planar transistors. These transistors consist of a germanium crystal base with indium beads fused on either side to form the emitter and collector. The regions of germanium-indium alloy form the "P" regions. In the photo, the germanium disk is in the small circular hole. Copper wires are connected to the indium beads. The photo below shows an IBM 083 transistor from the IBM 1401. This is the NPN version of the transistors in the 3JMX card. If you want a deeper understanding, look at bipolar junction transistor theory, which in turn is explained by quantum physics and solid-state device theory.

Inside a germanium alloy-junction transistor used in the IBM 1401 computer. This is an IBM 083 NPN transistor. Photo from http://ibm-1401.info/GermaniumAlloy.html

Inside a germanium alloy-junction transistor used in the IBM 1401 computer. This is an IBM 083 NPN transistor. Photo from IBM 1401 restoration team.

[13] You may wonder how 8=4+4 gets computed, since the card described doesn't handle that. The sum 4+4 is computed by the card just below the asterisk (a triple AND gate card of type JGVW). The other two AND gates in that card compute 6+6 and 8+8. To determine what each board in the IBM 1401 does, look at the Automated Logic Diagrams, page 34.32.14.2.

[14] The qui-binary carry logic happens in several phases. The qui parts are added, generating a carry if needed. The binary parts are added with a simple binary adder (not shown). A carry from the binary part shifts the qui part by 2. A carry out signal is also generated as needed. For instance, adding 3 + 5 is done by adding Q2 B1 + Q4 B1. This generates Q6 + B0 + B carry. The B carry increments the qui component to Q8, yielding the result Q8 B0 (i.e. 8).

The qui-binary to BCD translation circuit uses straightforward AND-OR logic, detecting the various combinations. Note that 0 is represented in the 1401 as binary 1010 (because binary 0000 indicates a blank), so the BCD output bits 8 and 2 are set for qui-binary value Q0 B0. The parity output is generate by combining the binary parity (even for B0; odd for B1) with the qui parity value. The qui even parity signal is set for Q0 or Q6, while the qui odd parity signal is set for Q2, Q4, Q8. Note that representing 0 as binary 1010 instead of 0000 doesn't affect the parity.

The error detection circuit uses AND-OR logic to detect bad qui-binary results. It detects a fault if no B bits are set or both B bits are set. Instead of testing every qui bit combination, it implements a short cut from the qui parity circuit. If the even qui parity signal and the odd qui parity signal are both set, this indicates multiple qui lines are set, triggering a fault. If neither qui parity signal is set, then no qui lines are set, also triggering a fault. The parity check misses a few qui combinations (such as Q0 and Q6 set), so these are tested separately. The result is that any invalid qui-binary result triggers a fault.

[15] The rack of cards shown is officially known as gate 01B3. The functions assigned to each card in the photo are approximate, because some cards are used by multiple functions. For exact information, see the plug list, which specifies the card type and function for every card in the 1401.

[16] One complication with the 1401's arithmetic instructions are numbers are stored as a positive value with a sign bit (on the last digit). This format makes printing of positive and negative numbers simpler, which is important for a business computer, but it makes arithmetic more complicated. First, the signs must be checked to determine if the numbers are being added or subtracted. Next, each digit is added or subtracted in sequence until the end of the number is reached. If the result is negative, the 1401 flips the result sign and converts the answer back to a positive value by making two additional digit-by-digit passes over the number. Modern computers use binary and handle negative numbers with two's complement, which makes subtraction much simpler. It takes 9 pages of documentation to explain the addition operation, complete with multiple flowcharts: see IBM 1401 Data Flow pages 24-32. (Keep in mind that these flowcharts are implemented in hardware, not with microcode or subroutines.)

[17] Arithmetic on the 1401 and the qui-binary adder are discussed in detail in 1401 Instruction Logic, pages 49-67. For the history leading up to qui-binary arithmetic, see this article by Carl Claunch.


Understanding silicon circuits: inside the ubiquitous 741 op amp

$
0
0
The 741 op amp is one of the most famous and popular ICs[1] with hundreds of millions sold since its invention in 1968 by famous IC designer Dave Fullagar. In this article, I look at the silicon die for the 741, discuss how it works, and explain how circuits are built from silicon.

The 741 op amp, packaged in a TO-99 metal can.

The 741 op amp, packaged in a TO-99 metal can.

I started with a 741 op amp that was packaged in a metal can (above). Cutting the top off with a hacksaw reveals the tiny silicon die (below), connected to the pins by fine wires.

Inside a 741 op amp, showing the die. This is a TO-99 metal can package, with the top sawed off

Inside a 741 op amp, showing the die. This is a TO-99 metal can package, with the top sawed off

Under a microscope, the details of the silicon chip are visible, as shown below. At first, the chip looks like an incomprehensible maze, but this article will show how transistors, resistors and capacitors are formed on the chip, and explain how they combine to make the op amp.

Die photo of the 741 op amp

Die photo of the 741 op amp

Why op amps are important

Op amps are a key component in analog circuits. An op amp takes two input voltages, subtracts them, multiplies the difference by a huge value (100,000 or more), and outputs the result as a voltage. If you've studied analog circuits, op amps will be familiar to you, but otherwise this may seem like a bizarre and pointless device. How often do you need to subtract two voltages? And why amplify by such a huge factor: will a 1 volt input result in lightning shooting from the op amp? The answer is feedback: by using a feedback signal, the output becomes a sensible value and the high amplification makes the circuit performance stable.

Op amps are used as amplifiers, filters, integrators, differentiators, and many other circuits.[2] Op amps are all around you: your computer's power supply uses op amps for regulation. Your cell phone uses op amps for filtering and amplifying audio signals, camera signals, and the broadcast cell signal.

The structure of the integrated circuit

NPN transistors inside the IC

Transistors are the key components in a chip. If you've studied electronics, you've probably seen a diagram of a NPN transistor like the one below, showing the collector (C), base (B), and emitter (E) of the transistor, The transistor is illustrated as a sandwich of P silicon in between two symmetric layers of N silicon; the N-P-N layers make a NPN transistor. It turns out that transistors on a chip look nothing like this, and the base often isn't even in the middle!

Symbol and oversimplified structure of an NPN transistor.

Symbol and oversimplified structure of an NPN transistor.

The photo below shows one of the transistors in the 741 as it appears on the chip. The different brown and purple colors are regions of silicon that has been doped differently, forming N and P regions. The whitish-yellow areas are the metal layer of the chip on top of the silicon - these form the wires connecting to the collector, emitter, and base.

Underneath the photo is a cross-section drawing showing approximately how the transistor is constructed. There's a lot more than just the N-P-N sandwich you see in books, but if you look carefully at the vertical cross section below the 'E', you can find the N-P-N that forms the transistor. The emitter (E) wire is connected to N+ silicon. Below that is a P layer connected to the base contact (B). And below that is a N+ layer connected (indirectly) to the collector (C).[3] The transistor is surrounded by a P+ ring that isolates it from neighboring components.

Structure of a NPN transistor in the 741 op amp

Structure of a NPN transistor in the 741 op amp

PNP transistors inside the IC

You might expect PNP transistors to be similar to NPN transistors, just swapping the roles of N and P silicon. But for a variety of reasons, PNP transistors have an entirely different construction. They consist of a circular emitter (P), surrounded by a ring shaped base (N), which is surrounded by the collector (P).[4] This forms a P-N-P sandwich horizontally (laterally), unlike the vertical structure of the NPN transistors.

The diagram below shows one of the PNP transistors in the 741, along with a cross-section showing the silicon structure. Note that although the metal contact for the base is on the edge of the transistor, it is electrically connected through the N and N+ regions to its active ring in between the collector and emitter.

Structure of a PNP transistor in the 741 op amp.

Structure of a PNP transistor in the 741 op amp.

The output transistors in the 741 are larger than the other transistors and have a different structure in order to produce the high-current output. The output transistors must support 25mA, compared to microamps for the internal transistors. The photo below shows one of the output transistors. Note the multiple interlocking "fingers" of the emitter and base, surrounded by the large collector.

A high-current PNP transistor inside the 741 op amp

A high-current PNP transistor inside the 741 op amp

How resistors are implemented in silicon

Resistors are a key component of analog chips. Unfortunately, resistors in ICs are very inaccurate; the resistances can vary by 50% from chip to chip. Thus, analog ICs are designed so only the ratio of resistors matters, not the absolute values, since the ratios remain nearly constant from chip to chip.

The photo below shows two resistors in the 741 op amp, formed using different techniques. The resistor on the left is formed from a meandering strip of P silicon, and is about 5K&ohm;. The resistor on the right is a pinch resistor and is about 50K&ohm;. In the pinch resistor, a layer of N silicon on top makes the conductive region much thinner (i.e. pinches it). This allows a much higher resistance for a given size. Both resistors are at the same scale below, but the pinch resistor has ten times the resistance. The tradeoff is the pinch resistor is much less accurate.

Two resistors from the 741 op amp. The left resistor is a simple 'base resistor', while the right resistor is a 'pinch resistor'.

Two resistors from the 741 op amp. The left resistor is a simple 'base resistor', while the right resistor is a 'pinch resistor'.

How capacitors are implemented in silicon

The 741's capacitor is essentially a large metal plate separated from the silicon by an insulating layer. The main drawback of capacitors on ICs is they are physically very large. The 25pF capacitor in the 741 has a very small value but takes up a large fraction of the chip's area.[5][6] You can see the capacitor in the middle of the die photo; it is the largest structure on the chip.

IC component: The current mirror

There are some subcircuits that are very common in analog ICs, but may seem mysterious at first. Before explaining the 741's circuit, I'll first give a brief overview of the current mirror and differential pair circuits.

Schematic symbols for a current source.

Schematic symbols for a current source.

If you've looked at analog IC block diagrams, you may have seen the above symbols for a current source and wondered what a current source is and why you'd use one. The idea of a current source is you start with one known current and then you can "clone" multiple copies of the current with a simple transistor circuit.

The following circuit shows how a current mirror is implemented.[7] A reference current passes through the transistor on the left. (In this case, the current is set by the resistor.) Since both transistors have the same emitter voltage and base voltage, they source the same current,[8] so the current on the right matches the reference current on the left.

Current mirror circuit. The current on the right copies the current on the left.

Current mirror circuit. The current on the right copies the current on the left.

A common use of a current mirror is to replace resistors. As explained earlier, resistors inside ICs are both inconveniently large and inaccurate. It saves space to use a current mirror instead of a resistor whenever possible. [9]

The diagram below shows that much of the 741 die is taken up by multiple current mirrors. The large resistor snaking around the upper middle of the IC controls the initial current. This current is then duplicated by multiple current mirrors, providing controlled currents to various parts of the chip. Using one large resistor and current mirrors is more compact and more accurate than using multiple large resistors. The current mirror in the middle is slightly different; it provides an active load for the input stage, improving the performance.

Die for the 741 op amp, showing the current mirrors, along with the resistor that controls the current.

Die for the 741 op amp, showing the current mirrors, along with the resistor that controls the current.

IC component: The differential pair

The second important circuit to understand is the differential pair, the most common two-transistor subcircuit used in analog ICs.[10] You may have wondered how the op amp subtracts two voltages; it's not obvious how to make a subtraction circuit. This is the job of the differential pair.

Schematic of a simple differential pair circuit. The current source sends a fixed current I through the differential pair. If the two inputs are equal, the current is split equally.

Schematic of a simple differential pair circuit. The current source sends a fixed current I through the differential pair. If the two inputs are equal, the current is split equally.

The schematic above shows a simple differential pair. The key is the current source at the top provides a fixed current I, which is split between the two input transistors. If the input voltages are equal, the current will be split equally into the two branches (I1 and I2). If one of the input voltages is a bit higher than the other, the corresponding transistor will conduct more current, so one branch gets more current and the other branch gets less. As one input continues to increase, more current gets pulled into that branch. Thus, the differential pair is a surprisingly simple circuit that routes current based on the difference in input voltages.

The internal blocks of the 741

The internal circuitry of the 741 op amp has been explained in many places[11], so I'll just give a brief description of the main blocks. The interactive chip viewer below provides more explanation.

The two input pins are connected to the differential amplifier, which is based on the differential pair described above. The output from the differential amplifier goes to the second (gain) stage, which provides additional amplification of the signal. Finally, the output stage has large transistors to generate the high-current output, which is fed to the output pin.

Die for the 741 op amp, showing the main functional units.

Die for the 741 op amp, showing the main functional units.
A key innovation that led to the 741 was Fairchild's development of a new process for building capacitors on ICs using silicon nitride.[12] Op amps before the 741 required an external capacitor to prevent oscillation, which was inconvenient.[13] Dave Fullagar had the idea to put the compensation capacitor on the 741 chip using the new manufacturing process. Doing away with the external capacitor made the 741 extremely popular, either because engineers are lazy[14] or because the reduced part count was beneficial.

Another feature that made the 741 popular is its short-circuit protection. Many integrated circuits will overheat and self-destruct if you accidentally short circuit an output. The 741, though, includes clever circuits to shut down the output before damage occurs.

Interactive chip viewer

The die photo and schematic below are interactive. Click components in the die photo or schematic[15] to explore the chip, and a description will be displayed below. NPN transistors are highlighted in blue and PNP transistors are in red.

How I photographed the 741 die

Integrated circuit usually come in a black epoxy package. Dangerous concentrated acid is required to dissolve the epoxy package and see the die. But some ICs, such as the 741, are available in metal cans which can be easily opened with a hacksaw.[16] I used this safer approach. With even a basic middle-school microscope, you can get a good view of the die at low magnification but for the die photos, I used a metallurgical microscope, which shines light from above through the lens. A normal microscope shines light from below, which works well for transparent cells but not so well for opaque ICs. A metallurgical microscope is the secret to getting clear photos at higher magnification, since the die is brightly illuminated.[17]

Conclusion

Despite being almost 50 years old, the 741 op amp illustrates a lot of interesting features of analog integrated circuits. Next time you're listening to music, talking on your cell phone, or even just using your computer, think about the tiny op amps that make it possible and the 741 that's behind it all.

See more comments on Hacker News, Reddit and Hackaday. Los comentarios en español en Menéame.

We've got a winner! 741 op amp marketing letter from 1968. Courtesy of Dave Fullagar.

We've got a winner! 741 op amp marketing letter from 1968. Courtesy of Dave Fullagar.

Thanks to Dave Fullagar for providing information on the 741, including the letter above, which shows that the 741 was an instant success.

Notes and references

[1] The 741 op amp is one 25 Microchips That Shook the World and is popular enough to be on mugs and multipletshirts, as well as available in a giant kit.

[2] To see the variety of circuits that can be built from an op amp, see this op amp circuit collection.

[3] You might have wondered why there is a distinction between the collector and emitter of a transistor, when the simple picture of a transistor is totally symmetrical. Both connect to an N layer, so why does it matter? As you can see from the die photo, the collector and emitter are very different in a real transistor. In addition to the very large size difference, the silicon doping is different. The result is a transistor will have poor gain if the collector and emitter are swapped.

[4] In many of the ICs that I've examined, it's easy to distinguish NPN and PNP transistors by their shape: NPN transistors are rectangular, while PNP transistors have circular emitters and bases with a circular metal layer on top. For some reason, this 741 chip uses rectangular and circular transistors for both NPN and PNP transistors. Thus, a closer examination is necessary to separate the NPN and PNP transistors.

[5] The capacitor in the 741 is located at a special point in the circuit where the effect of the capacitance is amplified due to something called the Miller effect. This allows the capacitor in the 741 to be much smaller than it would be otherwise. Given how much of the 741 die is used for the capacitor already, taking advantage of the Miller effect is very important.

[6] An alternative way to put capacitors on a chip is the junction capacitor, which is basically a large reverse-biased diode junction. The 741 doesn't use this technique; for more information on junction capacitors see my article on the TL431.

[7] For more information about current mirrors, you can check wikipedia, any analog IC book, or chapter 3 of Designing Analog Chips. If you're interested in how analog chips work, I strongly recommend you take a look at Designing Analog Chips.

[8] The current mirror doesn't provide exactly the same current for a variety of reasons. For instance, the base current is small but not zero. Transistor matching is very important: if the transistors are not identical, the currents will be different. (Using a single transistor with two collectors helps with matching.) If the collector voltages are different, the Early effect will cause the currents to be different. More complex current mirror circuits can reduce these problems.

[9] The 741 uses are several common extensions of the current source. First, by adding additional output transistors, you can create multiple copies of the current. Second, if you use a transistor with twice the collector size, you will get an output with twice the current (for instance). Third, instead of multiple output transistors, you can use one transistor with multiple collectors; this seems bizarre if you are used to discrete 3-pin transistors, but is a normal thing to do in IC designs. Finally, by flipping the circuit and using NPN transistors in place of PNP transistors, you can create a current sink, which is the same except current flows into the circuit instead of out of the circuit.

[10] Differential pairs are also called long-tailed pairs. According to Analysis and Design of Analog Integrated Circuits the differential pair is "perhaps the most widely used two-transistor subcircuits in monolithic analog circuits." (p214) For more information about differential pairs, see wikipedia, any analog IC book, or chapter 4 of Designing Analog Chips.

[11] You might expect 741 chips to all be pretty much the same, but the "741" name is really a category, not a single design. Manufacturers use diverse circuits for their 741 chips. Studying data sheet schematics, I found that 741 chips can be be divided into two categories based on the circuits for the second stage and output stage. The more common variant has 24 transistors, while the less common variant has 20 transistors. As far as I can tell, nobody has pointed this out before.

Wikipedia explains the 20-transistor variant while the 24-transistor variants are discussed in Operational AmplifiersIC Op-Amps Through the Ages, UNCC class notes and the book Microelectronic Circuits chapter 12. The 741 die I discuss in this article is the 24-transistor variant.

[12] For details on the 741's history, see this interesting discussion: Computer history museum: Fairchild Oral History Panel.

[13] If the output is too low, the feedback circuit pushes it higher. But if it goes too high, the feedback circuit pulls it lower. This could repeat, causing larger and larger oscillations. The capacitor blocks these oscillations. I've vastly oversimplified op amp stability and frequency compensation. Some more detailed discussions are here and here.

[14] IC Op-Amps Through the Ages says: "Despite a consequent near guarantee of suboptimal performance for most applications [because of the fixed capacitor], the ease of using the 741 has made it tremendously popular, proving Fullager's assumption that engineers are basically lazy (I mean, very time-efficient)."

[15] The schematic is from the Fairchild LM741 datasheet. I added the missing collector-base connection on Q12 and removed R12 (which is unused in this die). The component I photographed is the Analog Devices AD741, but that datasheet doesn't have a schematic.

[16] A plain hacksaw works to cut open an IC can. For later ICs, I used a jeweler's saw which gives a cleaner cut than a hacksaw - the IC doesn't look like it was ripped open by a bear. I got a saw on eBay for $14, and used the #2 blade. Make sure you cut near the top of the IC so you don't hit the internal pins or the die.

[17] To form the large image of the 741 die, I used Microsoft ICE to composite four images into a larger image. The Hugin photo stitcher can also be used for this, but I had trouble with it.

Macbook charger teardown: The surprising complexity inside Apple's power adapter

$
0
0
Have you ever wondered what's inside your Macbook's charger? There's a lot more circuitry crammed into the compact power adapter than you'd expect, including a microprocessor. This charger teardown looks at the numerous components in the charger and explains how they work together to power your laptop.

Inside the Macbook charger, after removing the heat sinks and insulating tape.

Inside the Macbook charger. Many electronic components work together to provide smooth power to your laptop.
Most consumer electronics, from your cell phone to your television, use a switching power supply to convert AC power from the wall to the low-voltage DC used by electronic circuits. The switching power supply gets its name because it switches power on and off thousands of times a second, which turns out to be a very efficient way to do this conversion.[1]

Switching power supplies are now very cheap, but this wasn't always the case. In the 1950s, switching power supplies were complex and expensive, used in aerospace and satellite applications that needed small, lightweight power supplies. By the early 1970s, new high-voltage transistors and other technology improvements made switching power supplies much cheaper and they became widely used in computers.[2] The introduction of a single-chip power supply controller in 1976 made switching power supplies simpler, smaller, and cheaper.

Apple's involvement with switching power supplies goes back to 1977 when Apple's chief engineer Rod Holt designed a switching power supply for the Apple II. According to Steve Jobs:[3]

"That switching power supply was as revolutionary as the Apple II logic board was. Rod doesn't get a lot of credit for this in the history books but he should. Every computer now uses switching power supplies, and they all rip off Rod Holt's design."

This is a fantastic quote, but unfortunately it is entirely false. The switching power supply revolution happened before Apple came along, Apple's design was similar to earlier power supplies[4] and other computers don't use Rod Holt's design. Nevertheless, Apple has extensively used switching power supplies and pushes the limits of charger design with their compact, stylish and advanced chargers.

Inside the charger

For the teardown I started with a Macbook 85W power supply, model A1172, which is small enough to hold in your palm. The picture below shows several features that can help distinguish the charger from counterfeits: the Apple logo in the case, the metal (not plastic) ground pin on the right, and the serial number next to the ground pin.

Apple 85W Macbook charger

Apple 85W Macbook charger
Strange as it seems, the best technique I've found for opening a charger is to pound on a wood chisel all around the seam to crack it open. With the case opened, the metal heat sinks of the charger are visible. The heat sinks help cool the high-power semiconductors inside the charger.

Inside the Apple 85W Macbook charger

Inside the Apple 85W Macbook charger
The other side of the charger shows the circuit board, with the power output at the bottom. Some of the tiny components are visible, but most of the circuitry is covered by the metal heat sink, held in place by yellow insulating tape.

The circuit board inside the Apple 85W Macbook charger.

The circuit board inside the Apple 85W Macbook charger. At the right, screws firmly attach components to the heat sinks.
After removing the metal heat sinks, the components of the charger are visible. These metal pieces give the charger a substantial heft, more than you'd expect from a small unit.

Exploded view of the Apple 85W charger

Exploded view of the Apple 85W charger, showing the extensive metal heat sinks.
The diagram below labels the main components of the charger. AC power enters the charger and is converted to DC. The PFC circuit (Power Factor Correction) improves efficiency by ensuring the load on the AC line is steady. The primary chops up the high-voltage DC from the PFC circuit and feeds it into the transformer. Finally, the secondary receives low-voltage power from the transformer and outputs smooth DC to the laptop. The next few sections discuss these circuits in more detail, so follow along with the diagram below.

The components inside an Apple Macbook 85W power supply.

The components inside an Apple Macbook 85W power supply.

AC enters the charger

AC power enters the charger through a removable AC plug. A big advantage of switching power supplies is they can be designed to run on a wide range of input voltages. By simply swapping the plug, the charger can be used in any region of the world, from European 240 volts at 50 Hertz to North American 120 volts at 60 Hz. The filter capacitors and inductors in the input stage prevent interference from exiting the charger through the power lines. The bridge rectifier contains four diodes, which convert the AC power into DC. (See this video for a great demonstration of how a full bridge rectifier works.)

The input filtering in a Macbook charger. The diode bridge is attached to the metal heat sink with a clip.

The input components in a Macbook charger. The diode bridge rectifier is attached to the metal heat sink with a clip.

PFC: smoothing the power usage

The next step in the charger's operation is the Power Factor Correction circuit (PFC), labeled in purple. One problem with simple chargers is they only draw power during a small part of the AC cycle.[5] If too many devices do this, it causes problems for the power company. Regulations require larger chargers to use a technique called power factor correction so they use power more evenly.

The PFC circuit uses a power transistor to precisely chop up the input AC tens of thousands of times a second; contrary to what you might expect, this makes the load on the AC line smoother. Two of the largest components in the charger are the inductor and PFC capacitor that help boost the voltage to about 380 volts DC.[6]

The primary: chopping up the power

The primary circuit is the heart of the charger. It takes the high voltage DC from the PFC circuit, chops it up and feeds it into the transformer to generate the charger's low-voltage output (16.5-18.5 volts). The charger uses an advanced design called a resonant controller, which lets the system operate at a very high frequency, up to 500 kilohertz. The higher frequency permits smaller components to be used for a more compact charger. The chip below controls the switching power supply.[7]

The circuit board inside the Macbook charger. The chip in the middle controls the switching power supply circuit.

The circuit board inside the Macbook charger. The chip in the middle controls the switching power supply circuit.

The two drive transistors (in the overview diagram) alternately switch on and off to chop up the input voltage. The transformer and capacitor resonate at this frequency, smoothing the chopped-up input into a sine wave.

The secondary: smooth, clean power output

The secondary side of the circuit generates the output of the charger. The secondary receives power from the transformer and converts it DC with diodes. The filter capacitors smooth out the power, which leaves the charger through the output cable.

The most important role of the secondary is to keep the dangerous high voltages in the rest of the charger away from the output, to avoid potentially fatal shocks. The isolation boundary marked in red on the earlier diagram indicates the separation between the high-voltage primary and the low-voltage secondary. The two sides are separated by a distance of about 6 mm, and only special components can cross this boundary.

The transformer safely transmits power between the primary and the secondary by using magnetic fields instead of a direct electrical connection. The coils of wire inside the transformer are triple-insulated for safety. Cheap counterfeit chargers usually skimp on the insulation, posing a safety hazard. The optoisolator uses an internal beam of light to transmit a feedback signal between the secondary and primary. The control chip on the primary side uses this feedback signal to adjust the switching frequency to keep the output voltage stable.

The output components in an Apple Macbook charger. The microcontroller board is visible behind the capacitors.

The output components in an Apple Macbook charger.The two power diodes are in front on the left. Behind them are three cylindrical filter capacitors.The microcontroller board is visible behind the capacitors.

A powerful microprocessor in your charger?

One unexpected component is a tiny circuit board with a microcontroller, which can be seen above. This 16-bit processor constantly monitors the charger's voltage and current. It enables the output when the charger is connected to a Macbook, disables the output when the charger is disconnected, and shuts the charger off if there is a problem. This processor is a Texas Instruments MSP430 microcontroller, roughly as powerful as the processor inside the original Macintosh.[8]

The microcontroller circuit board from an 85W Macbook power supply, on top of a quarter. The MPS430 processor monitors the charger's voltage and current.

The microcontroller circuit board from an 85W Macbook power supply, on top of a quarter. The MPS430 processor monitors the charger's voltage and current.

The square orange pads on the right are used to program software into the chip's flash memory during manufacturing.[9] The three-pin chip on the left (IC202) reduces the charger's 16.5 volts to the 3.3 volts required by the processor.[10]

The charger's underside: many tiny components

Turning the charger over reveals dozens of tiny components on the circuit board. The PFC controller chip and the power supply (SMPS) controller chip are the main integrated circuits controlling the charger. The voltage reference chip is responsible for keeping the voltage stable even as the temperature changes.[11] These chips are surrounded by tiny resistors, capacitors, diodes and other components. The output MOSFET transistor switches the power to the output on and off, as directed by the microcontroller. To the left of it, the current sense resistors measure the current flowing to the laptop.

The printed circuit board from an Apple 85W Macbook power supply, showing the tiny components inside the charger.

The printed circuit board from an Apple 85W Macbook power supply, showing the tiny components inside the charger.
The isolation boundary (marked in red) separates the high voltage circuitry from the low voltage output components for safety. The dashed red line shows the isolation boundary that separates the low-voltage side (bottom right) from the high-voltage side. The optoisolators send control signals from the secondary side to the primary, shutting down the charger if there is a malfunction.[12]

One reason the charger has more control components than a typical charger is its variable output voltage. To produce 60 watts, the charger provides 16.5 volts at 3.6 amps. For 85 watts, the voltage increases to 18.5 volts at 4.6 amps. This allows the charger to be compatible with lower-voltage 60 watt chargers, while still providing 85 watts for laptops that can use it.[13] As the current increases above 3.6 amps, the circuit gradually increases the output voltage. If the current increases too much, the charger abruptly shuts down around 90 watts.[14]

Inside the Magsafe connector

The magnetic Magsafe connector that plugs into the Macbook is more complex than you would expect. It has five spring-loaded pins (known as Pogo pins) to connect to the laptop. Two pins are power, two pins are ground, and the middle pin is a data connection to the laptop.

The pins of a Magsafe 2 connector. The pins are arranged symmetrically, so the connector can be plugged in either way.

The pins of a Magsafe 2 connector. The pins are arranged symmetrically, so the connector can be plugged in either way.
Inside the Magsafe connector is a tiny chip that informs the laptop of the charger's serial number, type, and power. The laptop uses this data to determine if the charger is valid. This chip also controls the status LEDs. There is no data connection to the charger block itself; the data connection is only with the chip inside the connector. For more details, see my article on the Magsafe connector.

The circuit board inside a Magsafe connector is very small. There are two LEDs on each side. The chip is a DS2413 1-Wire switch.

The circuit board inside a Magsafe connector is very small. There are two LEDs on each side. The chip is a DS2413 1-Wire switch.

Operation of the charger

You may have noticed that when you plug the connector into a Macbook, it takes a second or two for the LED to light up. During this time, there are complex interactions between the Macbook, the charger, and the Magsafe connector.

When the charger is disconnected from the laptop, the output transistor discussed earlier blocks the output power.[15] When the Magsafe connector is plugged into a Macbook, the laptop pulls the power line low.[16] The microcontroller in the charger detects this and after exactly one second enables the power output. The laptop then loads the charger information from the Magsafe connector chip. If all is well, the laptop starts pulling power from the charger and sends a command through the data pin to light the appropriate connector LED. When the Magsafe connector is unplugged from the laptop, the microcontroller detects the loss of current flow and shuts off the power, which also extinguishes the LEDs.

You might wonder why the Apple charger has all this complexity. Other laptop chargers simply provide 16 volts and when you plug it in, the computer uses the power. The main reason is for safety, to ensure that power isn't flowing until the connector is firmly attached to the laptop. This minimizes the risk of sparks or arcing while the Magsafe connector is being put into position.

Why you shouldn't get a cheap charger

The Macbook 85W charger costs $79 from Apple, but for $14 you can get a charger on eBay that looks identical. Do you get anything for the extra $65? I opened up an imitation Macbook charger to see how it compares with the genuine charger. From the outside, the charger looks just like an 85W Apple charger except it lacks the Apple name and logo. But looking inside reveals big differences. The photos below show the genuine Apple charger on the left and the imitation on the right.

Inside the Apple 85W Macbook charger (left) vs an imitation charger (right). The genuine charger is crammed full of components, while the imitation has fewer parts.

Inside the Apple 85W Macbook charger (left) vs an imitation charger (right). The genuine charger is crammed full of components, while the imitation has fewer parts.

The imitation charger has about half the components of the genuine charger and a lot of blank space on the circuit board. While the genuine Apple charger is crammed full of components, the imitation leaves out a lot of filtering and regulation as well as the entire PFC circuit. The transformer in the imitation charger (big yellow rectangle) is much bulkier than in Apple's charger; the higher frequency of Apple's more advanced resonant converter allows a smaller transformer to be used.

The circuit board of the Apple 85W Macbook charger (left) compared with an imitation charger (right). The genuine charger has many more components.

The circuit board of the Apple 85W Macbook charger (left) compared with an imitation charger (right). The genuine charger has many more components.

Flipping the chargers over and looking at the circuit boards shows the much more complex circuitry of the Apple charger. The imitation charger has just one control IC (in the upper left).[17] since the PFC circuit is omitted entirely. In addition, the control circuits are much less complex and the imitation leaves out the ground connection.

The imitation charger is actually better quality than I expected, compared to the awful counterfeit iPad charger and iPhone charger that I examined. The imitation Macbook charger didn't cut every corner possible and uses a moderately complex circuit. The imitation charger pays attention to safety, using insulating tape and keeping low and high voltages widely separated, except for one dangerous assembly error that can be seen below. The Y capacitor (blue) was installed crooked, so its connection lead from the low-voltage side ended up dangerously close to a pin on the high-voltage side of the optoisolator (black), creating a risk of shock.

Safety hazard inside an imitation Macbook charger. The lead of the Y capacitor is too close to the pin of the optoisolator, causing a risk of shock.

Safety hazard inside an imitation Macbook charger. The lead of the Y capacitor is too close to the pin of the optoisolator, causing a risk of shock.

Problems with Apple's chargers

The ironic thing about the Apple Macbook charger is that despite its complexity and attention to detail, it's not a reliable charger. When I told people I was doing a charger teardown, I rapidly collected a pile of broken chargers from people who had failed chargers. The charger cable is rather flimsy, leading to a class action lawsuit stating that the power adapter dangerously frays, sparks and prematurely fails to work. Apple provides detailed instructions on how to avoid damaging the wire, but a stronger cable would be a better solution. The result is reviews on the Apple website give the charger a dismal 1.5 out of 5 stars.

Burn mark inside an 85W Apple Macbook power supply that failed.

Burn mark inside an 85W Apple Macbook power supply that failed.

Macbook chargers also fail due to internal problems. The photos above and below show burn marks inside a failed Apple charger from my collection.[18] I can't tell exactly what went wrong, but something caused a short circuit that burnt up a few components. (The white gunk in the photo is insulating silicone used to mount the board.)

Burn marks inside an Apple Macbook charger that malfunctioned.

Burn marks inside an Apple Macbook charger that malfunctioned.

Why Apple's chargers are so expensive

As you can see, the genuine Apple charger has a much more advanced design than the imitation charger and includes more safety features. However, the genuine charger costs $65 more and I doubt the additional components cost more than $10 to $15[19]. Most of the cost of the charger goes into the healthy profit margin that Apple has on their products. Apple has an estimated 45% profit margin on iPhones[20] and chargers are probably even more profitable. Despite this, I don't recommend saving money with a cheap eBay charger due to the safety risk.

Conclusion

People don't give much thought to what's inside a charger, but a lot of interesting circuitry is crammed inside. The charger uses advanced techniques such as power factor correction and a resonant switching power supply to produce 85 watts of power in a compact, efficient unit. The Macbook charger is an impressive piece of engineering, even if it's not as reliable as you'd hope. On the other hand, cheap no-name chargers cut corners and often have safety issues, making them risky, both to you and your computer.

Notes and references

[1] The main alternative to a switching power supply is a linear power supply, which is much simpler and converts excess voltage to heat. Because of this wasted energy, linear power supplies are only about 60% efficient, compared to about 85% for a switching power supply. Linear power supplies also use a bulky transformer that may weigh multiple pounds, while switching power supplies can use a tiny high-frequency transformer.

[2] Switching power supplies were taking over the computer industry as early as 1971. Electronics World said that companies using switching regulators "read like a 'Who's Who' of the computer industry: IBM, Honeywell, Univac, DEC, Burroughs, and RCA, to name a few". See "The Switching Regulator Power Supply", Electronics World v86 October 1971, p43-47. In 1976, Silicon General introduced SG1524 PWM integrated circuit, which put the control circuitry for a switching power supply on a single chip.

[3] The quote about the Apple II power supply is from page 74 of the 2011 book Steve Jobs by Walter Isaacson. It inspired me to write a detailed history of switching power supplies: Apple didn't revolutionize power supplies; new transistors did. Steve Job's quote sounds convincing, but I consider it the reality distortion field in effect.

[4] If anyone can take the credit for making switching power supplies an inexpensive everyday product, it is Robert Boschert. He started selling switching power supplies in 1974 for everything from printers and computers to the F-14 fighter plane. See Robert Boschert: A Man Of Many Hats Changes The World Of Power Supplies in Electronic Design. The Apple II's power supply is very similar to the Boschert OL25 flyback power supply but with a patented variation.

[5] You might expect the bad power factor is because switching power supplies rapidly turn on and off, but that's not the problem. The difficulty comes from the nonlinear diode bridge, which charges the input capacitor only at peaks of the AC signal. (If you're familiar with power factors due to phase shift, this is totally different. The problem is the non-sinusoidal current, not a phase shift.)

The idea behind PFC is to use a DC-DC boost converter before the switching power supply itself. The boost converter is carefully controlled so its input current is a sinusoid proportional to the AC waveform. The result is the boost converter looks like a nice resistive load to the power line, and the boost converter supplies steady voltage to the switching power supply components.

[6] The charger uses a MC33368"High Voltage GreenLine Power Factor Controller" chip to run the PFC. The chip is designed for low power, high-density applications so it's a good match for the charger.

[7] The SMPS controller chip is a L6599 high-voltage resonant controller; for some reason it is labeled DAP015D. It uses a resonant half-bridge topology; in a half-bridge circuit, two transistors control power through the transformer first one direction and then the other. Common switching power supplies use a PWM (pulse width modulation) controller, which adjusts the time the input is on. The L6599, on the other hand, adjusts the frequency instead of the pulse width. The two transistors alternate switching on for 50% of the time. As the frequency increases above the resonant frequency, the power drops, so controlling the frequency regulates the output voltage.

[8] The processor in the charger is a MSP430F2003 ultra low power microcontroller with 1kB of flash and just 128 bytes of RAM. It includes a high-precision 16-bit analog to digital converter. More information is here.

The 68000 microprocessor from the original Apple Macintosh and the 430 microcontroller in the charger aren't directly comparable as they have very different designs and instruction sets. But for a rough comparison, the 68000 is a 16/32 bit processor running at 7.8MHz, while the MSP430 is a 16 bit processor running at 16MHz. The Dhrystone benchmark measures 1.4 MIPS (million instructions per second) for the 68000 and much higher performance of 4.6 MIPS for the MSP430. The MSP430 is designed for low power consumption, using about 1% of the power of the 68000.

[9] The 60W Macbook charger uses a custom MSP430 processor, but the 85W charger uses a general-purpose processor that needs to loaded with firmware. The chip is programmed with the Spy-Bi-Wire interface, which is TI's two-wire variant of the standard JTAG interface. After programming, a security fuse inside the chip is blown to prevent anyone from reading or modifying the firmware.

[10] The voltage to the processor is provided by not by a standard voltage regulator, but a LT1460 precision reference, which outputs 3.3 volts with the exceptionally high accuracy of 0.075%. This seems like overkill to me; this chip is the second-most expensive chip in the charger after the SMPS controller, based on Octopart's prices.

[11] The voltage reference chip is unusual, it is a TSM103/A that combines two op amps and a 2.5V reference in a single chip. Semiconductor properties vary widely with temperature, so keeping the voltage stable isn't straightforward. A clever circuit called a bandgap reference cancels out temperature variations; I explain it in detail here.

[12] Since some readers are very interested in grounding, I'll give more details. A 1K&ohm; ground resistor connects the AC ground pin to the charger's output ground. (With the 2-pin plug, the AC ground pin is not connected.) Four 9.1M&ohm; resistors connect the internal DC ground to the output ground. Since they cross the isolation boundary, safety is an issue. Their high resistance avoids a shock hazard. In addition, since there are four resistors in series for redundancy, the charger remains safe even if a resistor shorts out somehow. There is also a Y capacitor (680pF, 250V) between the internal ground and output ground; this blue capacitor is on the upper side of the board. A T5A fuse (5 amps) protects the output ground.

[13] The power in watts is simply the volts multiplied by the amps. Increasing the voltage is beneficial because it allows higher wattage; the maximum current is limited by the wire size.

[14] The control circuitry is fairly complex. The output voltage is monitored by an op amp in the TSM103/A chip which compares it with a reference voltage generated by the same chip. This amplifier sends a feedback signal via an optoisolator to the SMPS control chip on the primary side. If the voltage is too high, the feedback signal lowers the voltage and vice versa. That part is normal for a power supply, but ramping the voltage from 16.5 volts to 18.5 volts is where things get complicated.

The output current creates a voltage across the current sense resistors, which have a tiny resistance of 0.005&ohm; each - they are more like wires than resistors. An op amp in the TSM103/A chip amplifies this voltage. This signal goes to tiny TS321 op amp which starts ramping up when the signal corresponds to 4.1A. This signal goes into the previously-described monitoring circuit, increasing the output voltage.

The current signal also goes into a tiny TS391 comparator, which sends a signal to the primary through another optoisolator to cut the output voltage. This appears to be a protection circuit if the current gets too high. The circuit board has a few spots where zero-ohm resistors (i.e. jumpers) can be installed to change the op amp's amplification. This allows the amplification to be adjusted for accuracy during manufacture.

[15] If you measure the voltage from a Macbook charger, you'll find about six volts instead of the 16.5 volts you'd expect. The reason is the output is deactivated and you're only measuring the voltage through the bypass resistor just below the output transistor.

[16] The laptop pulls the charger output low with a 39.41K&ohm; resistor to indicate that it is ready for power. An interesting thing is it won't work to pull the output too low - shorting the output to ground doesn't work. This provides a safety feature. Accidental contact with the pins is unlikely to pull the output to the right level, so the charger is unlikely to energize except when properly connected.

[17] The imitation charger uses the Fairchild FAN7602 Green PWM Controller chip, which is more advanced than I expected in a knock-off; I wouldn't have been surprised if it just used a simple transistor oscillator. Another thing to note is the imitation charger uses a single-sided circuit board, while the genuine uses a double-sided circuit board, due to the much more complex circuit.

[18] The burnt charger is an Apple A1222 85W Macbook charger, which is a different model from the A1172 charger in the rest of the teardown. The A1222 is in a slightly smaller, square case and has a totally different design based on the NCP 1203 PWM controller chip. Components in the A1222 charger are packed even more tightly than in the A1172 charger. Based on the burnt-up charger, I think they pushed the density a bit too far.

[19] I looked up many of the charger components on Octopart to see their prices. Apple's prices should be considerably lower. The charger has many tiny resistors, capacitors and transistors; they cost less than a cent each. The larger power semiconductors, capacitors and inductors cost considerably more. I was surprised that the 16-bit MSP430 processor costs only about $0.45. I estimated the price of the custom transformers. The list below shows the main components.

ComponentCost
MSP430F2003 processor$0.45
MC33368D PFC chip$0.50
L6599 controller chip$1.62
LT1460 3.3V reference$1.46
TSM103/A reference$0.16
2x P11NM60AFP 11A 60V MOSFET$2.00
3x Vishay optocoupler$0.48
2x 630V 0.47uF film capacitor$0.88
4x 25V 680uF electrolytic capacitor$0.12
420V 82uF electrolytic capacitor$0.93
polypropylene X2 capacitor$0.17
3x toroidal inductor$0.75
4A 600V diode bridge$0.40
2x dual common-cathode schottky rectifier 60V, 15A$0.80
20NC603 power MOSFET$1.57
transformer$1.50?
PFC inductor$1.50?

[20] The article Breaking down the full $650 cost of the iPhone 5 describes Apple's profit margins in detail, estimating 45% profit margin on the iPhone. Some people have suggested that Apple's research and development expenses explain the high cost of their chargers, but the math shows R&D costs must be negligible. The book Practical Switching Power Supply Design estimates 9 worker-months to design and perfect a switching power supply, so perhaps $200,000 of engineering cost. More than 20 million Macbooks are sold per year, so the R&D cost per charger would be one cent. Even assuming the Macbook charger requires ten times the development of a standard power supply only increases the cost to 10 cents.

Creating high resolution integrated circuit die photos with Hugin or ICE

$
0
0
Have you ever wanted to take a bunch of photos of an integrated circuit die and combine them into a high-res image? The stitching software can be difficult, so I've written a guide to the process I use. These tips may also be useful for other Hugin panoramas.

The first step is to take a bunch of photos of the die with a microscope. I used an old Motorola 6820 PIA (Peripheral Interface Adapter) chip. This chip had a metal cap over the die that popped off easily with a chisel, exposing the die. The 6820 is notable as the keyboard interface chip in the Apple I computer.

The MC6820 chip with the metal lid popped off to reveal the silicon die.

The MC6820 chip with the metal lid popped off to reveal the silicon die.

The next step is to take photos of the die through a microscope. I used an AmScope metallurgical microscope like the one below. A metallurgical microscope shines the light from above so you can view opaque objects such as chips. (The box on the left of the microscope is the light.) It's much easier if the microscope has an X-Y stage to precisely move the die for each picture.

The key to success is pictures with substantial overlap, so the software can figure out how to combine them. Use more overlap than you think necessary - at least 30% is good. Skimping on the overlap may result in hours of manual work later. The quality of the input photos is also important - make sure the die is level so you can get sharp focus across the whole image. Give the images structured names according to their grid position: 11.png, 12.png, 21.png, ... This will make it much easier to figure out which photos are overlapping neighbors when stitching them together.

For this article, I used the set of images below. Some of them overlap substantially, and some ... not so much. As a result, this article describes a fairly difficult stitch. In the process I learned the importance of overlap, and Hugin worked much better when I tried again with a denser set of images.

The set of images used to generate the die photo.

The set of images used to generate the die photo.

The easiest way to stitch together photos is with Microsoft's Image Composite Editor (ICE). You simply import the photos, click Stitch, and save the result. If ICE works, it's super-easy, but it doesn't have any flexibility if you run into problems (as I did). ICE can be downloaded from Microsoft.

If ICE doesn't work for you, the open-source Hugin panorama photo stitcher is much more flexible and provides many more options. While Hugin is easy to use for simple panoramas, it's pretty confusing for more complex projects, which is why I've written this. The software can be downloaded from the Hugin website. To start a stitch with Hugin, load the images by dragging-and-dropping them into the Photos window. Enter "Normal (rectilinear)" for the lens type and 1 for HFOV in the dialog.

The next step is to generate the control points, which indicate features that match between pairs of images. The control points are what tie the images together, so high quality control points are critical. To generate control points, under "Feature Matching" select "Hugin's CPFind" and click "Create control points". (See the screenshot below.) It will take several minutes to generate control points. You can install other control point finders if you want. Autopano-SIFT-C is said to be good, but I didn't get good results at all with it; it is in a zip file here.

Main screen of the Hugin panorama program

Main screen of the Hugin panorama program

Next, optimize the control points to fit the images together. Under "Optimize", select "Positions (incremental, starting from anchor)" and click "Calculate". Hugin will try to find the best positions for the images. You want a maximum distance of a few pixels, but if you're unlucky the distance may be in the hundreds. Click Yes to apply the optimization.

The Panorama Preview icon will generate a panorama based on the control points. To get the image to the center, click Center and then click the center of the images. Click Fit and it may fit the panorama into the window, or you may need to move the sliders (very slowly). Above the panorama, you can select which images you wish to display. Important: only the selected images will be optimized. If you don't have enough images selected, you'll get the mysterious error "No Feature Points". As you can see below, my first attempt was a mess with all the images in one badly-aligned horizontal strip.

An unsuccessful attempt to generate a composite photo of an IC die with Hugin.

An unsuccessful attempt to generate a composite photo of an IC die with Hugin.

The next step is to fix the control points. Because Hugin optimizes globally, even a few bad control points can mess up the entire image. The main way to fix control points is the Control Points screen, shown below. Select an image on the left and an image on the right. The image selection dialog shows how many control points match between the images. The squares on the images indicate matching control points, which are also listed. If images overlap but don't have any control points, add control points by clicking matching spots in the left and right images. The images will then zoom so you can fine-tune the positions. Finally, click Add.

The control point editing screen in Hugin.

The control point editing screen in Hugin.

A quick way to create control points between two images that overlap is to re-run Hugin's feature mapper on the pair of images. Go to the Photos tab, control-click two images, and then click Create Control Points. If the images overlap sufficiently, Hugin should find control points. If this doesn't work, you're stuck with manually adding points as described above.

If two images shouldn't share control points, go to the Control Points tab, select the two images and delete their control points. This is where organized naming of the images helps - if you see control points between img00 and img35, there's probably something wrong.

You can also clean up bad control points with the control points list. Click the Show Control Points icon at the top and click Distance to sort. You should see a lot of small distances (good) and some very large distances (bad) at the bottom. Click a large distance, and it will bring up the Control Points page. Delete the bad control points. You can also do a bulk delete from the Show Control Points dialog. Click Select by Distance, enter 50 (for example), and then click delete. (But be warned this could delete some good control points too, so you might want to check them first.)

Once the control points are reasonably sensible, go back to the Photos tab and re-optimize. If you're lucky, the images will now be aligned. Unfortunately, I ended up with a cubist mess. I'll explain how to still get a panorama even if you run into problems like this.

Another unsuccessful attempt to make a composite die photo with Hugin.

Another unsuccessful attempt to make a composite die photo with Hugin.

If the parameters get too messed up, select Custom Parameters under Optimize, which will add the Optimizer tab. Under that tab you can reset all the parameters, or parameters for individual images. This is helpful if images start showing up rotated, for instance.

To debug your panorama, you can add images to the panorama one at a time to see which image is causing the problems. Use the Panorama Preview to select the images you want to process. After adding each new image, use the Optimizer tab to optimize the selected images: check "Only use control points between image selected in preview window" and click "Optimize now". If the image shows up in the right spot, all is well. Otherwise, there's something wrong with the last image's control points. Examine its control points under the Control Points tab, and delete any bad matches. (Since integrated circuits often have repeated blocks, it's easy for the matcher to generate convincing but entirely wrong control points.) If the newly-added image doesn't show up at all, it probably lacks any control points linking it with the rest of the images, and got placed at the origin. If the image shows up at an angle, it may have just one control point linking it to another image, letting it swivel around, so add more matching control points. After fixing the image's control points, re-optimize and hopefully it will now be placed correctly. You should be able to correct all the problems by proceeding image by image.

The Panorama Preview window in Hugin. By selecting a subset of the images to tile, control point errors can be corrected one image at a time.

The Panorama Preview window in Hugin. By selecting a subset of the images to tile, control point errors can be corrected one image at a time.

Once you have a good preview, you can generate the final image. Go to the Stitcher tab. Select Equirectangular project. Click Calculate field of view. I recommend starting with a small canvas; it's annoying to wait for a 100 megapixel image and then discover it's a mess. I suggest avoiding cropping; Hugin tends to crop too much, and it's easy to crop later with a tool such as Gimp. Finally, click Stitch, save the project, and wait while the image is generated.

If the result looks good, increase the resolution and generate a high-res version. The photo below shows my final stitched image of the Motorola 6820 die. Click for the full-size image. I've left the image uncropped to make the tiling more visible. I've since made a better composite, starting with source images that overlapped more, and the process was much easier.

Die photo of the Motorola 6820 Peripheral Interface Adapter chip, composited with Hugin.

Die photo of the Motorola 6820 Peripheral Interface Adapter chip, composited with Hugin.

One advanced Hugin feature that may be useful is defining horizontal and vertical lines, so your image comes out straight (wiki). To do this, add control points on a horizontal line between two images, e.g. the upper edge at the left and the upper edge at the right. Note that unlike regular control points, you are not matching the same point in both images, just points on the same horizontal line. After clicking Add, change the mode to Horizontal Line using the dropdown. Put another horizontal edge on the bottom of the die. Vertical lines are similar.

To conclude, making a high-res die photo is an interesting project if you have the right kind of microscope. The Hugin compositing software has a steep learning curve, but hopefully this article will help. Starting with images that overlap significantly will make the process much easier. I should mention that I'm not at all an expert at Hugin or die photos - please leave a comment if you have suggestions.

Acknowledgements: Mikhail at zeptobars gave me helpful advice about Hugin. Other good sites with die photos are Visual 6502 and Silicon Pr0n.

Reverse engineering the ARM1, ancestor of the iPhone's processor

$
0
0
Almost every smartphone uses a processor based on the ARM1 chip created in 1985. The Visual ARM1 simulator shows what happens inside the ARM1 chip as it runs; the result (below) is fascinating but mysterious.[1] In this article, I reverse engineer key parts of the chip and explain how they work, bridging the gap between the puzzling flashing lines in the simulator and what the chip is actually doing. I describethe overall structure of the chip and then descend to the individual transistors, showing how they are built out of silicon and work together to store and process data. After reading this article, you can look at the chip's circuits and understand the data they store.

Simulation of the ARM1 processor chip.

Screenshot of the Visual ARM1 simulator, showing the activity inside the ARM1 chip as it executes a program.

Overview of the ARM1 chip

The ARM1 chip is built from functional blocks, each with a different purpose. Registers store data, the ALU (arithmetic-logic unit) performs simple arithmetic, instruction decoders determine how to handle each instruction, and so forth. Compared to most processors, the layout of the chip is simple, with each functional block clearly visible. (In comparison, the layout of chips such as the 6502 or Z-80 is highly hand-optimized to avoid any wasted space. In these chips, the functional blocks are squished together, making it harder to pick out the pieces.)

The diagram below shows the most important functional blocks of the ARM chip.[2] The actual processing happens in the bottom half of the chip, which implements the data path. The chip operates on 32 bits at a time so it is structured as 32 horizontal layers: bit 31 at the top, down to bit 0 at the bottom. Several data buses run horizontally to connect different sections of the chip. The large register file, with 25 registers, stands out in the image. The Program Counter (register 15) is on the left of the register file and register 0 is on the right.[3]

The main components of the ARM1 chip. Most of the pins are used for address and data lines; unlabeled pins are various control signals.

The main components of the ARM1 chip. Most of the pins are used for address and data lines; unlabeled pins are various control signals.

Computation takes place in the ALU (arithmetic-logic unit), which is to the right of the registers. The ALU performs 16 different operations (add, add with carry, subtract, logical AND, logical OR, etc.) It takes two 32-bit inputs and produces a 32-bit output. The ALU is described in detail here.[4] To the right of the ALU is the 32-bit barrel shifter. This large component performs a binary shift or rotate operation on its input, and is described in more detail below. At the left is the address circuitry which provides an address to memory through the address pins. At the right data circuitry reads and writes data values to memory.

Above the datapath circuitry is the control circuitry. The control lines run vertically from the control section to the data path circuits below. These signals select registers, tell the ALU what operation to perform, and so forth. The instruction decode circuitry processes each instruction and generates the necessary control signals. The register decode block processes the register select bits in an instruction and generates the control signals to select the desired registers.[5]

The pins

The squares around the outside of the image above are the pads that connect the processor to the outside world. The photo below shows the 84-pin package for the ARM1 processor chip. The gold-plated pins are wired to the pads on the silicon chip inside the package.

The ARM1 processor chip installed in the Acorn ARM Evaluation System. Original photo by Flibble, https://commons.wikimedia.org/wiki/File:Acorn-ARM-Evaluation-System.jpg, CC BY-SA 3.0.

The ARM1 processor chip installed in the Acorn ARM Evaluation System. Full photo by Flibble, CC BY-SA 3.0.

Most of the pads are used for the address and data lines to memory. The chip has 26 address lines, allowing it to access 64MB of memory, and has 32 data lines, allowing it to read or write 32 bits at a time. The address lines are in the lower left and the data lines are in the lower right. As the simulator runs, you can see the address pins step through memory and the data pins read data from memory. The right hand side of the simulator shows the address and data values in hex, e.g. "A:00000020 D:e1a00271". If you know hex, you can easily match these values to the pin states.

Each corner of the chip has a power pin (+) and a ground pin (-), providing 5 volts to run the chip. Various control signals are at the top of the chip. In the simulator, it is easy to spot the the two clock signals that step the chip through its operations (below). The phase 1 and phase 2 clocks alternate, providing a tick-tock rhythm to the chip. In the simulator, the clock runs at a couple cycles per second, while the real chip has a 8MHz clock, more than a million times faster. Finally, note below the manufacturer's name "ACORN" on the chip in place of pin 82.

The two clock signals for the ARM1 processor chip.

History of the ARM chip

The ARM1 was designed in 1985 by engineers Sophie Wilson (formerly Roger Wilson) and Steve Furber of Acorn Computers. The chip was originally named the Acorn RISC Machine and intended as a coprocessor for the BBC Micro home/educational computer to improve its performance. Only a few hundred ARM1 processors were fabricated, so you might expect ARM to be a forgotten microprocessor, a historical footnote of the 1980s. However, the original ARM1 chip led to the amazingly successful ARM architecture with more than 50 billion ARM chips produced. What happened?

In the early 1980s, academic research suggested that instead of making processor instruction sets more complex, designers would get better performance from a processor that was simple but fast: the Reduced Instruction Set Computer or RISC.[6] The Berkeley and Stanford research papers on RISC inspired the ARM designers to choose a RISC design. In addition, given the small size of the design team at Acorn, a simple RISC chip was a practical choice.[7]

The simplicity of a RISC design is clear when comparing the ARM1 and Intel's 80386, which came out the same year: the ARM1 had about 25,000 transistors versus 275,000 in the 386.[8] The photos below show the two chips at the same scale; the ARM1 is 50mm2 compared to 104mm2 for the 386. (Twenty years later, an ARM7TDMI core was 0.1mm2; magnified at the same scale it would be the size of this square vividly illustrating Moore's law.)

Die photo of the ARM1 processor chip. Courtesy of Computer History Museum.Intel 386 CPU die photo (A80386DX-20). By Pdesousa359, https://commons.wikimedia.org/wiki/File:Intel_A80386DX-20_CPU_Die_Image.jpg (CC BY-SA 3.0)

Die photos of the ARM1 processor and the Intel 386 processor to the same scale. The ARM1 is much smaller and contained 25,000 transistors compared to 275,000 in the 386. The 386 was higher density, with a 1.5 micron process compared to 3 micron for the ARM1. ARM1 photo courtesy of Computer History Museum. Intel A80386DX-20 by Pdesousa359, CC BY-SA 3.0.

Because of the ARM1's small transistor count, the chip used very little power: about 1/10 Watt, compared to nearly 2 Watts for the 386. The combination of high performance and low power consumption made later versions of ARM chip very popular for embedded systems. Apple chose the ARM processor for its ill-fated Newton handheld system and in 1990, Acorn Computers, Apple, and chip manufacturer VLSI Technology formed the company Advanced RISC Machines to continue ARM development.[9]

In the years since then, ARM has become the world's most-used instruction set with more than 50 billion ARM processors manufactured. The majority of mobile devices use an ARM processor; for instance, the Apple A8 processor inside iPhone 6 uses the 64-bit ARMv8-A. Despite its humble beginnings, the ARM1 made IEEE Spectrum's list of 25 microchips that shook the world and PC World's 11 most influential microprocessors of all time.

Looking at the low-level construction of the ARM1 chip

Getting back to the chip itself, the ARM1 chip is constructed from five layers. If you zoom in on the chip in the simulator, you can see the components of the chip, built from these layers. As seen below, the simulator uses a different color for each layer, and highlights circuits that are turned on. The bottom layer is the silicon that makes up the transistors of the chip. During manufacturing, regions of the silicon are modified (doped) by applying different impurities. Silicon can be doped positive to form a PMOS transistor (blue) or doped negative for an NMOS transistor (red). Undoped silicon is basically an insulator (black).

The ARM1 simulator uses different colors to represent the different layers of the chip.

The ARM1 simulator uses different colors to represent the different layers of the chip.

Polysilicon wires (green) are deposited on top of the silicon. When polysilicon crosses doped silicon, it forms the gate of a transistor (yellow). Finally, two layers of metal (gray) are on top of the polysilicon and provide wiring.[10] Black squares are contacts that form connections between the different layers.

For our purposes, a MOS transistor can be thought of as a switch, controlled by the gate. When it is on (closed), the source and drain silicon regions are connected. When it is off (open), the source and drain are disconnected. The diagram below shows the three-dimensional structure of a MOS transistor.

Structure of a MOS transistor.

Structure of a MOS transistor.

Like most modern processors, the ARM1 was built using CMOS technology, which uses two types of transistors: NMOS and PMOS. NMOS transistors turn on when the gate is high, and pull their output towards ground. PMOS transistors turn on when the gate is low, and pull their output towards +5 volts.

Understanding the register file

The register file is a key component of the ARM1, storing information inside the chip. (As a RISC chip, the ARM1 makes heavy use of its registers.) The register file consists of 25 registers, each holding 32 bits. This section describes step-by-step how the register file is built out of individual transistors.

The diagram below shows two transistors forming an inverter. If the input is high (as below), the NMOS transistor (red) turns on, connecting ground to the output so the output is low. If the input is low, the PMOS transistor (blue) turns on, connecting power to the output so the output is high. Thus, the output is the opposite of the input, making an inverter.

An inverter in the ARM1 chip, as displayed by the simulator.

An inverter in the ARM1 chip, as displayed by the simulator.

Combining two inverters into a loop forms a simple storage circuit. If the first inverter outputs 1, the second inverter outputs 0, causing the first inverter to output 1, and the circuit is stable. Likewise, if the first inverter outputs 0, the second outputs 1, and the circuit is again stable. Thus, the circuit will remain in either state indefinitely, "remembering" one bit until forced into a different state.

Two inverters in the ARM1 chip form one bit of register storage.

Two inverters in the ARM1 chip form one bit of register storage.

To make this circuit into a useful register cell, read and write bus lines are added, along with select lines to connect the cell to the bus lines. When the write select line is activated, the pass connector connects the write bus to the inverter, allowing a new value to be overwrite the current bit. Likewise, pass transistors connect the bit to a read bus when activated by the corresponding select line, allowing the stored value to be read out.

Schematic of one bit in the ARM1 processor's register file.

Schematic of one bit in the ARM1 processor's register file.

To create the register file, the register cell above is repeated 32 times vertically for each bit, and 25 times horizontally to form each register. Each bit has three horizontal bus lines — the write bus and the two read buses — so there are 32 triples of bus lines. Each register has three vertical control lines — the write select line and two read select lines — so there are 25 triples of control lines. By activating the desired control lines, two registers can be read and one register can be written at a time.[11] When the simulator is running, you can see the vertical control lines activated to select registers, and you can see the data bits flowing on the horizontal bus lines.

By looking at a memory cell in the simulator, you can see which inverter is on and determine if the bit is a 0 or a 1. The diagram below shows a few register bits. If the upper inverter input is active, the bit is 0; if the lower inverter input is active, the bit is 1. (Look at the green lines above or below the bit values.) Thus, you can read register values right out of the simulator if you look closely.

By looking at the ARM1 register file, you can determine the value of each bit. For a 0 bit, the input to the top inverter is active (green/yellow); for a 1 bit, the input to the bottom inverter is active.

By looking at the ARM1 register file, you can determine the value of each bit. For a 0 bit, the input to the top inverter is active (green/yellow); for a 1 bit, the input to the bottom inverter is active.

The barrel shifter

The barrel shifter, which performs binary shifts, is another interesting component of the ARM1. Most instructions use the barrel shifter, allowing a binary argument to be shifted left, shifted right, or rotated by any amount (0 to 31 bits). While running the simulator, you can see diagonal lines jumping back and forth in the barrel shifter.

The diagram below shows the structure of the barrel shifter. Bits flows into the shifter vertically with bit 0 on the left and bit 31 on the right. Output bits leave the shifter horizontally with bit 0 on the bottom and bit 31 on top. The diagonal lines visible in the barrel shifter show where the vertical lines are connected to the horizontal lines, generating a shifted output. Different positions of the diagonals result in different shifts. The upper diagonal line shifts bits to the left, and the lower diagonal line shifts bits to the right. For a rotation, both diagonals are active; it may not be immediately obvious but in a rotation part of the word is shifted left and part is shifted right.

Structure of the barrel shifter in the ARM1 chip.

Structure of the barrel shifter in the ARM1 chip.

Zooming in on the barrel shifter shows exactly how it works. It contains a 32 by 32 crossbar grid of transistors, each connecting one vertical line to one horizontal line. The transistor gates are connected by diagonal control lines; transistors along the active diagonal connect the appropriate vertical and horizontal lines. Thus, by activating the appropriate diagonals, the output lines are connected to the input lines, shifted by the desired amounts. Since the chip's input lines all run horizontally, there are 32 connections between input lines and the corresponding vertical bit lines.

Details of the barrel shifter in the ARM1 chip. Transistors along a specific diagonal are activated to connect the vertical bit lines and output lines. Each input line is connected to a vertical bit line through the indicated connections.

Details of the barrel shifter in the ARM1 chip. Transistors along a specific diagonal are activated to connect the vertical bit lines and output lines. Each input line is connected to a vertical bit line through the indicated connections.

The demonstration program

When you run the simulator, it executes a short hardcoded program that performs shifts of increasing amounts. You don't need to understand the code, but if you're curious it is:
0000  E1A0100F mov     r1, pc        @ Some setup
0004  E3A0200C mov     r2, #12
0008  E1B0F002 movs    pc, r2
000C  E1A00000 nop
0010  E1A00000 nop
0014  E3A02001 mov     r2, #1        @ Load register r2 with 1
0018  E3A0100F mov     r1, #15       @ Load r1 with value to shift
001C  E59F300C ldr     r3, pointer
    loop:
0020  E1A00271 ror     r0, r1, r2    @ Rotate r1 by r2 bits, store in r0
0024  E2822001 add     r2, r2, #1    @ Add 1 to r2
0028  E4830004 str     r0, [r3], #4  @ Write result to memory
002C  EAFFFFFB b       loop          @ Branch to loop
Inside the loop, register r1 (0x000f) is rotated to the right by r2 bit positions and the result is stored in register r0. Then r2 is incremented and the shift result written to memory. As the simulator runs, watch as r2 is incremented and as r0 goes through the various values of 4 bits rotated. The A and D values show the address and data pins as instructions are read from memory.

The changing shift values are clearly visible in the barrel shifter, as the diagonal line shifts position. If you zoom in on the register file, you can read out the values of the registers, as described earlier.

Conclusion

The ARM1 processor led to the amazingly successful ARM processor architecture that powers your smart phone. The simple RISC architecture of the ARM1 makes the circuitry of the processor easy to understand, at least compared to a chip such as the 386.[12] The ARM1 simulator provides a fascinating look at what happens inside a processor, and hopefully this article has helped explain what you see in the simulator.

P.S. If you want to read more about ARM1 internals, see Dave Mugridge's series of posts:
Inside the armv1 Register Bank
Inside the armv1 Register Bank - register selection
Inside the armv1 Read Bus
Inside the ALU of the armv1 - the first ARM microprocessor

Notes and references

[1] I should make it clear that I am not part of the Visual 6502 team that built the ARM1 simulator. More information on the simulator is in the Visual 6502 team's blog post The Visual ARM1.

[2] The block diagram below shows the components of the chip in more detail. See the ARM Evaluation System manual for an explanation of each part.

Floorplan of the ARM1 chip, from ARM Evaluation System manual.

Floorplan of the ARM1 chip, from ARM Evaluation System manual.

[3] You may have noticed that the ARM architecture describes 16 registers, but the chip has 25 physical registers. There are 9 "extra" registers because there are extra copies of some registers for use while handling interrupts.

Another interesting thing about the register file is the PC register is missing a few bits. Since the ARM1 uses 26-bit addresses, the top 6 bits are not used. Because all instructions are aligned on a 32-bit boundary, the bottom two address bits in the PC are always zero. These 8 bits are not only unused, they are omitted from the chip entirely.

[4] The ALU doesn't support multiplication (added in ARM 2) or division (added in ARMv7).

[5] A bit more detail on the decode circuitry. Instruction decoding is done through three separate PLAs. The ALU decode PLA generates control signals for the ALU based on the four operation bits in the instruction. The shift decode PLA generates control signals for the barrel shifter. The instruction decode PLA performs the overall decoding of the instruction. The register decode block consists of three layers. Each layer takes a 4-bit register id and activates the corresponding register. There are three layers because ARM operations use two registers for inputs and a third register for output.

[6] In a RISC computer, the instruction set is restricted to the most-used instructions, which are optimized for high performance and can typically execute in a single clock cycle. Instructions are a fixed size, simplifying the instruction decoding logic. A RISC processor requires much less circuitry for control and instruction decoding, leaving more space on the chip for registers. Most instructions operate on registers, and only load and store instructions access memory. For more information on RISC vs CISC, see RISC architecture.

[7] For details on the history of the ARM1, see Conversation with Steve Furber: The designer of the ARM chip shares lessons on energy-efficient computing.

[8] The 386 and the ARM1 instruction sets are different in many interesting ways. The 386 has instructions from 1 byte to 15 bytes, while all ARM1 instructions are 32-bits long. The 386 has 15 registers - all with special purposes, while the ARM1 has 25 registers, mostly general-purpose. 386 instructions can usually operate on memory, while ARM1 instructions operate on registers except for load and store. The 386 has about 140 different instructions, compared to a couple dozen in the ARM1 (depending how you count). Take a look at the 386 opcode map to see how complex decoding a 386 instruction is. ARM1 instructions fall into 5 categories and can be simply decoded. (I'm not criticizing the 386's architecture, just pointing out the major architectural differences.)

See the Intel 80386 Programmer's Reference Manual and 80386 Hardware Reference Manual for more details on the 386 architecture.

[9] Interestingly the ARM company doesn't manufacture chips. Instead, the ARM intellectual property is licensed to hundreds of different companies that build chips that use the ARM architecture. See The ARM Diaries: How ARM's business model works for information on how ARM makes money from licensing the chip to other companies.

[10] The first metal layer in the chip runs largely top-to-bottom, while the second metal layer runs predominantly horizontally. Having two layers of metal makes the layout much simpler than single-layer processors such as the 6502 or Z-80.

[11] In the register file, alternating bits are mirrored to simplify the layout. This allows neighboring bits to share power and ground lines. The ARM1's register file is triple-ported, so two register can be read and one register written at the same time. This is in contrast to chips such as the 6502 or Z-80, which can only access registers one at a time.

[12] For more information on the ARM1 internals, the book VLSI Risc Architecture and Organization by ARM chip designer Steven Furber has a hundred pages of information on the ARM chip internals. An interesting slide deck is A Brief History of ARM by Lee Smith, ARM Fellow.

Counting bits in hardware: reverse engineering the silicon in the ARM1 processor

$
0
0
How can you count bits in hardware? In this article, I reverse-engineer the circuit used by the ARM1 processor to count the number of set bits in a 16-bit field, showing how individual transistors form multiplexers, which are combined into adders, and finally form the bit counter. The ARM1 is the ancestor of the processor in most cell phones, so you may have a descendent of this circuit in your pocket.

ARM is now the world's most popular instruction set but it has humble beginnings. The original ARM1 processor was designed in 1985 by a UK company called Acorn Computer for the BBC Micro home/educational computer. A few years later Apple needed a low-power, high-performance processor for its ill-fated Newton handheld system and chose ARM.[1] In 1990, Acorn Computers, Apple, and chip manufacturer VLSI Technology formed the company Advanced RISC Machines to continue ARM development. ARM became very popular for low power applications (such as phones) and now more than 50 billion ARM processors have been manufactured.

One way ARM processors increase performance is through block data transfer instructions, which efficiently copy data between on-chip registers and memory storage.[2] These instructions can transfer any subset of ARM's 16 registers in a single instruction. The desired registers are specified by setting the corresponding bits in a 16-bit field in the instruction. To implement the block transfer instructions, the ARM requires two specialized circuits. The first circuit, the bit counter, counts the number of bits set in the register select field to determine how many registers are being transferred.[3] The second circuit, the priority encoder, scans the register select field and finds the next set bit, indicating which register to load/store next.

The ARM1 processor chip with major functional groups labeled. The bit counter and priority encoder used for the LDM/STM instructions are highlighted in red. These take up about 3% of the chip's area.

The ARM1 processor chip with major functional groups labeled. The bit counter and priority encoder used for the LDM/STM instructions are highlighted in red. These take up about 3% of the chip's area.ARM1 die photo courtesy of Computer History Museum.
These two circuits are highlighted in red in the ARM1 die photo above. As you can see, the circuits take up a significant fraction of the chip (about 3%), but the chip designers felt the performance gain from block transfers was worth the increase in chip size and complexity. This article explains the bit counter, and I plan to describe the priority encoder later.

Zooming in on the bit counter reveals the circuit below. It looks like a jumble of lines, but by examining it carefully, you can get an understanding of what is going on. The remainder of the article explains how a special type of circuitry called pass transistor logic is used to build a multiplexer — a circuit that selects one of its two inputs. The multiplexers are used to form logic gates, which are then combined to form a full adder, which adds three bits. Finally, the adders are combined to create the bit counting circuit. If you're not familiar with digital logic or the ARM processor, you might want to start with my earlier article on reverse-engineering the ARM1 for an overview.

The bit counter circuit from the ARM1 processor chip. This circuit counts the number of registers selected by the LDM/STM instructions.

The bit counter circuit from the ARM1 processor chip. This circuit counts the number of registers selected by the LDM/STM instructions.

Pass transistors and transmission gates

The bit counter is built from a type of circuitry called pass transistor logic. Unlike normal logic gates, pass transistor logic switches the inputs themselves to pass an input directly to the output. Pass transistors are used because sums (i.e. XORs) are inconvenient to generate with standard logic and can be generated more efficiently with pass transistor logic.

The ARM1 chip, like most modern chips, is built from a technology called CMOS. The C in CMOS stands for complementary because CMOS circuits are built from two complementary types of transistors. NMOS transistors switch on when the control signal on the gate is high, and can pull the output low. PMOS transistors are opposite; they switch on when the gate's control signal is low, and can pull the output high. Combining an NMOS transistor and a PMOS transistor in parallel forms a transmission gate. If both transistors are on, the input will be passed to the output whether it is low or high. If both transistors are off, the input is blocked. Thus, the circuit acts as a switch that can either pass the input through to the output or block it.

The diagram below shows two transistors (circled) connected to form a transmission gate. The upper one is NMOS and the lower one is PMOS. On the right is the symbol for a transmission gate. Note that because the transistors are complementary, they require opposite enable signals.

Schematic symbols for a CMOS pass gate. On the left, the two transistors are shown. On the right is the equivalent pass gate symbol. The circles around the transistors are to make the transistors clear and are not part of the symbol.

Schematic symbols for a CMOS transmission gate. On the left, the two transistors are shown. On the right is the equivalent transmission gate symbol. The circles around the transistors are to make the transistors clear and are not part of the symbol.

The multiplexer

Next, we can look at how transmission gates are used in the chip. The diagram below shows a multiplexer as it appears in the Visual ARM1 simulator. The ARM1 chip is constructed from five layers, which appear as different colors in the simulator. (The layers are harder to distinguish in the real chip.) The bottom layer is the silicon that makes up the transistors of the chip. During manufacturing, regions of the silicon are modified (doped) by applying different impurities. Silicon can be doped positive to form a PMOS transistor (blue) or doped negative for an NMOS transistor (red). Undoped silicon (black) is basically an insulator. Polysilicon wires (green) are deposited on top of the silicon. When polysilicon crosses doped silicon, it forms the gate of a transistor (yellow). Finally, two layers of metal[4] (gray) are on top of the polysilicon and provide wiring. Black squares are contacts that form connections between the different layers.

A pass-gate multiplexer in the ARM1 processor, showing how different layers are displayed in the Visual ARM1 simulator.

A pass-gate multiplexer in the ARM1 processor, showing how different layers are displayed in the Visual ARM1 simulator.

Each multiplexer consists of four transistors: two NMOS (red) and two PMOS (blue); the gate appears in yellow between the two sides of the transistor. These form two transmission gates allowing either the left input or the right input to be connected to the output. If "Select left" is high and "Select right" is low, the two transistors on the left turn on, connecting the left input to the output. Conversely, if "Select right" is high and "Select left" is low, the two transistors on the right turn on, connecting the right input to the output.

A pass-gate multiplexer circuit in the ARM1 processor. The left shows the physical construction of the circuit, as it appears in the Visual ARM1 simulator. The corresponding schematic is on the right. If 'Select left' is high, the two transistors on the left will be active, connecting the left input to the output. If 'Select right' is high, the two transistors on the right will connect the right input to the output.

A pass-gate multiplexer circuit in the ARM1 processor. The left shows the physical construction of the circuit, as it appears in the Visual ARM1 simulator. The corresponding schematic is on the right. If 'Select left' is high, the two transistors on the left will be active, connecting the left input to the output. If 'Select right' is high, the two transistors on the right will connect the right input to the output.
The symbol for a multiplexer is shown below. If the select line is 1, the input labeled 1 is selected for the output, and conversely for 0. Note that the inverted select line is also required, but isn't explicitly shown in the symbol. This is important, since the inverted select must be generated in the circuit.

Symbol for a two-input multiplexer. Based on the select line, one of the inputs goes to the output.

Symbol for a two-input multiplexer. Based on the select line, one of the inputs goes to the output.

Building a full adder from multiplexers

A full adder is a digital circuit to add two bits along with a carry in, generating a sum output and a carry output. (If you think of the output as a binary sum, the sum output is the low bit and the carry output is the high bit.) Equivalently, the full adder can be thought of as adding three input bits. The full adder is the building block of the ARM1's bit counting circuit.

In the ARM1, a full adder is built from multiplexers, along with a few inverters. The diagram below shows how a full adder appears in the simulator. Counting the yellow rectangles, you can see that there are 29 transistors in the circuit. The transistors are connected by metal wires (gray) and polysilicon wires (green). While the layout may appear chaotic, the transistors are arranged in an orderly way: a row of PMOS transistors (blue), two rows of NMOS transistors (red), and a second row of PMOS transistors (blue).[5]

A full-adder circuit in the ARM1 processor, as it appears in the Visual ARM1 simulator.

A full-adder circuit in the ARM1 processor, as it appears in the Visual ARM1 simulator.
Arranging components for high density wasn't important to the ARM1 designers, so they built circuits from standard blocks (or cells) using computerized design tools, resulting in the regular layout seen above. On the other hand, the designers of earlier processors such as the 6502 and Z-80 tried to minimize the chip size as much as possible, so the chip layout was highly optimized. Each transistor and wire was hand-drawn to fit as tightly as possible, almost like a jigsaw puzzle. The image below shows part of the Z-80 chip, demonstrating the tightly-packed, irregular layout. The difference between hand-draw, optimized layout and computer-generated layout is striking.

A detail of the Z-80 processor layout, showing the complex hand-drawn layout. Each transistor and wire is carefully shaped to minimize the chip's size.

A detail of the Z-80 processor layout, showing the complex hand-drawn layout. Each transistor and wire is carefully shaped to minimize the chip's size. Z-80 data is from the Visual 6502 project.

The schematic below shows how the full adder in the ARM1 is built from multiplexers. In the lower left, a multiplexer generates "A XOR B", which is the single-bit sum of A and B. If you try the combinations of A and B, you'll find that the output is 1 if exactly one of the inputs is 1, and otherwise 0. The next multiplexer reverses the A inputs and computes the complement of A XOR B.[6] The third multiplexer implements a NAND gate: If B is 1 and A is 1, the output is 0.[7]

Schematic of a full-adder in the ARM1 processor, showing its construction from multiplexers. Inverters for A and B are not shown.

Schematic of a full-adder in the ARM1 processor, showing its construction from multiplexers. Inverters for A and B are not shown.

The multiplexers in the upper half compute the sum and carry (i.e. bit 0 and bit 1 of the binary sum), as can be verified by trying the input combinations. You might wonder why inverters are used, rather than generating the desired outputs directly. The reason is to boost the signals, since the outputs of multiplexers are relatively weak.

The diagram below indicates the multiplexers and inverters[6] that make up a full adder, with the components highlighted. Each multiplexer is built as described earlier, and they are arranged as in the schematic above. The multiplexers are connected together by polysilicon and metal wires. The three inputs are at the bottom and the two outputs are at the top. This adder is the main block used to build the bit counter, and the next section will show how adders are connected together.

A full-adder circuit in the ARM1 processor, showing how it is built from pass-gate multiplexers and inverters.

A full-adder circuit in the ARM1 processor, showing how it is built from pass-gate multiplexers and inverters.

Building the bit counter from adders

The bit counter takes 16 bit inputs and generates a 4-bit count as output, using adders as building blocks. The flow chart below shows how it operates, with data flowing from top to bottom. Each box is an adder, with carry (C) and sum (S) outputs. Boxes are colored according to which bit of the sum they are computing: red for the 1's bit, green for the 2's bit, blue for the 4's bit and purple for the 8's bit. Each box passes its sum output down and passes its carry to the left.

Overall, the process is similar to long addition if you could just add three digits at a time. You compute partial sums, then add up those sums, and so forth until all the sums are added up. Then the carries need to be added up, along with the sums of those carries, and so forth. If there are carries from those digits, they need to be added up, until finally everything has been added.

The first step of counting the bits is to add each triple of bits with a full adder, generating a two bit count (0, 1, or 2). Inconveniently, since the sixteen input bits aren't divisible by 3, one bit is left over and is handled separately. Next, the five partial sums are added by more adders (red). As carries are generated, they also get added (green). Carries from the carries are also added (blue). In the final step, two-input half adders[8] compute the sum output; these half adders are simpler than the three-input full adders.[9]

The bit counter in the ARM1 processor is built from full-adders and half adders. Red corresponds to sum bit 0, green is bit 1, blue is bit 2, and purple is bit 3.

The bit counter in the ARM1 processor is built from full-adders and half adders. Red corresponds to sum bit 0, green is bit 1, blue is bit 2, and purple is bit 3. To simplify the diagram, outputs from the first stage are indicated by letters rather than lines.

The diagram below shows how the flow chart above is implemented on the chip to create the entire bit counter circuit. The adders are numbered to match the flow chart. The data bus is at the bottom, connected to the bit counter inputs by 16 polysilicon wires (green). Data flows generally upwards through the circuit, opposite to the flow chart. The five adders at the bottom add triples of input bits, and the remaining adders combine the sums and carries. The four half adders are connected to the output drivers in the upper right. The control circuit enables and disables the output drivers, so the bit count is output to the bus at the right times.

The bit counter circuit in the ARM1 processor. The full-adders and half-adders are indicated with numbers. The bits enter and the bottom and the count is output at the upper right.

The bit counter circuit in the ARM1 processor. The full-adders and half-adders are indicated with numbers. The bits enter and the bottom and the count is output at the upper right.

Conclusion

Well, it's been quite a journey from individual transistors to the bit counter, a complex functional block in a real processor. Hopefully this article has taken some of the mystery out of how circuits in a processor are constructed. Now you can try out the Visual ARM1 simulator and take a look at this circuit in action.[10]

Notes and references

[1] An interesting interview with Steve Furber, co-designer of the ARM1, explains how ARM achieved low power consumption. Acorn wanted to use a low-cost plastic package for the chip, but it could only handle 1 Watt. The designers didn't have good tools for estimating power consumption, so they were conservative in their design and the final power consumption was way below the target, just 1/10 Watt. In addition, ARM1 had a simple RISC (Reduced Instruction Set Computer) design, which also reduced power consumption: ARM1 had about 25,000 transistors compared to 275,000 in the 80386 which came out the same year. Thus, the low power consumption of ARM that led to its wild success in mobile applications was largely accidental.

[2] ARM's block data transfer instructions are called STM (Store Multiple) and LDM (Load Multiple), storing and loading multiple registers with one instruction. These instructions don't exactly fit the RISC processor philosophy since they are fairly complex and perform many memory accesses, but the ARM designers took the pragmatic approach and implemented them for efficiency. These instructions can be used for copying data or for stack push/pop, saving registers in a subroutine call or interrupt handler. Note that these instructions are not implemented in microcode, but in hardware that steps through the registers and memory.

[3] It's not obvious why a bit counter is required at all. You'd think the chip could just store registers until it's done, without knowing the total count. The unexpected answer is that LDM/STM always start with the lowest address working upwards. For example, if you're popping 4 registers off the stack with LDM, you'd expect to start at the top of the stack and work down. Instead, the ARM pulls registers out of the middle of the stack: it starts four words from the top, pops registers in reverse order going up, and then updates the stack pointer to the bottom. The results are exactly the same as popping from the top, just the memory accesses are in the reverse order. (The STM instruction is explained in detail on the ARMwiki.) Thus, the bit counter is needed to figure out how far down to jump in memory at the start of the instruction.

That raises the question of why would memory accesses always go low to high, even when that seems backwards. The explanation is that you want to update register 15 (the program counter) last, so if there's a fault during the instruction you haven't clobbered the instruction address and can restart. This problem was discovered partway through the ARM1 design, causing the designers to implement the new strategy that block transfers always go from lowest register to highest register and lowest address to highest address. The bit counter was added to support this. Some remnants of the earlier, simpler design are visible in the ARM1. Specifically, the priority encoder can operate either direction, but high-to-low is never used. In addition, the address incrementer can both increment and decrement addresses, but decrement is never used. The unused circuitry was removed from the later ARM2.

[4] At the time, having two layers of metal in the chip instead of one was a risky technology. However, the ARM1 designers wanted the convenience of two layers, which made routing the chip much simpler.

[5] A few other things to point out in the multiplexer layout. Note that the second input to each multiplexer matches the first input to the next multiplexer. This lets neighboring multiplexers share inputs, so they can be packed together more closely. Another thing of interest is the transistor sizes. The PMOS transistors are about twice the size of the NMOS transistors in order to provide the same current. The reason is that electrons carry the charge around in NMOS transistors, while "holes" carry the charge in PMOS transistor, and electrons move faster, providing more current (details). Finally, the transistors in the upper right are larger. These transistor drive the outputs from the multiplexer, so they must provide more current.

[6] You might wonder why the circuit computes the complement of A XOR B when it isn't used in the schematic. The reason is the multiplexer uses both the select input and the complement of the select input. Thus, the complement is used; it just isn't explicitly shown in the schematic. Likewise an inverter complements B, so it is available for the select lines.

[7] It is very unusual to implement a NAND gate with a multiplexer. Normally CMOS circuits implement a NAND gate with a standard four transistor circuit. But since the circuit already had multiplexers, adding an additional one was more efficient than the standard NAND gate.

[8] The half adder is built from standard gates, rather than multiplexers, as shown in the schematic below. The half adder's behavior is different from a standard half adder: it computes A+B+1 instead of A+B. Thus, the output of the four half adders is equivalent to adding binary 1111 to the sum, equivalent to subtracting 1. The output drivers invert this, so the output on the bus is the twos complement of the sum. The outputs are also shifted two bits on the bus, multiplying the value by 4 (since ARM registers are 4 bytes long). For example, if you pop 3 registers the stack will be decremented by 12 bytes.

The half-adder circuit from the ARM1 processor's bit counter. The outputs from this half-adder are different from normal, as it is used to generate a twos-complement negative output.

The half-adder circuit from the ARM1 processor's bit counter. The outputs from this half-adder are different from normal, as it is used to generate a twos-complement negative output.

[9] The circuit complexity of the bit counter is interesting. To sum 16 bits requires 15 adders. In general, summing N bits will require N-1 adders (for N a power of 2). Note that each adder takes 3 lines down to 2, so reducing N lines down to 1output requires N-1 adders. (There are 4 outputs, not 1, but the half adders bump the total back to N-1). The number of adders for each output bit is a power of 2: 1 purple, 2 blue, 4 green, 8 red. Larger sum circuits could be created by combining two smaller ones. For example, two 16-bit counter circuits could be combined to create a 32-bit counter circuit by adding four more full adders to add the results from each half, before the final half-adder layer. The circuit used in the ARM1 isn't quite the recursive design, pushing more adders to the first layer. An important part of the design is to minimize propagation delay; in the ARM1 design, signals go through 6 adders in worst case, slightly better than the purely recursive design.

[10] Thanks to the Visual 6502 team for providing the simulator and ARM1 chip layout data. If you're interested in ARM1 internals, also see Dave Mugridge's series of posts.

Viewing all 311 articles
Browse latest View live